


Room Visualiser
Try our floors in your home
0
0
Classic patterns like chevron flooring and herringbone flooring are the most popular choices when choosing an attractive flooring design for your home or office. With their geometric and angular designs, both patterns add beauty and character to a space. However, it can be hard for many to distinguish between them, and it’s easy to be confused. The key is understanding the differences in how the planks are cut and installed.
In this post, we’ll help you identify each pattern and explore its differences in various aspects, including installation, cost, durability, and design versatility.
The word chevron comes from the French word for slope or sloping roof. However, the first evidence of chevron flooring dates back to the Roman Empire in the 2nd and 3rd centuries AD. Its heyday was in 17th-century France when the design symbolised elegance and was mainly used in palaces and aristocratic homes.
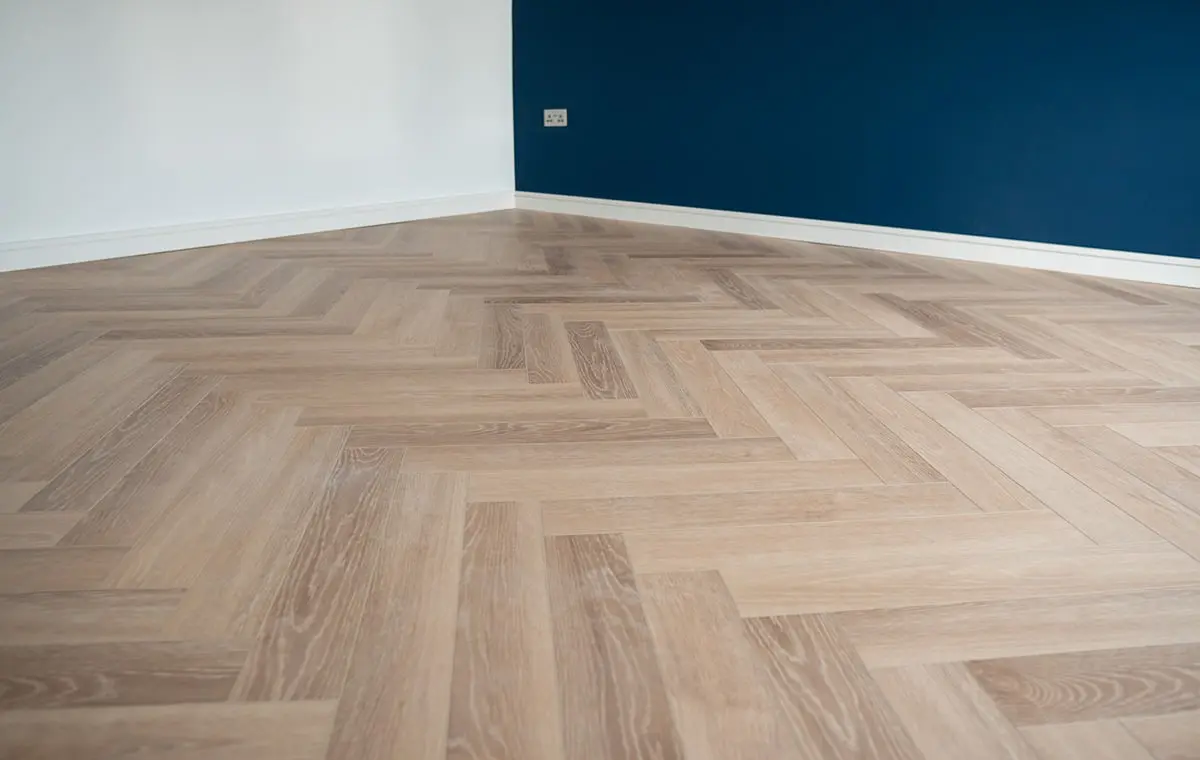
In a chevron flooring pattern, each plank is cut at a 45 or 60-degree angle and placed together in a way that meets exactly the same point, creating the iconic “V” shape. This style creates a symmetrical look and visual movement, making the space seem alive and energetic. Chevron can be an attractive choice for any interior design style, from modern minimalist to classic and contemporary. Solid wood flooring and engineered wood flooring are the best flooring options for chevron patterns. This design can also be applied to laminate flooring and luxury vinyl flooring.
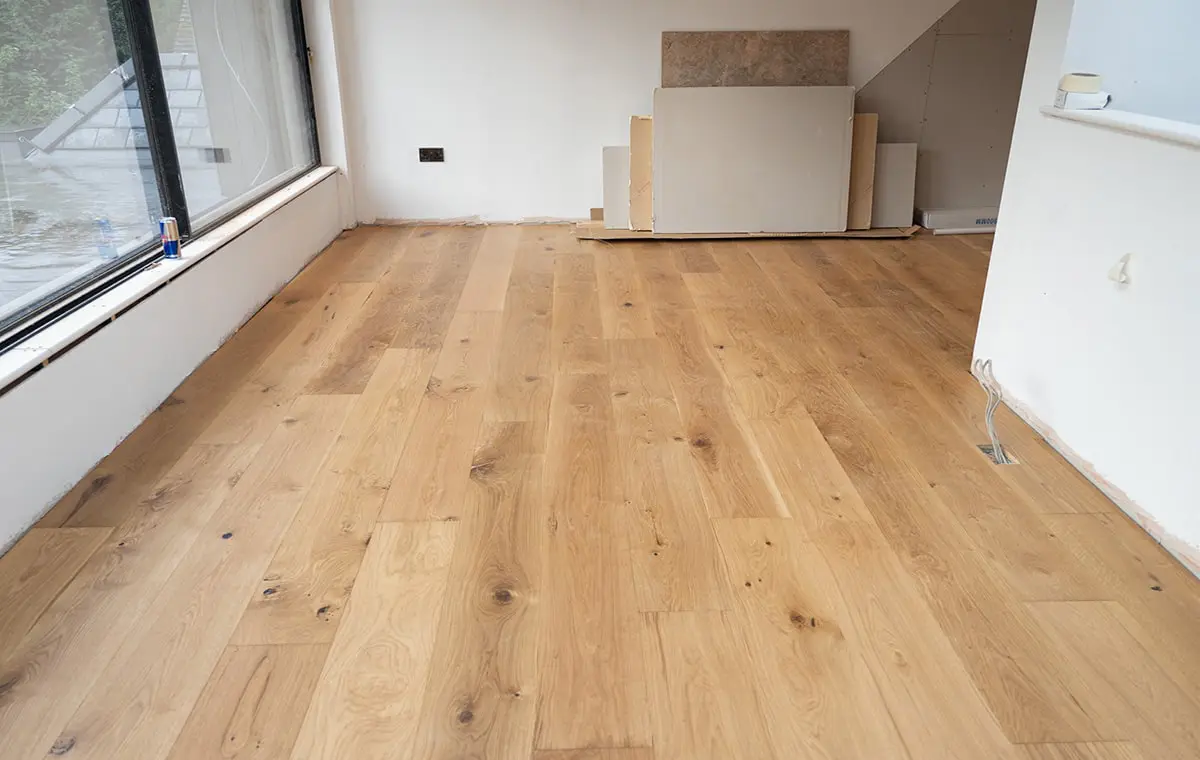
The Herringbone pattern resembles the bones of a herringbone fish. Ancient architecture from Mesopotamia and Egypt shows that the herringbone pattern was used in paving and flooring before the chevron. The herringbone flooring of Chateau de Fontainebleau in France, dating back to 1539, is evidence that the pattern’s popularity in the heart of Europe also has a long history.
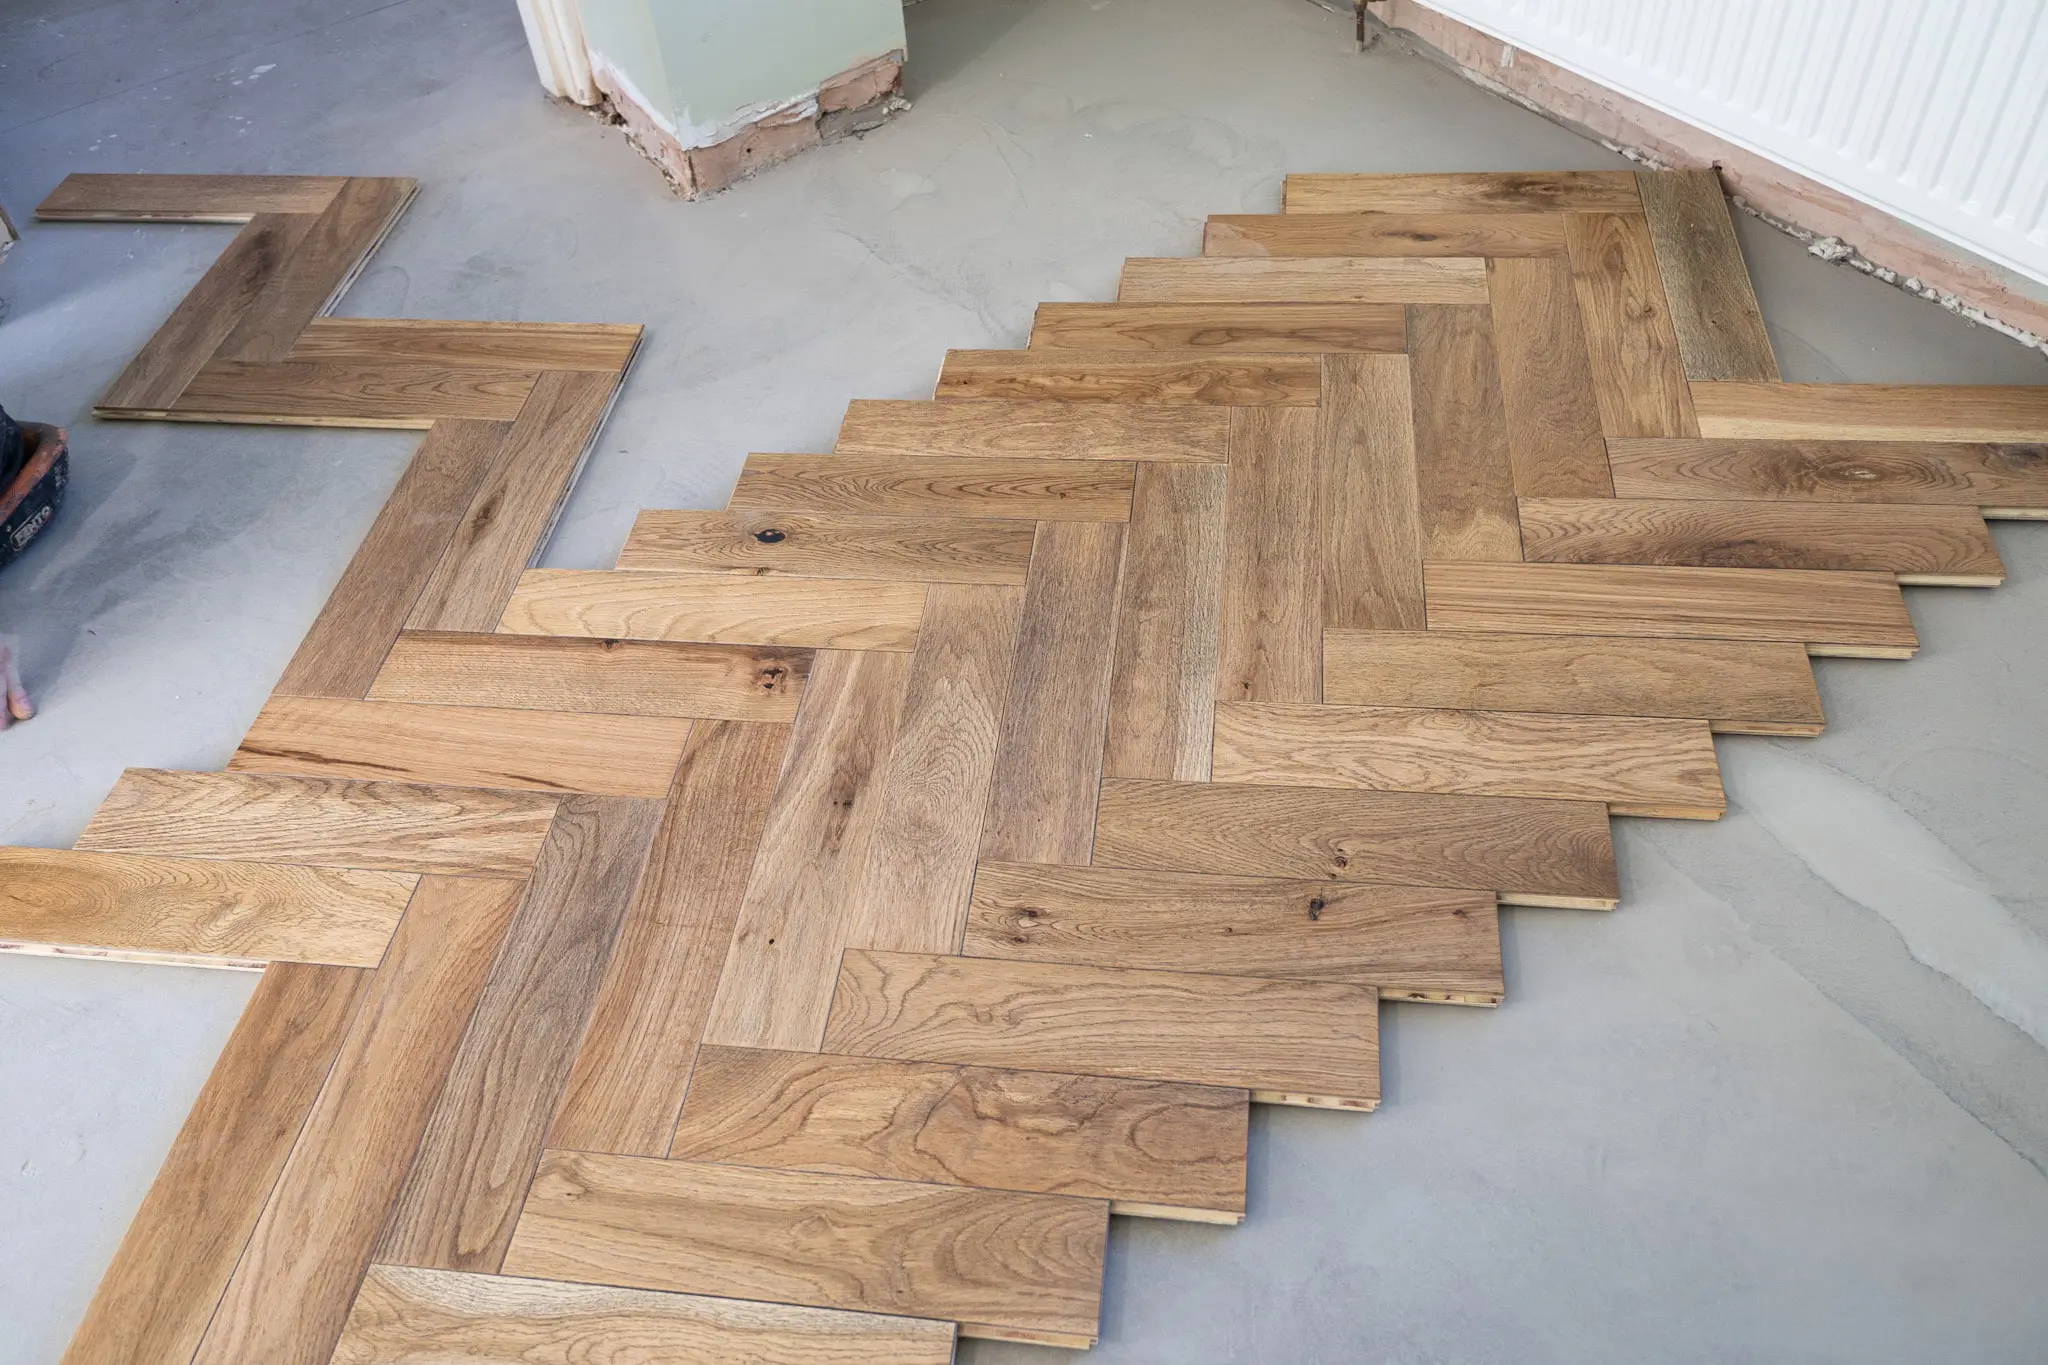
In this pattern, parquet boards are laid at a 90-degree angle to each other. Unlike chevron, the planks overlap at their ends to create a broken zigzag that adds movement and texture to the floor. The interlocking layout of the herringbone pattern allows for better pressure distribution and increased durability.
Herringbone can be applied to various flooring, from hardwood to laminate, giving the space a classic and warm feel.
Also read : How to Choose the Right Patterned Flooring
Now that we know both patterns, can we better understand the difference between them? Let’s examine herringbone and chevron from different perspectives.
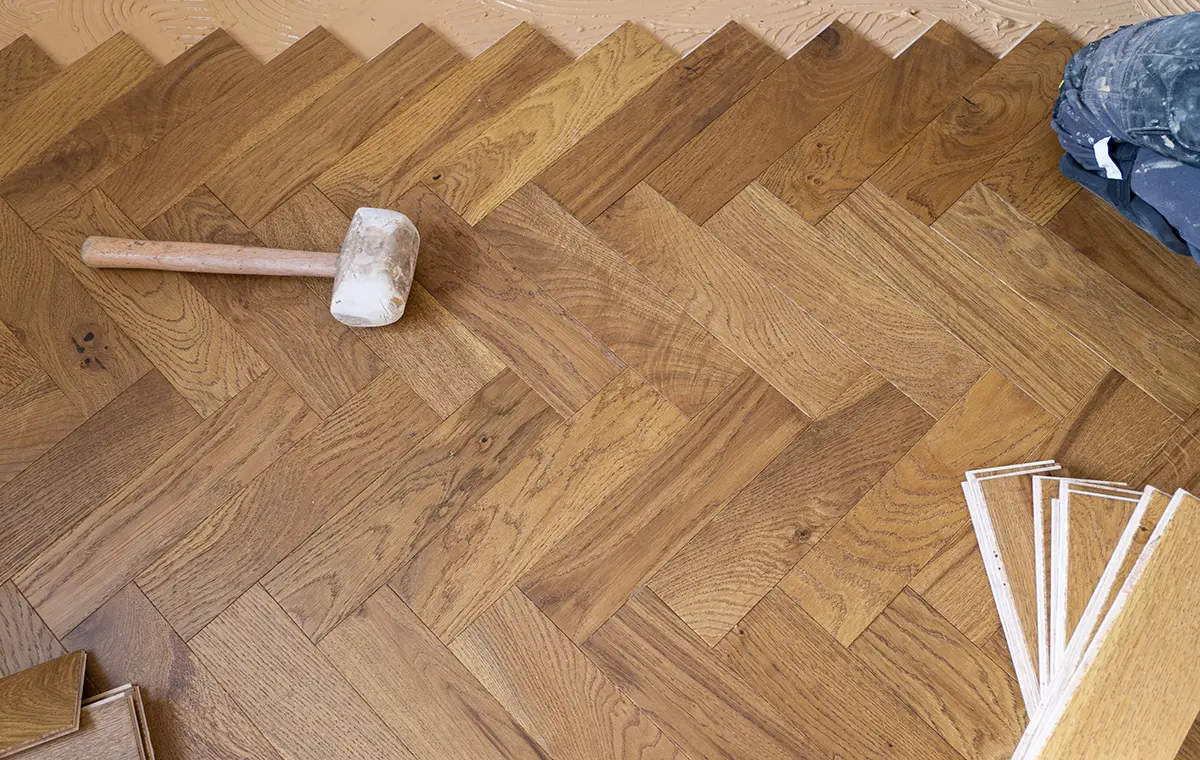
In the herringbone installation technique, planks are cut into rectangles and laid together at 90-degree angles to create a zigzag look. In a chevron pattern, each plank is cut at a specific angle (usually 30 or 45 degrees) so that when installed, they fit together end-to-end in a straight line, creating a V-shaped pattern.
Because chevron flooring requires angled cuts and more precise execution, it tends to produce more waste, take longer to install, and can be more expensive than herringbone. The price depends on factors such as the type of material, the quality of the flooring, the type of finish, and even the colour.
Herringbone floors are generally easier to maintain and clean than chevron floors, especially with materials like laminate or vinyl. However, the sharp angles and lines in a chevron pattern can be areas where more dust accumulates. Additionally, herringbone flooring spreads pressure and impact more evenly across the surface due to the rectangular arrangement of the planks. Chevron flooring may require more care due to the angled cuts. The thickness and type of flooring should also be considered.
Both patterns work beautifully for large, bright interiors. Herringbone adds texture and visual depth, making it a luxurious choice for creating statement spaces. On the other hand, chevron flooring can make a space appear longer, wider, or taller, depending on the direction of the chevron pattern. As a result, it is a good option for small rooms and hallways. To implement herringbone in smaller spaces, consider light herringbone flooring colours.
| Feature | Herringbone | Chevron |
| Installation Technique | Rectangular planks arranged at 90° angles in a broken zigzag pattern. | Angled planks (30°,45° or 60°) joined end-to-end to form a continuous V shape. |
| Installation Cost | Less waste and quicker to install. | More waste and time-consuming due to angled cuts. |
| Maintenance & Durability | Easier to clean; distributes pressure evenly. | Angles may trap dust; may require more care. |
| Visual Impact | Adds depth and texture, creating a luxurious feel | Creates a sense of space, elongating or widening a room |
| Recommended Use | Ideal for large, open, or luxurious spaces, as well as high-traffic areas | Effective in smaller rooms or hallways, while also suitable for high-traffic areas |
| Design Compatibility | Modern, minimalist, and contemporary, trend-forward space | Angles may trap dust; they may require more care. |
Herringbone and Chevron floors have graced homes, mansions and palaces for centuries. These patterned floors make a space feel more luxurious while adding visual variety and a strong focal point to the interior design.
Using planks with mixed colours can also create more visual variety. However, choosing between the two patterns depends on your style and interior design preferences.
Contact us for expert advice if you’re unsure whether Herringbone or Chevron flooring is the best for your space. Flooring Surgeons offers both designs in a wide range of colours and flooring materials, helping you choose the best option for your preferences and budget.
For any flooring queries, drop us an email at info@flooringsurgeons.co.uk – or visit our showrooms located in Birmingham & Wolverhampton!
Halesowen
214A Dudley Road. Halesowen, Birmingham, B63 3NJ
0121 274 8575
Monday – Friday: 9 AM – 6 PM | Weekends: 10 AM – 4 PM
Wolverhampton
317 Penn Rd, Wolverhampton, West Midlands, WV4 5QF
01902 836666
Monday – Friday: 9 AM – 6 PM | Sat: 10 AM – 4 PM | Sun: Closed
info@flooringsurgeons.co.uk
fitting@flooringsurgeons.co.uk
customerservices@flooringsurgeons.co.uk
One of the most important aspects of interior design is picking the perfect wall colour to match your flooring. The right floor and wall colour will depend on the room’s style, purpose, and existing décor. It doesn’t matter whether you are renovating your home or are about to complete your new home; this blog will help you learn how to match wood flooring with a wall colour for a beautiful result.
These two elements set the tone for the whole space, defining its character and style. According to Elle Décor, clever colour combinations can elevate a room’s sophistication.
Walls and floors should complement each other to create a balanced and inviting atmosphere rather than compete for attention. Aligning colour choices with your interior style ensures consistency and enhances the overall design aesthetic.
In selecting the best wall and floor colour combinations, it is necessary to study the environment and all its characteristics in depth.
There are essential principles you should keep in mind:
When you want to know how to choose the best wall and floor colours, the room size is a fundamental aspect to consider. Small rooms usually need light-coloured walls and floors to increase the perceived size of the environment.
On the other hand, in larger rooms, light-coloured combinations could risk making the environment cold, while darker hues add intimacy to larger spaces and offer a cosier and more grounded feeling.
The undertone is one of the most overlooked but crucial aspects of choosing the best colour combination. Generally, light woods like ash or grey have cooler undertones, dark woods such as mahogany or espresso have rich, warm undertones, and medium woods have an equal range of warm and cool undertones, which are called neutral undertones. Warm floor undertones pair well with warm wall colours. In contrast, cool floor undertones harmonise well with cooler shades.
Also read: Choose the Right Patterned Flooring
Creating contrast between your floors and walls can bring character to your space. Imagine how dark floors with light walls create a striking and dynamic effect. This is called high-contrast combinations.
Pairing beige walls with light Herringbone Laminate Flooring creates a seamless and calming atmosphere. This is an example of low-contrast
If you want something in between, tone-on-tone or medium colour Herringbone Laminate Flooring combinations are a good option.
When wall and floor colours match, the room feels right. Harmonious colours create calm and a smooth visual flow, allowing the eyes to travel through the room without distraction. Choosing colours with the same tone ensures a cohesive and natural look. Depending on the room’s purpose, you can go light-on-light or dark-on-dark. This approach adds a sense of continuity and works well in relaxing areas like bedrooms or reading nooks.
See light solid wood flooring and dark solid wood flooring models.
Lighting plays a massive role in how colours appear in a room.
Natural light brings out the underlying colour of the flooring. However, artificial light can affect the underlying tone of the flooring, depending on the temperature. Warm light brings out cosy, warm tones, while cool white light accentuates cooler hues. Choosing a light colour palette for spaces that don’t get much natural light can help brighten the space and create the illusion of openness. On the other hand, rooms that get plenty of natural light—regardless of their size—look more beautiful and bold with darker colours.
see dark models of Herringbone Flooring
Different rooms have different uses, so it is essential to consider each room’s intended use before applying a colour combination. It is also crucial to choose pairings that work well with your existing furniture and décor.
Soft, muted tones like sage green, warm beige, or dove grey can promote calm and relaxation, making them ideal for bedrooms and living rooms. A white-on-white pairing can create a unified, reassuring look, especially in spaces like bathrooms, kitchens, and areas where you want to make a bright, clean feeling.
also read: Tips to choose the right colour for flooring
Light Engineered floors offer great versatility and work well in almost any setting. Light-coloured floors, in combination with dark walls, can create a sophisticated contrast.
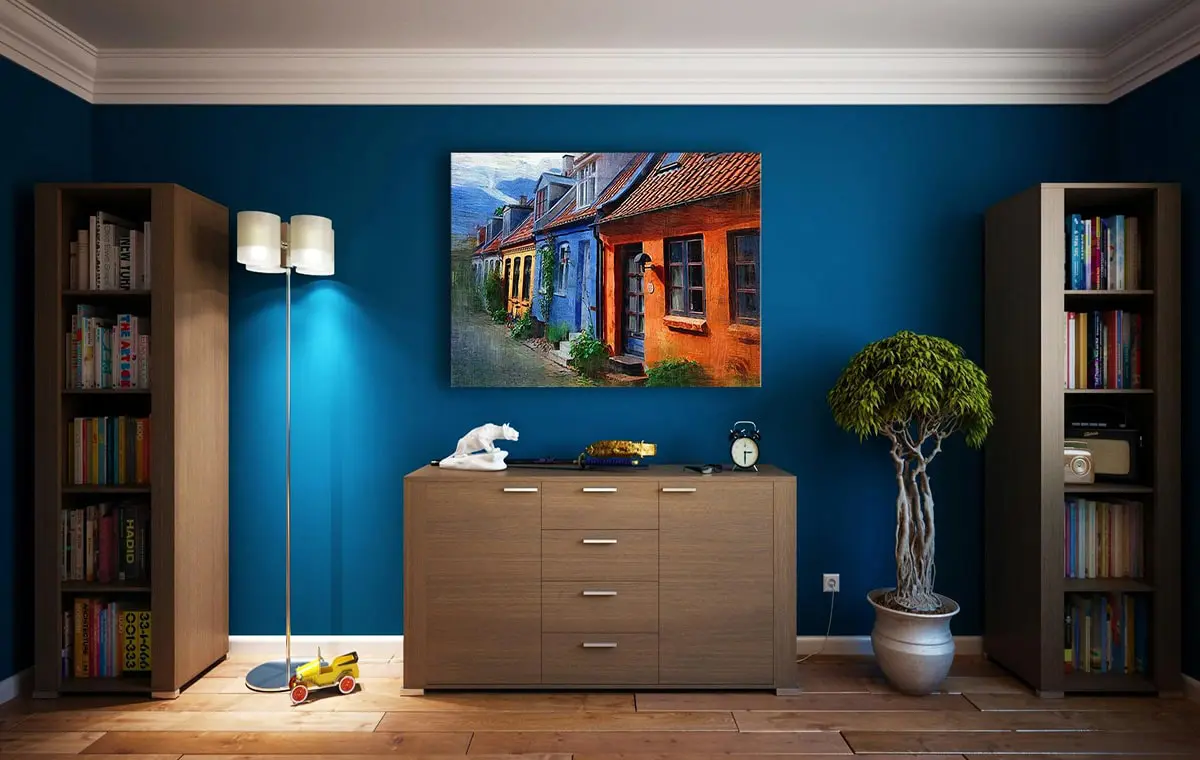
Contrasting walls and floors can give your space character, especially when decorating with neutral colours. For example, you can pair a dark wall with light Grey Laminate Flooring when you want to emphasise an element such as furniture or artwork.
Soft neutral walls, such as whites, Taupes, beiges, and light greys, create a timeless look when paired with light wood floors. This combination increases the room’s brightness and serves as an excellent backdrop for artwork.
Soft blue, pale pink, or pistachio green can add a subtle touch of colour without overpowering the space.
Combining light wood floors with dark wall colours such as deep red, forest green, charcoal, or navy creates a luxurious and striking look that will enhance any décor.
If you want luxury flooring models, check this page: LUXURY VINYL (LVT)
Dark wood floors add a sense of richness and warmth to any space if you know how to pair them with different wall colours.
Dark wood floors can stand out when paired with light-coloured walls, such as crisp white or soft cream. This combination will brighten the room and is the best choice for dynamic architectural spaces.
Warm wall colours like terracotta or muted gold complement the richness of dark wood floors, creating a cosy and inviting atmosphere. This pairing enhances the room’s warmth and depth.
Pairing dark with dark works well in spaces where you want to introduce a sense of drama and sophistication. However, to prevent the room from feeling too enclosed, it’s essential to incorporate natural or artificial light and balance the richness of the walls with lighter furnishings, such as light-coloured rugs, throw pillows, or furniture.
Rich jewel wall tones like emerald green, ruby red, and sapphire blue create luxurious, dramatic spaces paired with dark wood floors. They evoke mood and richness, often in maximalist or eclectic interiors.
Different wood flooring species have unique characteristics that influence suitable wall colour pairings.
Oak wood flooring is one of the most popular wood flooring options, and it pairs beautifully with various wall colours. Light oak floors are best suited with soft whites, muted greys, or warm beige walls. These tones allow the natural grain of the oak to shine through without competition.
Darker oak floors, particularly red or honey oak, pair well with earthy tones like sage green, terracotta, or creamy ivory. These colours add a touch of warmth and help balance the depth of the dark oak. Ideal Home UK suggests that soft greens and blues can create an elegant contrast with the warmth of oak, particularly red oak floors.
Maple wood is typically lighter, with subtle grain patterns and a fine, even texture. Its neutral hues are often suitable for brighter, bolder wall colours. Warm coral shades can enhance maple’s natural glow.
Cool tones like mint or slate blue contrast maple’s warmth, creating a vibrant yet balanced aesthetic.
Cherry and walnut flooring are known for their deep, rich colours and luxurious feel. They can easily be paired with rich wall colours like olive green, navy blue, or deep burgundy.
Below, we highlight some of the most common errors to avoid when matching wall colours with wood floors.
Too much contrast—like stark white walls with dark cherry floors—can have an unsightly effect on an interior design if not balanced with transitional colours or soft furnishings. Smooth transitions between walls, floors, and furniture should be maintained.
Not paying attention to the undertone of your wood flooring can lead to visual conflict, which can affect your entire interior design. We recommend that you take the time to understand the undertone of your flooring.
Never underestimate the role of lighting. Lighting can dramatically alter the appearance of both floor and wall colours. It’s better to test samples under different lighting conditions.
Wood’s texture and grain can affect a space’s overall feel and should not be overlooked. For example, pairing a heavy-grained wood like oak with a smooth, glossy wall can create an imbalance. Consider the texture of both elements when making your colour choices.
Some expert tips can help you combine wall colours and wood floors perfectly.
An interior designer can help you navigate undertones, lighting, and style preferences to create a cohesive look. They’ll also suggest options you may not have considered, such as accent walls or two-tone combinations.
A well-placed rug can provide the transition between contrasting wall and floor tones. Complementary cushions throws, and artwork further enhance the space and ensure a harmonious design by tying everything together.
Before committing, use sample pots and lay wood floor swatches against them.
To maintain balance and avoid overwhelming the space, follow this classic design principle:
This approach helps distribute colour evenly throughout the room, ensuring that the colours work well together and don’t clash.
Choosing the right wall colour to complement your hardwood floors is essential in interior design. It’s critical to take the time to consider factors like lighting, undertones, and how the colours interact with each other. Try to see how the colour looks in natural light by using large samples and viewing them at different times of the day. Finally, remember that rules and expert tips are just a guide. The best colour combination depends on your personal preferences and style.
If you are unsure about choosing the best combination, contact us today for expert advice on creating the perfect look for your home.
For any flooring queries, drop us an email at info@flooringsurgeons.co.uk – or Visit our showrooms located in Birmingham & Wolverhampton!
Halesowen
214A Dudley Road. Halesowen, Birmingham, B63 3NJ
0121 274 8575
Monday – Friday: 9 AM – 6 PM | Weekends: 10 AM – 4 PM
Wolverhampton
317 Penn Rd, Wolverhampton, West Midlands, WV4 5QF
01902 836666
Monday – Friday: 9 AM – 6 PM | Sat: 10 AM – 4 PM | Sun: Closed
info@flooringsurgeons.co.uk
fitting@flooringsurgeons.co.uk
customerservices@flooringsurgeons.co.uk
One of the most important aspects of interior design is picking the perfect wall colour to match your flooring. The right floor and wall colour will depend on the room’s style, purpose, and existing décor. It doesn’t matter whether you are renovating your home or are about to complete your new home; this blog will help you learn how to match wood flooring with a wall colour for a beautiful result.
These two elements set the tone for the whole space, defining its character and style. According to Elle Décor, clever colour combinations can elevate a room’s sophistication.
Walls and floors should complement each other to create a balanced and inviting atmosphere rather than compete for attention. Aligning colour choices with your interior style ensures consistency and enhances the overall design aesthetic.
In selecting the best wall and floor colour combinations, it is necessary to study the environment and all its characteristics in depth.
There are essential principles you should keep in mind:
When you want to know how to choose the best wall and floor colours, the room size is a fundamental aspect to consider. Small rooms usually need light-coloured walls and floors to increase the perceived size of the environment.
On the other hand, in larger rooms, light-coloured combinations could risk making the environment cold, while darker hues add intimacy to larger spaces and offer a cosier and more grounded feeling.
The undertone is one of the most overlooked but crucial aspects of choosing the best colour combination. Generally, light woods like ash or grey have cooler undertones, dark woods such as mahogany or espresso have rich, warm undertones, and medium woods have an equal range of warm and cool undertones, which are called neutral undertones. Warm floor undertones pair well with warm wall colours. In contrast, cool floor undertones harmonise well with cooler shades.
Creating contrast between your floors and walls can bring character to your space. Imagine how dark floors with light walls create a striking and dynamic effect. This is called high-contrast combinations.
Pairing beige walls with light Herringbone Laminate Flooring creates a seamless and calming atmosphere. This is an example of low-contrast
If you want something in between, tone-on-tone combinations are a good option.
When wall and floor colours match, the room feels right. Harmonious colours create calm and a smooth visual flow, allowing the eyes to travel through the room without distraction. Choosing colours with the same tone ensures a cohesive and natural look. Depending on the room’s purpose, you can go light-on-light or dark-on-dark. This approach adds a sense of continuity and works well in relaxing areas like bedrooms or reading nooks.
Lighting plays a massive role in how colours appear in a room.
Natural light brings out the underlying colour of the flooring. However, artificial light can affect the underlying tone of the flooring, depending on the temperature. Warm light brings out cosy, warm tones, while cool white light accentuates cooler hues. Choosing a light colour palette for spaces that don’t get much natural light can help brighten the space and create the illusion of openness. On the other hand, rooms that get plenty of natural light—regardless of their size—look more beautiful and bold with darker colours.
Different rooms have different uses, so it is essential to consider each room’s intended use before applying a colour combination. It is also crucial to choose pairings that work well with your existing furniture and décor.
Soft, muted tones like sage green, warm beige, or dove grey can promote calm and relaxation, making them ideal for bedrooms and living rooms. A white-on-white pairing can create a unified, reassuring look, especially in spaces like bathrooms, kitchens, and areas where you want to make a bright, clean feeling.
Light wood floors offer great versatility and work well in almost any setting. Light-coloured floors, in combination with dark walls, can create a sophisticated contrast.
Contrasting walls and floors can give your space character, especially when decorating with neutral colours. For example, you can pair a dark wall with light Grey Laminate Flooring when you want to emphasise an element such as furniture or artwork.
Soft neutral walls, such as whites, Taupes, beiges, and light greys, create a timeless look when paired with light wood floors. This combination increases the room’s brightness and serves as an excellent backdrop for artwork.
Soft blue, pale pink, or pistachio green can add a subtle touch of colour without overpowering the space.
Combining light wood floors with dark wall colours such as deep red, forest green, charcoal, or navy creates a luxurious and striking look that will enhance any décor.
Dark wood floors add a sense of richness and warmth to any space if you know how to pair them with different wall colours.
Dark wood floors can stand out when paired with light-coloured walls, such as crisp white or soft cream. This combination will brighten the room and is the best choice for dynamic architectural spaces.
Warm wall colours like terracotta or muted gold complement the richness of dark wood floors, creating a cosy and inviting atmosphere. This pairing enhances the room’s warmth and depth.
Pairing dark with dark works well in spaces where you want to introduce a sense of drama and sophistication. However, to prevent the room from feeling too enclosed, it’s essential to incorporate natural or artificial light and balance the richness of the walls with lighter furnishings, such as light-coloured rugs, throw pillows, or furniture.
Rich jewel wall tones like emerald green, ruby red, and sapphire blue create luxurious, dramatic spaces paired with dark wood floors. They evoke mood and richness, often in maximalist or eclectic interiors.
Different wood flooring species have unique characteristics that influence suitable wall colour pairings.
Oak is one of the most popular wood flooring options, and it pairs beautifully with various wall colours. Light oak floors are best suited with soft whites, muted greys, or warm beige walls. These tones allow the natural grain of the oak to shine through without competition.
Darker oak floors, particularly red or honey oak, pair well with earthy tones like sage green, terracotta, or creamy ivory. These colours add a touch of warmth and help balance the depth of the dark oak. Ideal Home UK suggests that soft greens and blues can create an elegant contrast with the warmth of oak, particularly red oak floors.
Maple wood is typically lighter, with subtle grain patterns and a fine, even texture. Its neutral hues are often suitable for brighter, bolder wall colours. Warm coral shades can enhance maple’s natural glow.
Cool tones like mint or slate blue contrast maple’s warmth, creating a vibrant yet balanced aesthetic.
Cherry and walnut floors are known for their deep, rich colours and luxurious feel. They can easily be paired with rich wall colours like olive green, navy blue, or deep burgundy.
Below, we highlight some of the most common errors to avoid when matching wall colours with wood floors.
Too much contrast—like stark white walls with dark cherry floors—can have an unsightly effect on an interior design if not balanced with transitional colours or soft furnishings. Smooth transitions between walls, floors, and furniture should be maintained.
Not paying attention to the undertone of your wood flooring can lead to visual conflict, which can affect your entire interior design. We recommend that you take the time to understand the undertone of your flooring.
Never underestimate the role of lighting. Lighting can dramatically alter the appearance of both floor and wall colours. It’s better to test samples under different lighting conditions.
Wood’s texture and grain can affect a space’s overall feel and should not be overlooked. For example, pairing a heavy-grained wood like oak with a smooth, glossy wall can create an imbalance. Consider the texture of both elements when making your colour choices.
Some expert tips can help you combine wall colours and wood floors perfectly.
An interior designer can help you navigate undertones, lighting, and style preferences to create a cohesive look. They’ll also suggest options you may not have considered, such as accent walls or two-tone combinations.
A well-placed rug can provide the transition between contrasting wall and floor tones. Complementary cushions throws, and artwork further enhance the space and ensure a harmonious design by tying everything together.
Before committing, use sample pots and lay wood floor swatches against them.
To maintain balance and avoid overwhelming the space, follow this classic design principle:
This approach helps distribute colour evenly throughout the room, ensuring that the colours work well together and don’t clash.
Choosing the right wall colour to complement your hardwood flooring is essential in interior design. It’s critical to take the time to consider factors like lighting, undertones, and how the colours interact with each other. Try to see how the colour looks in natural light by using large samples and viewing them at different times of the day. Finally, remember that rules and expert tips are just a guide. The best colour combination depends on your personal preferences and style.
If you are unsure about choosing the best combination, contact us today for expert advice on creating the perfect look for your home.
For any flooring queries, drop us an email at info@flooringsurgeons.co.uk – or Visit our showrooms located in Birmingham & Wolverhampton!
Halesowen
214A Dudley Road. Halesowen, Birmingham, B63 3NJ
0121 274 8575
Monday – Friday: 9 AM – 6 PM | Weekends: 10 AM – 4 PM
Wolverhampton
317 Penn Rd, Wolverhampton, West Midlands, WV4 5QF
01902 836666
Monday – Friday: 9 AM – 6 PM | Sat: 10 AM – 4 PM | Sun: Closed
info@flooringsurgeons.co.uk
fitting@flooringsurgeons.co.uk
customerservices@flooringsurgeons.co.uk
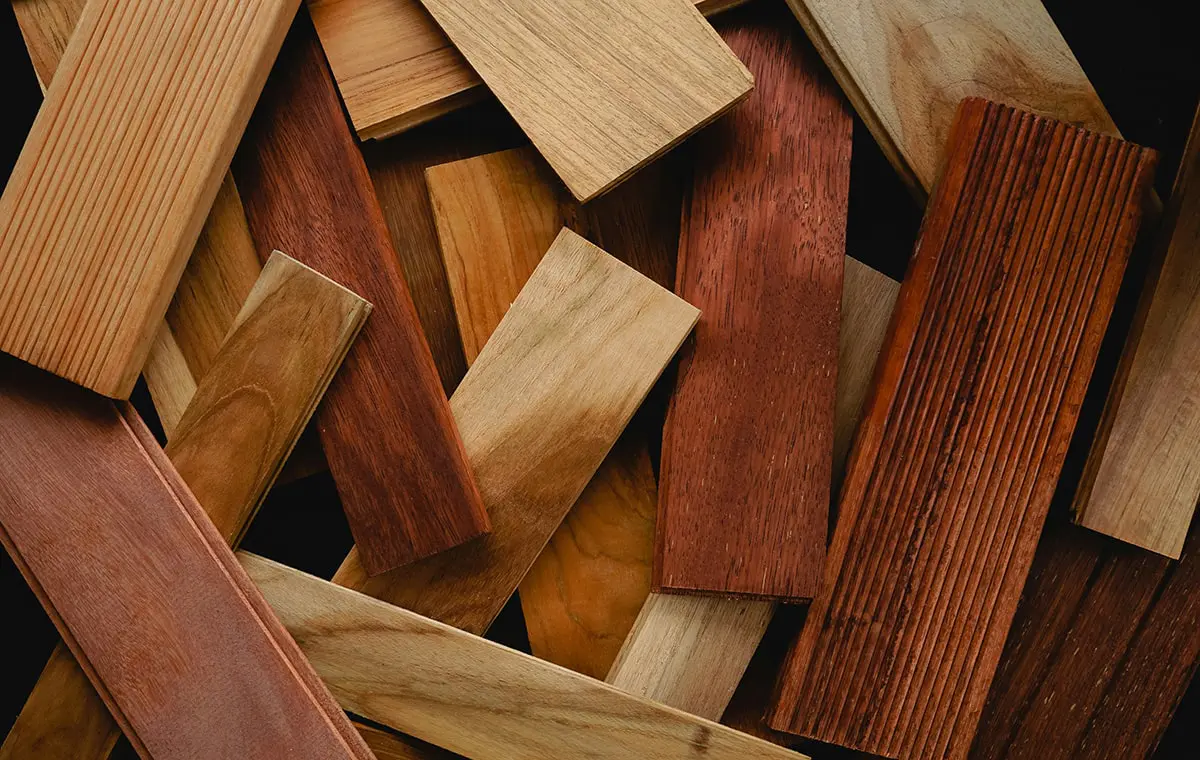
Most people assume that allergy symptoms are mainly caused by outdoor factors. If you think the same, you might be surprised to learn that a potential allergy trigger could be right inside your home, under your feet and your pet’s paws! Certain flooring materials can release volatile organic compounds (VOCs) into the air. VOCs are a variety of chemicals with high vapour pressure. They can cause pollution alone and in reaction with other substances. Exposure to VOCs can lead to headaches, nausea, and worsened asthma symptoms. Over time, these compounds may increase the risk of cancer. Understanding flooring health, how different flooring types can trigger allergies, and how to reduce their impact is key to creating a healthier home for you and your family.
That’s why we’ve compared various flooring options—from the best to the worst—to help you make an informed choice.
Certain types of flooring may contain processed plastics and toxic chemicals, which can be released into the air through a process called off-gassing.
Off-gassing occurs due to ongoing chemical reactions within the materials, releasing compounds like formaldehyde, benzene, and toluene. These chemicals often have strong, sharp fragrances (like bleach, nail polish, or fresh paint!)
In continuing, first, we are going to introduce the types of flooring that are more natural and less allergenic, then move on to flooring with a higher risk of allergies.
Real wood has zero VOCs, so solid wood flooring is a healthy choice in itself. However, some wood finishes or coatings might release VOCs during curing. Despite this, in terms of flooring health, solid wood is still a low-VOC (typically less than 0.3mg/m³) option and is considered the best flooring for those who have allergies or asthma.
Engineered wood flooring is the second healthiest choice as it offers the same benefits as solid wood. However, concerns about some adhesives and coatings That may carry VOCs still exist.
Linoleum is made from natural materials like pine resin and wood flour. It also has natural antimicrobial properties and is easy to maintain. Considering low-VOC installation products can make natural linoleum floors more natural.
Like linoleum, cork is a natural, hypoallergenic material free from harmful chemicals. However, the composition of cork flooring can vary. Some cork floors feature polyurethane coatings or adhesives that may release VOCs. Choosing low-VOC finishes helps improve indoor air quality.
Bamboo is an eco-friendly and sustainable option, making it a favourite among those prioritising health and environmental impact. However, However, you should note when purchasing bamboo flooring, ensure it does not contain formaldehyde-based adhesives.
Some alternative adhesives may also contain isocyanates, which can potentially cause irritation or even lead to asthma.
Most smooth-finished tiles and stones are excellent hypoallergenic flooring options if natural stone and tiles do not have uneven edges to trap dust, dirt, and mould. The main concern is that materials such as adhesives and grout may contain toxic compounds and heavy metals like lead, cadmium, arsenic, and chromium.
Certain flooring types pose a greater risk of triggering allergies than others.

While luxury vinyl flooring has significantly lower VOC levels than older versions, older vinyl floors and some lower-quality new products may still release VOCs and phthalates.
Phthalates, used to enhance flexibility and durability, can continue leaching into the air for years after installation. Exposure to these chemicals has been linked to congenital disabilities and hormonal disruptions.
also read: Vinyl Flooring or Laminate Flooring?
If you struggle with allergies, synthetic carpets are one of the worst choices for healthy flooring. Those made from polyester or nylon often contain harmful chemicals, such as formaldehyde and other irritants, that can remain trapped in the fibres for months or even years.
Additionally, carpets accumulate dust, allergens, and mould. Keeping them clean is challenging, and they can significantly reduce indoor air quality.
The dyes used for colouring carpets, the adhesives binding the fibres, and the chemicals applied for stain resistance all contribute to indoor air pollution.
Laminate flooring may resemble hardwood, but when it comes to toxicity, it tells a different story. Some laminate flooring products contain adhesives that release formaldehyde and other VOCs. The level of emissions varies depending on the product and manufacturer. In some cases, it may exceed recommended safety limits.
| Flooring Type | VOC Emission Level | Factors Affecting VOC Emission |
| Solid Hardwood | Very Low (almost zero) | Type of finish or coating used |
| Engineered Wood | Moderate | Adhesives and coatings in the layers |
| Natural Linoleum | Low | Installation adhesives and sealants |
| Tile & Stone | Nearly Zero | Type of grout and adhesives used |
| Bamboo Flooring | Varies | Type of adhesives (formaldehyde-based or isocyanate-based) |
| Cork Flooring | Varies | Presence of polyurethane coatings |
| Vinyl Flooring | High | Phthalates and plasticisers in PVC composition |
| Synthetic Carpet | High | Dyes, adhesives, and stain-resistant chemicals |
| Laminate Flooring | Varies (can be high) | Type of adhesives, presence of formaldehyde |
It may seem that almost all types of flooring come with a certain level of allergen risk, But some strategies can help minimise this as much as possible.
Flooring is an essential element of your home that directly impacts indoor air quality and, consequently, your health. Choosing healthy flooring can significantly reduce their potential adverse effects on air quality.
Looking for healthy flooring options? Explore our range of low-VOC, eco-friendly flooring products today.
If you have any flooring queries, email Flooring Surgeons at info@flooringsurgeons.co.uk or visit our showrooms in Birmingham and Wolverhampton!
Halesowen
214A Dudley Road. Halesowen, Birmingham, B63 3NJ
0121 274 8575
Monday – Friday: 9 AM – 6 PM | Weekends: 10 AM – 4 PM
Wolverhampton
317 Penn Rd, Wolverhampton, West Midlands, WV4 5QF
01902 836 666
Monday – Friday: 9 AM – 6 PM
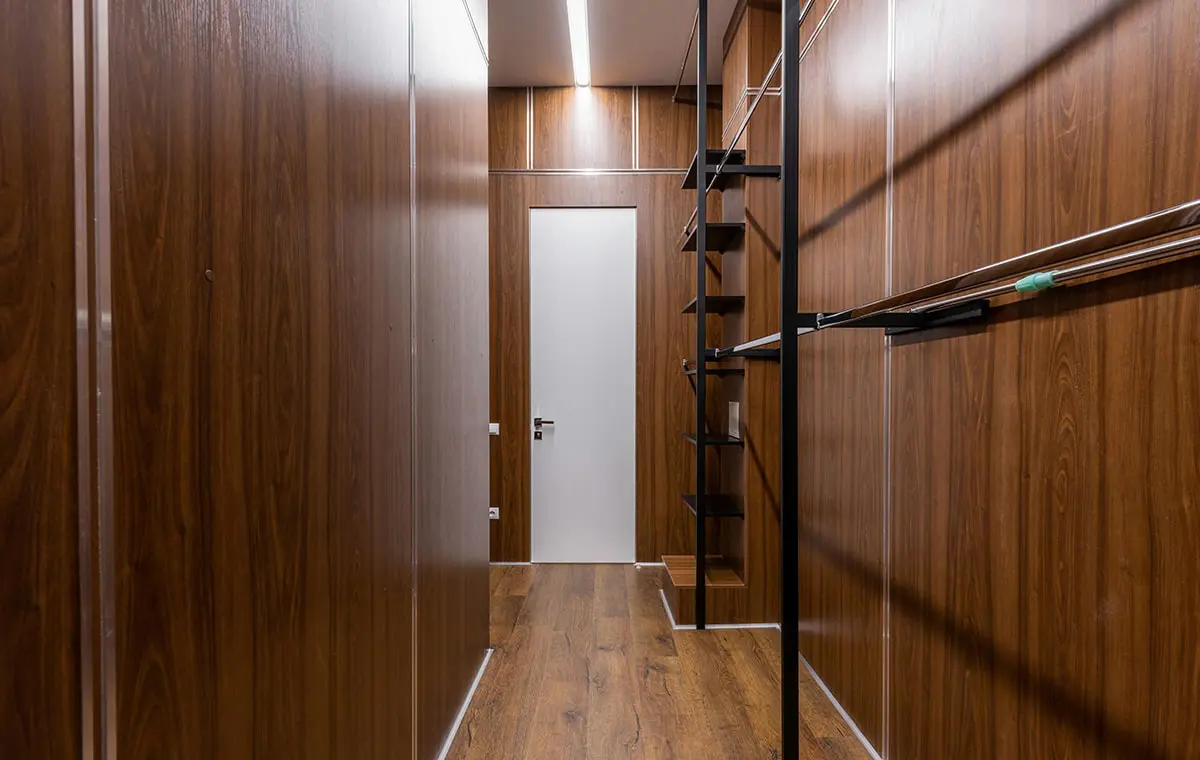
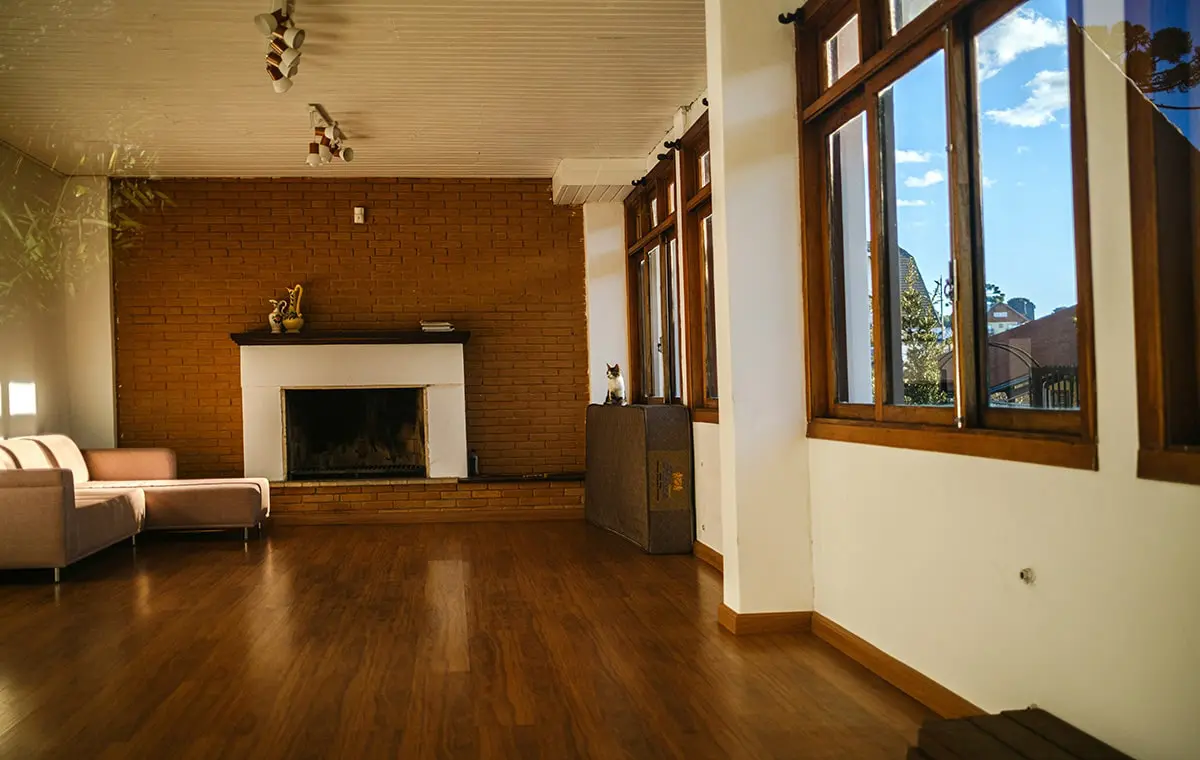
Brown is a warm, earthy colour that often evokes feelings of stability, comfort, and reliability. Brown walls can create a cosy, welcoming space and are popular in living rooms, bedrooms and other areas.
Coordination between wall and flooring colours is a fundamental aspect of interior design. While the right combination can enhance the space of a room and highlight architectural features, the wrong choice can negatively impact the feel of the entire home
Here, we will tell you what colour floors pair well with brown walls.
According to Elle Décor, brown is a standout colour choice that boosts a room’s style.
Each shade of brown brings a unique personality and tone to a room. Warm brown undertones make a space more lively, while cooler brown undertones create a calmer atmosphere. Therefore, the best flooring colour for your brown wall is heavily dependent on the warmth/coolness of the wall’s undertones.
Light oak wood flooring contrasts with warm brown walls, like mahogany or cinnamon. It makes the space open and bright while maintaining a natural, cohesive look. Light oak flooring is a good choice for small rooms because it makes the space seem larger and more open.
Medium laminate flooring colours like honey are another excellent option for brown walls with warm undertones like butternut, mahogany, or chestnut. This colour complements brown walls and adds charm and richness to the space without overwhelming it.
The rich walnut engineered flooring complements cool-toned brown walls, such as charcoal, reddish brown, or brown with blue undertones. The varied grain patterns on walnut flooring also add visual interest and texture to the room.
Grey LVT flooring is an excellent, more affordable alternative to walnut hardwood flooring for cool brown walls. It works well with brown walls with cooler undertones and a modern look, and it’s a much more budget-friendly option than hardwood flooring over laminate.
Beige luxury vinyl flooring works well with warm brown walls like caramel, cinnamon or chestnut and neutral browns like light taupe or reddish brown. This colour combination creates a cosy, balanced atmosphere without overpowering the space.
White laminate flooring offers a unique and contemporary look when paired with neutral brown walls, such as taupe, light tan, or warm beige. The light, distressed finish of whitewashed laminate floors provides a striking contrast that brightens the room and adds a touch of rustic charm. This flooring style works particularly well with neutral brown walls, bringing out their warmth without overpowering them.
| Flooring Type | Compatible Brown Wall Tones | Specific Brown Shades | Design Style |
| Light Oak Wood Flooring | Warm Brown Walls | Mahogany, Cinnamon | Rustic, Cosy, Traditional, Minimalist |
| Medium laminate flooring | Warm Brown Walls | Butternut, Mahogany, Chestnut | Rustic, Traditional, Versatile |
| Walnut engineered flooring | Cool Brown Walls | Charcoal Brown, Taupe Brown | Sophisticated, Elegant, High-End |
| Grey Luxury Vinyl Flooring | Cool Brown Walls | Charcoal Brown, Taupe Brown | Modern, Minimalist, Contemporary |
| Beige Luxury Vinyl Flooring | Warm & Neutral Brown Walls | Caramel, Cinnamon, Chestnut, Light Tan, Taupe | Cosy, Balanced, Elegant |
| White Laminate Flooring | Neutral Brown Walls | Taupe, Light Tan, Warm Beige | Contemporary, Rustic, Modern |
Brown walls can complement and enhance numerous interior design styles, whether you want to decorate your home in a minimalist, modern, rustic, or contemporary décor style.
Combining brown walls with grey LVT or bleached laminate flooring gives you a modern, minimalist look. These light, neutral colours create a stylish, clean backdrop, allowing the brown walls to stand out without making the space feel heavy.
To achieve a rustic and cosy environment, you need warm, earthy natural wood tones like light oak or honey laminate. These colours complement brown walls beautifully and create a pleasant and comfortable environment.
For luxury and sophistication, go for dark walnut, deep mahogany, or even dark vinyl flooring. These flooring colours add richness and depth to a room with brown walls. Remember to ensure the space is large enough and has enough natural light to handle this rich brown colour, as darker floors can sometimes make a room feel cramped.
Combining beige or light oak LVT flooring with brown walls creates a vibrant and energetic décor. The flooring’s neutral colours are an excellent background for implementing different colour décor schemes.
From the size of the room to the amount of natural light and lifestyle, there are many aspects to consider when choosing a floor colour to pair with brown walls. Here are some essential things to consider when selecting the right flooring colour.
The lightness and darkness of the flooring colour play a significant role in creating a sense of spaciousness or confinement in a room. Lighter-coloured flooring can make small rooms appear larger and more open. While darker floors can add warmth and cosiness to larger spaces, they may make small rooms feel more confined.
Dark, deep-coloured flooring is a good choice for large spaces with plenty of natural light. However, dark flooring won’t work as well in spaces with less natural light. Lighter-coloured flooring works better for dimly lit spaces.
The colour combination of your flooring and walls should coordinate with your existing furniture and décor. For example, a lighter floor colour can create a nice contrast if you have dark wood furniture. Dark furniture on dark flooring can make the space feel boring and depressing.
Think about your style and preferences. To choose the right flooring colour, you must know what design and decoration style you want for your home. This will help you make the best decision about whether to choose grey or cool-coloured flooring.
As we have seen, the colour coordination of the floor and wall is one of the main factors in determining the room’s mood. While brown walls provide a versatile and warm backdrop, considering the lightness and darkness of the brown tones used, as well as the size of the room, lighting, and other elements in the space, can significantly impact the overall harmony and beauty of the space. The tips in this post are just a guide to get you started. Experiment with different colour combinations based on your preferences and lifestyle. Ultimately, the goal is to create a space that makes you feel comfortable and relaxed. To view various flooring options from laminate to vinyl and more colour variations, visit our store and benefit from expert advice.
For any flooring queries, drop us an email at info@flooringsurgeons.co.uk, or visit our showrooms located in Birmingham & Wolverhampton!
Halesowen
214A Dudley Road. Halesowen, Birmingham, B63 3NJ
0121 274 8575
Monday – Friday: 9 AM – 6 PM | Weekends: 10 AM – 4 PM
Wolverhampton
317 Penn Rd, Wolverhampton, West Midlands, WV4 5QF
01902 836666
Monday – Friday: 9 AM – 6 PM | Sat: 10 AM – 4 PM | Sun: Closed
info@flooringsurgeons.co.uk
fitting@flooringsurgeons.co.uk
customerservices@flooringsurgeons.co.uk
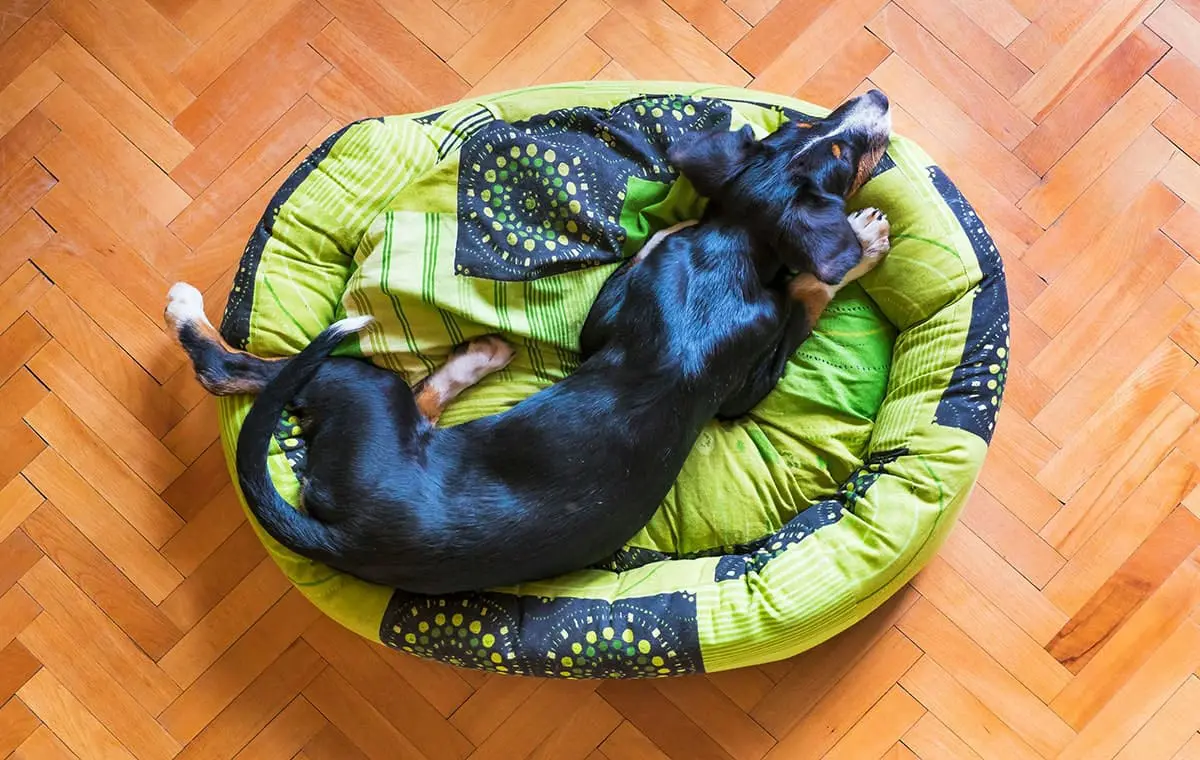
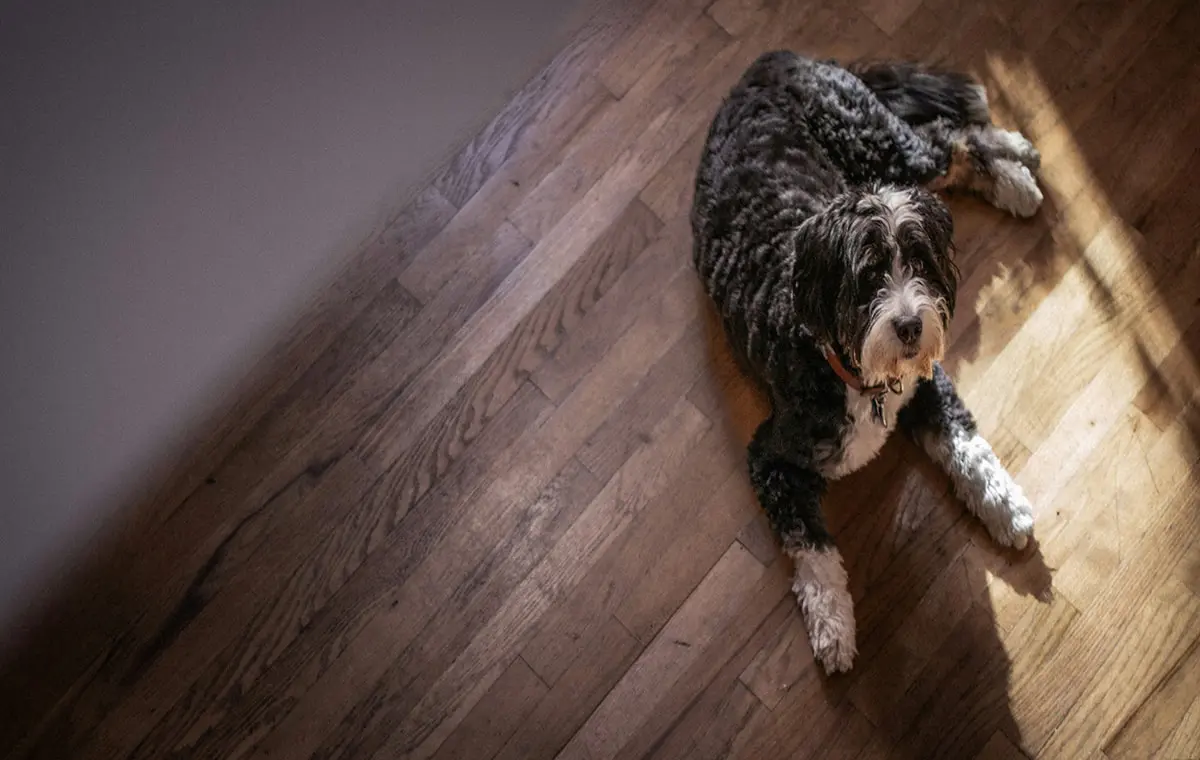
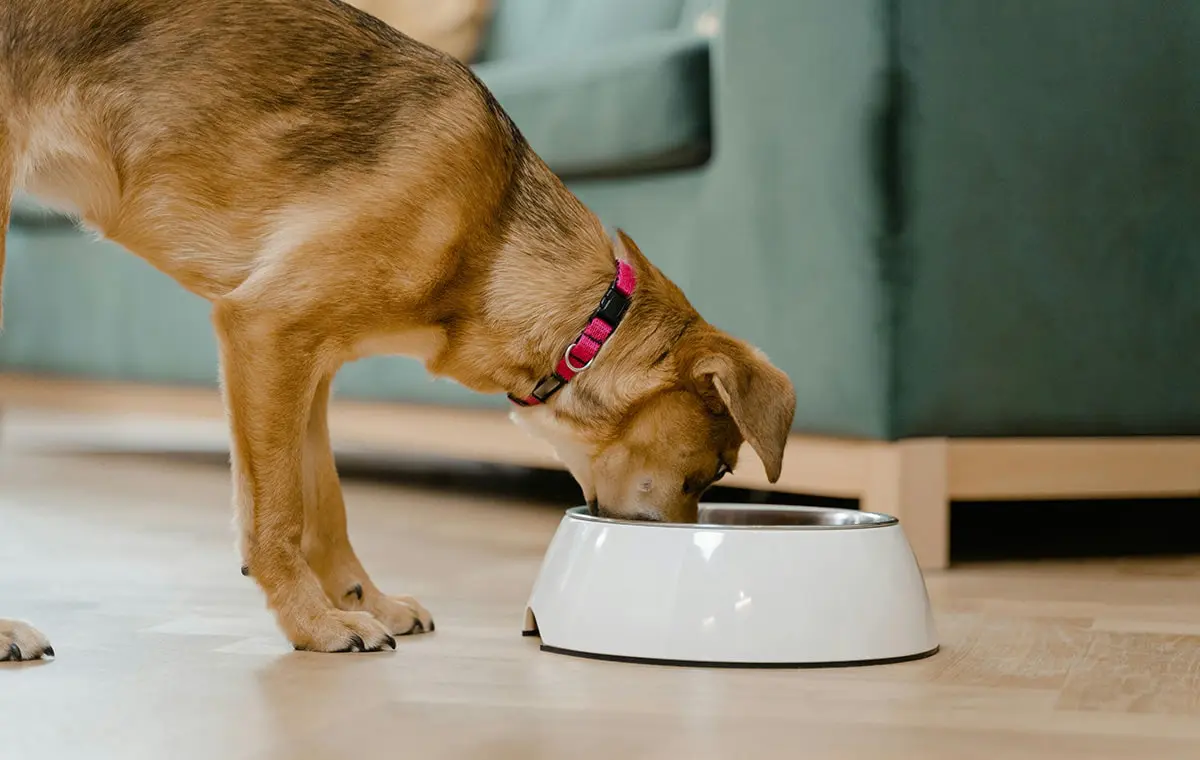
Cats and dogs are some of the most popular pets. The UK Pet Food (previously known as the PFMA) also states that Pet ownership has increased in the UK. If you’re a pet owner who lives with one or two furry friends (or even five – no judgment here), you already know that pets can bring endless joy as well as the occasional mess. Whether wet paw prints left by your dog or the persistent scratching of a cat who claims the flooring is their personal property, your floors can take a variety of damage.
Choosing the right flooring can make cleaning easier, prevent frequent repairs, and keep your home and pets comfortable and safe. From vinyl flooring to hardwood, tile, and carpet, we explore various popular flooring types and their pros and cons to decide which flooring suits your situation.
There are four factors that you should keep in mind when you want to choose the best flooring for pets:
Scratch resistance
Pets’ long nails can easily scratch your beautiful flooring. Therefore, you should consider scratch-resistant flooring for your pets.
Water resistance
Moisture is an inseparable part of living with pets. Waterproof or moisture-resistant flooring will save you a lot of hassle.
Traction
Smooth floors can be slippery for pets, leading to injuries. Look for textured or matte finishes that provide a bit of grip underfoot.
Comfort
Hard, cold floors might be durable, but they can be rough on older pets’ joints. Softer flooring is a better option.
Ease of maintenance
Undeniably, the easier the flooring is to clean, the easier it will be to maintain. Floors that don’t trap pet hair and don’t require special cleaning products will make your life much easier.
Choosing the ideal flooring for pet owners is all about balance. You need flooring that can withstand muddy paws, the occasional accident, energetic jumps, and various toys without showing signs of wear and tear after many years. It should also be beautiful and affordable. Let’s take a closer look at each of the best home flooring options.
Vinyl flooring is considered one of the best pet-friendly flooring options due to its excellent moisture resistance. It won’t absorb spills or accidents, preventing stains and unpleasant smells. Additionally, vinyl is tough enough to withstand the wear and tear from paws and claws and the hustle and bustle of everyday pet life.
Modern luxury vinyl flooring (LVT) is available in various stylish finishes designed to mimic the appearance of wood or stone. Not only is vinyl soft underfoot, making it comfortable for pets, but it also provides a safe surface.
The thicker the vinyl flooring, the more durable it will be and offer better resistance to jumps, scratches, moisture, and dents from heavy furniture or energetic running pets. If your dog is lightweight, has his nails trimmed regularly, and is well-behaved, LVT can be a smart and long-lasting investment (despite being on the pricier side)
Laminate flooring is an affordable choice that offers great durability and beauty. This flooring is remarkably resistant to scratches and moisture (if you clean it immediately), especially if you choose high-quality varieties built with modern technology. Laminate’s versatility makes it ideal for various interior design styles, from contemporary to rustic. Ultimately, the hard surface of laminate is the best option for a home with an active lifestyle. However, it should not be overlooked that pets, especially dogs, can be slippery. Your pet may have difficulty getting proper traction without a rug or pad.
Ceramic and porcelain tiles are fully waterproof and incredibly resistant to scratches, making them the toughest flooring options. Tiles are a worry-free solution for homes with energetic pets that can last decades.
For all its advantages, this type of flooring may not be comfortable enough. It is hard and has a cold underfoot, which may not be pleasant for pets. Additionally, the tiles can be slippery.
To reduce this problem, choose textured tiles or use area rugs in high-traffic areas. Heated floors can also help to warm up the space and provide a more comfortable surface for your pet to walk on.
Another consideration is grout lines. While the tiles themselves are nearly indestructible, the grout can be more vulnerable to stains and scratches. To avoid this problem, choose tiles with narrower grout lines, which make it harder for dirt and debris to accumulate.
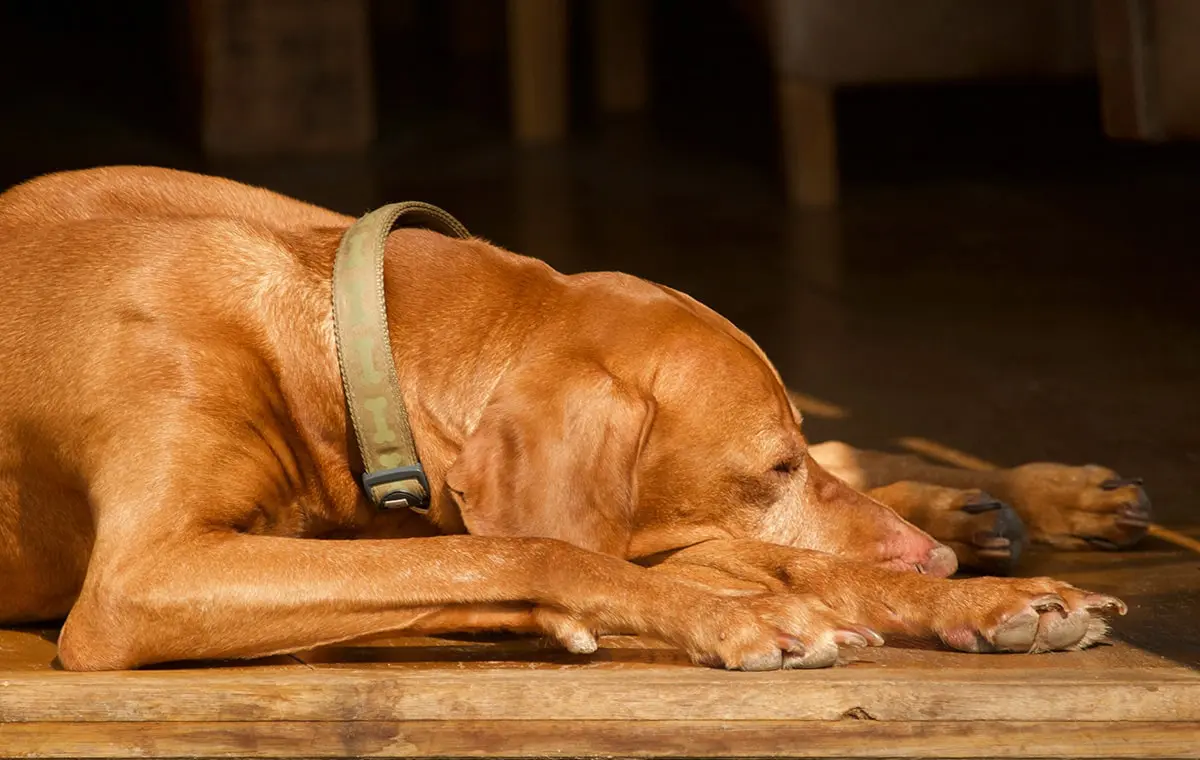
Solid wood can be susceptible to scratches and dents over time. Still, if you love the feel and look of natural wood and want to avoid stress, engineered hardwood is a more forgiving option. However, while it is mainly composed of plywood, it still has a top layer of real hardwood, so it must be cared for against moisture and scratches. Both types of flooring are suitable for quieter, well-behaved pets. Both options can still be great and very pet-friendly, with trimmed nails and preferably mats in high-traffic areas. For a more comfortable feel, using hardwood from harder trees, such as maple, with a thick layer is better. Hardwood and engineered wood, although susceptible to damage, are easy to clean and help you maintain a fresh environment without hassle. Additionally, hardwood is hypoallergenic, so it does not trap dust, pet hair or dander, making it an excellent choice for people with allergies or sensitivities.
The carpet is very cosy and brings a warm feeling into the room. However, you shouldn’t judge a flooring option only by its comfort level. Carpets can be a nightmare to keep clean; even with regular vacuuming, odours and smells can linger for a long time.
Carpet is also the worst choice for allergy sufferers because it can easily trap dirt, debris, and pet hair, leading to a build-up of allergens compared to other types of flooring. For pet owners, this can mean extra work to keep things clean, as fur tends to get everywhere, and the fibres can wear down over time due to scratching.
Some carpet textures can also cling to pets’ claws.
| Flooring Type | LVT | Laminate | Ceramic or Porcelain | Engineered and Solid Hardwood | Carpet |
Pros | WaterproofDurable and soft underfootEasy to clean | Scratch-resistantAffordableStylish Easy to clean | Fully waterproofExtremely durableEasy to clean | Beautiful, natural lookHypoallergenic Easy to wipe | Cosy & Comfortable |
| Cons | Can be expensive | Slippery for petsNeeds immediate cleaning after spills | Hard and coldCan be slippery | Scratches easilySensitive to moisture | Traps fur, dust, and allergensHard to clean Holds on to smells and stains |
| Best for | Most pets and busy households | Active pets on a budget | Messy pets and warm homes | Calm pets | Not ideal for pets and allergy sufferers. |
Flooring that works well for a calm cat or a gentle puppy might not offer enough durability to withstand the energy and enthusiasm of a lively, boisterous dog.
Large dogs can be tough on the floor. Their weight, energetic play and long nails can easily scratch and wear down delicate surfaces. Choose scratch-resistant options like tile, luxury vinyl, or durable laminate with a thick wear layer for large breeds.
On the other hand, small dogs are less of a hassle. However, they can still get into accidents, so waterproof or water-resistant flooring like vinyl and tile are great choices.
Cats are agile, quiet, and usually clean, but their claws can still cause damage. They also prefer quieter, softer surfaces to land on after jumping. Vinyl and luxury laminate with a heavy-duty wear layer are both good options for cats – they’re tough enough to resist scratches but still comfortable under their paws.
You can rely on luxury vinyl or ceramic tiles if you have a home with multiple pets. They can handle numerous accidents and endless foot traffic. Plus, they’re easy to clean.
Older pets need better traction and prefer softer surfaces that support their joints. Waterproof vinyl is excellent here. It’s easy to clean and offers more comfort than tile. Remember, it is crucial to avoid slippery flooring for old pets.
Maintaining your flooring is just as important as choosing the right type. Even if you choose the best flooring, you won’t be able to enjoy it for a long time if you don’t know how to keep it clean and cared for. Here are some essential tips for caring for your pet’s flooring:
While comparing flooring can give you a better idea of what is best for your pet, it ultimately comes down to your lifestyle and the type of animal you share your home with! Larger, heavier pets will need flooring more resistant to scratches and moisture. In comparison, quieter pets can go for more delicate flooring. If your pet listens to you, you can opt for solid and engineered hardwood. Still, if they are more energetic and boisterous, it is better to consider a more durable flooring option.
For any flooring queries, drop us an email at info@flooringsurgeons.co.uk – or Visit our showrooms located in Birmingham & Wolverhampton!
Halesowen
214A Dudley Road. Halesowen, Birmingham, B63 3NJ
0121 274 8575
Monday – Friday: 9 AM – 6 PM | Weekends: 10 AM – 4 PM
Wolverhampton
317 Penn Rd, Wolverhampton, West Midlands, WV4 5QF
01902 836666
Monday – Friday: 9 AM – 6 PM | Sat: 10 AM – 4 PM | Sun: Closed
info@flooringsurgeons.co.uk
fitting@flooringsurgeons.co.uk
customerservices@flooringsurgeons.co.uk
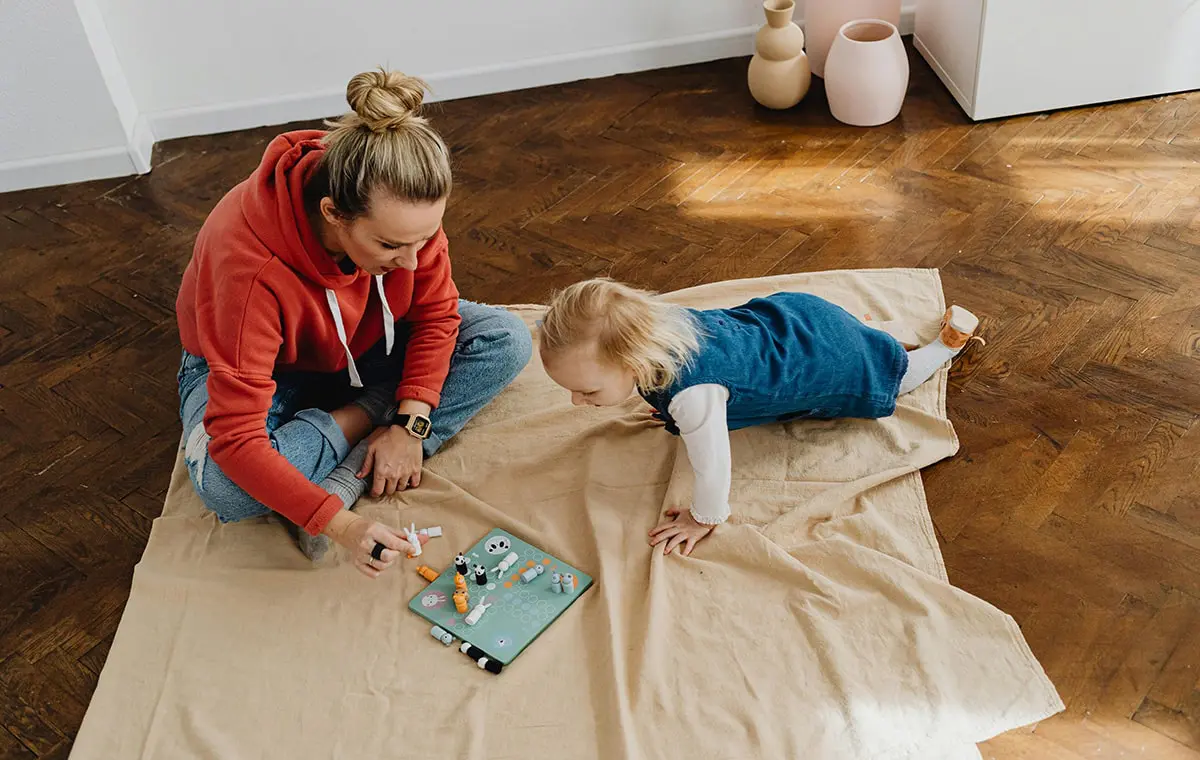
Babies can actually spend a lot of time on the floor, crawling, running, walking, sitting, or even falling asleep while playing on the floor. All of this means the flooring you choose plays a more significant role in your child’s room than you might think. Your child’s bedroom flooring needs careful consideration. It’s not just about aesthetics and how the flooring complements the interior design. It’s also about functionality, the child’s comfort and safety.
Let’s examine which flooring options offer the safest and most practical solutions for your growing family.
Flooring is a baby’s primary environment. From crawling on their stomachs to taking their first tentative steps, their floor is their playground, crash pad, and launching pad. Babies also love to put anything they see on the floor in their mouths and taste it. When choosing the right flooring for your baby’s bedroom, it’s essential to balance comfort, safety, health, durability, and budget.
Since young children spend a lot of time on the floor, it is essential to choose flooring that is not too cold.
The right flooring should have a hard, durable surface coating, withstand daily use, and maintain its beauty and character throughout your child’s growing years. This ensures the long-term value of your investment.
The flooring you choose for your child’s room should be easy to clean and not attract stains or dirt. When choosing flooring, look for slip-resistant options to handle the occasional accident or spill. On the other hand, Babies are still trying to master their balance, and stumbling and falling is inevitable. A soft surface can decrease the risk of minor injuries.
Another factor you will want to keep in mind is to ensure your baby’s room flooring is antimicrobial, allergen-free, and constructed of a clean, natural material without dangers. Additionally, some flooring (or the adhesives and finishes used) have high levels of volatile organic compounds (VOCs) that could harm your child. According to Greenseal, (VOCs) are common indoor air pollutants frequently found in household products and can cause adverse health effects.

Let’s take a look at the most common types of flooring to see which ones are closest to being kid-friendly.
Solid Wood flooring is a kid-friendly option–and looks fantastic too. It offers a range of benefits for a child’s bedroom. Solid Wood is a non-toxic flooring material and can be finished with non-toxic sealants, making it a healthier option. If you clean up water stains immediately and don’t let the damage cause cupping and buckling, your Solid Wood will last for years and can be repaired with sanding. There’s no denying the timeless beauty of solid wood flooring, but you should notice that it is a bit hard surface and better suited for a child a little older than a baby’s room.
Compared to hardwood, engineered wood has a bit more of a forgiving underfoot. While it’s not as soft as vinyl or carpet, it offers a balance of comfort and durability. One of the main benefits of engineered wood is its compatibility with underfloor heating. Although it costs more than laminate or vinyl, you will still need a rug to protect it.
While tile flooring is great for areas like bathrooms and kitchens because of its strength, durability, and easy-to-clean surface, it may not be the best choice for children’s rooms. Tiles can make a room feel cold, which is unpleasant for young children who often play on the floor. Unless you carpet or rug part of the room.
Carpets may seem attractive for a child’s room at first glance because they create a cosy and warm atmosphere. They also provide a soft, cushioned surface, reduce noise levels, and create a quieter space. However, there are some things to consider before making the final decision. Carpets are difficult to clean. They can collect and retain allergens, bacteria, and dust, aggravating allergy or asthma symptoms. Even with professional cleaning, it is challenging to remove all particles completely.
Vinyl flooring is a great and affordable option. The soft and comfortable underfoot makes it great for toddlers still learning balance. Choose vinyl flooring made with foam. Its cushioned and flexible surface will prevent your child from getting hit and provide good sound insulation.
Vinyl flooring is easy to install and DIY-friendly, saving you time and money. It only requires occasional cleaning to stay clean, and it’s often compatible with underfloor heating systems if you want to add extra comfort. For a more durable and healthier option, it is better to choose luxury vinyl (LVT) with low VOC and scratch-resistant finishes.
Laminate is another great option for your child’s room. It handles stains well and is easy to maintain. You also don’t need to be a professional to install it. One of the drawbacks of laminate is that it can be pretty slippery when wet. It’s best to consider a rug in areas where your baby is most active. Unlike hardwoods, which can be sanded and refinished multiple times throughout their lifespan, if your laminate floor becomes damaged or worn, you must remove and replace the damaged planks.
You should consider that laminate flooring can be noisy. A good quality underlay can reduce some of the noise problems. You can also use Underfloor heating with laminate flooring.
As we have seen, some flooring choices make more sense than others. To make a more informed decision, you should be sure of your preferences and priorities, examine different examples, and consider essential points. Here are a few additional important points to remember when choosing a baby’s room flooring.
If you need more help choosing the best flooring for babies, we would be happy to provide design and installation suggestions tailored to your circumstances and budget.
For any flooring queries, drop us an email at info@flooringsurgeons.co.uk – or Visit our showrooms located in Birmingham & Wolverhampton!
Halesowen
214A Dudley Road. Halesowen, Birmingham, B63 3NJ
0121 274 8575
Monday – Friday: 9 AM – 6 PM | Weekends: 10 AM – 4 PM
Wolverhampton
317 Penn Rd, Wolverhampton, West Midlands, WV4 5QF
01902 836666
Monday – Friday: 9 AM – 6 PM | Sat: 10 AM – 4 PM | Sun: Closed
info@flooringsurgeons.co.uk
fitting@flooringsurgeons.co.uk
customerservices@flooringsurgeons.co.uk
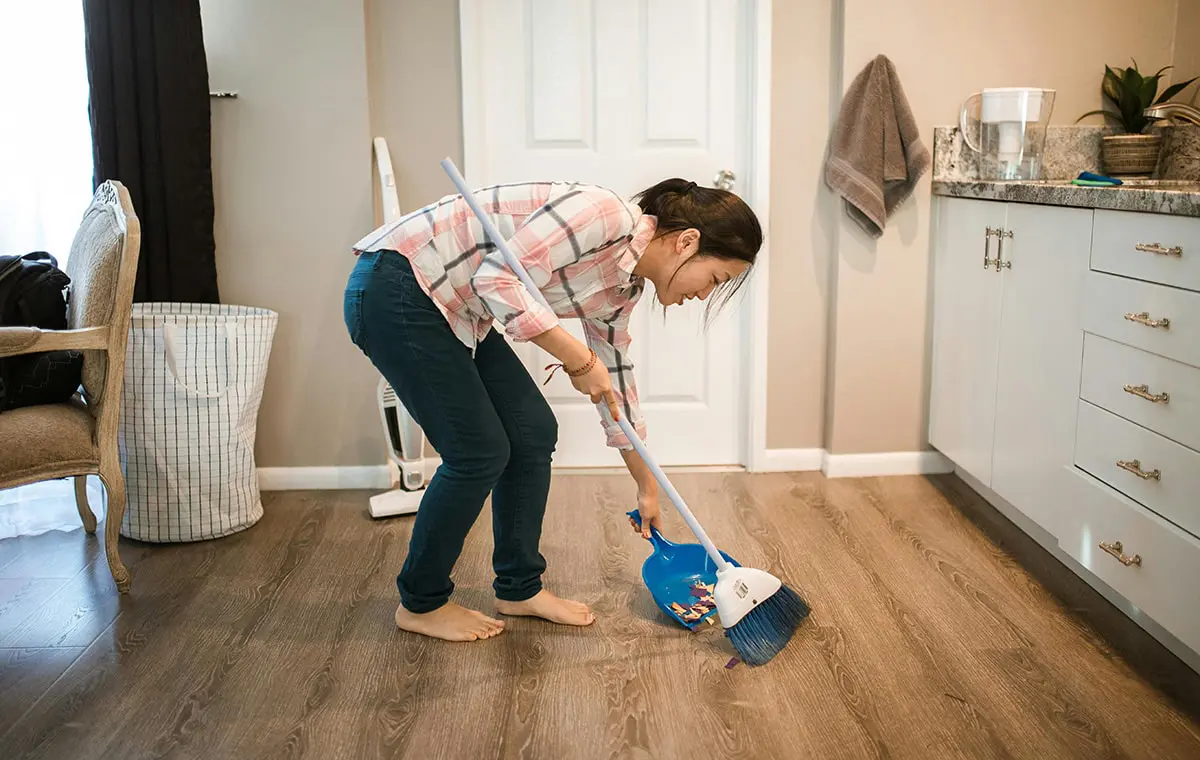
Laminate flooring is easy to maintain, making it a suitable alternative to hardwood flooring. However, that doesn’t mean that proper cleaning should be neglected. From fundamental techniques to some safe home methods, we’ll look at the best cleaning methods and tools to keep your laminate floors as beautiful and shiny as the day you first got them. Let’s see how to clean laminate flooring.
Regular cleaning will keep your flooring looking shiny and will extend its lifespan. Daily sweeping will remove particles that may scratch the surface. In addition to daily maintenance, laminate flooring should be deep cleaned every two weeks or once a month (depending on how busy your home is).
The key to cleaning laminate flooring properly is to avoid using too much water. Because laminate flooring has a fibrous core that is very sensitive to moisture, if too much water seeps into the joints, it can cause the planks to swell, warp, or even entirely separate.
Gather these essential tools before you start cleaning your laminate floors:
Tip: Soft microfibre mops are perfect for laminate floors, trapping dust and debris without scratching the surface. Lightweight vacuums with a hard floor setting are great for reaching corners and along skirting boards.
Any stains or spills, especially dark liquids like coffee or wine, will be easier to remove from your flooring if you wipe them off immediately.
A soft-bristled broom or vacuum cleaner is ideal for quick and light daily cleaning. Start with a hard floor for light vacuuming. Always work towards the floorboards to avoid pushing dirt into the joints. Avoid vacuuming with a rotating brush attachment, which can scratch the laminate surface.
Sometimes, Laminate Flooring needs more than a quick cleaning, especially in high-traffic areas like hallways, kitchens, and living rooms. Use a slightly dampened microfiber mop with a laminate-safe cleaning solution for a deep clean. Wring out the mop thoroughly; your goal is only to dampen, not soak. Ventilate the room or turn on a fan to help the floor dry faster.
While you shouldn’t rely on just any home remedy for cleaning laminate flooring, a mixture of lukewarm water and vinegar can be a natural and gentle alternative to store-bought cleaners. Apply the mixture to a small area and then wipe with a fine microfiber cloth.
Although laminate flooring is low maintenance and naturally stain-resistant, it will inevitably get dirty over time. The following tips will help you take the best care of your flooring.
Following the simple yet powerful tips outlined here will help keep your laminate flooring looking flawless for longer.
Suppose you want to add laminate flooring to your home. In that case, we offer a wide range of laminate flooring in various colours and thicknesses at Flooring Surgeons.
For any flooring queries, drop us an email at info@flooringsurgeons.co.uk – or Visit our showrooms located in Birmingham & Wolverhampton!
Halesowen
214A Dudley Road. Halesowen, Birmingham, B63 3NJ
0121 274 8575
Monday – Friday: 9 AM – 6 PM | Weekends: 10 AM – 4 PM
Wolverhampton
317 Penn Rd, Wolverhampton, West Midlands, WV4 5QF
01902 836666
Monday – Friday: 9 AM – 6 PM | Sat: 10 AM – 4 PM | Sun: Closed
info@flooringsurgeons.co.uk
fitting@flooringsurgeons.co.uk
customerservices@flooringsurgeons.co.uk
Everybody knows how much solid wood flooring can elevate the aesthetic of any home. However, as beautiful as it is, it requires careful maintenance. Solid wood flooring can last a lifetime, but unlike laminate flooring, they are particularly vulnerable to moisture, scratches, and general wear and tear, making routine maintenance essential. The key to keeping it stylish and extending its lifespan is using the correct cleaning tips and techniques. Using the wrong method can risk durability and dull its shine. In this guide, we’ll cover everything you need to know about cleaning solid wood floors, with step-by-step instructions to ensure they stay as flawless as the day they were installed.
Solid wood flooring comes from trees, most commonly oak, maple, or walnut. Each plank is cut directly from the tree trunk, then shaped and finished to prepare a durable and elegant flooring option. Unlike engineered wood, which consists of multiple layers of bonded wood veneer, solid wood is more sensitive to moisture and abrasive cleaning products, so it is important to know how to clean solid wood flooring correctly.
Read More: How to install solid wood
Daily maintenance and dust removal help prevent scratches and maintain a clean appearance. The best way to achieve this is to vacuum your solid wood floor first before using other cleaning tools.
Some dirt and grit can act like sandpaper and wear down the surface of your flooring over time. Regular vacuuming helps prevent marks and scratches. It also ensures that mopping is safe and more effective. Always set your vacuum to the “hard floor” setting to avoid damaging the wood.
After vacuuming, you can use a microfiber dust mop with peace of mind to remove any remaining dust and debris. For best maintenance, dust your floors at least once a day, especially in high-traffic areas.
If you remove stains when they happen, your floor won’t accumulate deep dirt and stains as easily. However, over time, a build-up of dirt, oil, and grime is inevitable and requires a deeper cleaning. Here’s how to clean solid wood flooring for stubborn spots.
Appropriate cleansers protect the wood’s natural finish and prevent it from drying out. It’s always recommended to follow the instructions on any commercial floor cleaner to ensure it suits your specific flooring type and that you’re applying it correctly.
Use pH-neutral cleaners free from harsh chemicals, thus minimising the risk of damage. Blending a few drops of hardwood flooring cleaner with warm water is also one of the effective cleaning solution.
Solid Wood Flooring requires careful mopping. This is because it is highly absorbent of moisture. Therefore, always ensure that you use a damp microfiber mop rather than a soaked onetain.
For stubborn spots or stains, use a lightly dampened cloth with a small amount of wood floor cleaner and then dry the floor immediately after mopping using a soft, dry cloth or towel.
If water spillages are left on the surface for an extended period, it could heavily damage your solid wood flooring. The best approach is not to allow any water ring or spillages for a long time and to wipe it immediately. For stubborn stains, you can try gently rubbing baking soda on the area and then wipe it with a damp cloth.
Read more: How to remove water stains from wood floors
Taking preventative measures to prevent dirt and scratches can significantly extend the life of your flooring and make it easier to clean.
To know how to clean solid wood flooring properly, you must know the type of stain, scratch, or dirt.Light scuffs can often be mopped easily. Stubborn stains require a little more pressure and attention to remove. Forget harmful cleaning myths, such as using vinegar to clean the wood floors. According to NWFA vinegar acidity can break down the wood’s finish over time.
Whilst a regular cleaning routine can extend the durability of the flooring, over time, your floor needs to be recoated and refinished. The best solution is to call professionals, but you may prefer DIY recoating. Choosing between DIY and experts depends on the flooring’s condition. For deep scratch damage, it is better to leave it to the experts. However, for minor damage, you may be able to get away with restoring it yourself if you are confident enough
Cleaning solid wood flooring doesn’t have to be complicated, but it does require proper techniques. Daily dusting, weekly vacuuming, and appropriate deep cleaning methods can protect your floors from damage and preserve their beauty for decades. For best results, always use cleaning products designed specifically for hardwood floors and avoid excess moisture, which can lead to warping. Thinking about giving your hardwood floors a fresh new look? Visit our store or contact our experts today to find the perfect fit for your home!
If you have any flooring queries, email us at info@flooringsurgeons.co.uk or visit our showrooms in Birmingham and Wolverhampton!
Halesowen
214A Dudley Road. Halesowen, Birmingham, B63 3NJ
0121 274 8575
Monday – Friday: 9 AM – 6 PM | Weekends: 10 AM – 4 PM
Wolverhampton
317 Penn Rd, Wolverhampton, West Midlands, WV4 5QF
01902 836 666
Monday – Friday: 9 AM – 6 PM | Sat: 10 AM – 4 PM | Sun: Closed
info@flooringsurgeons.co.uk
Vinyl flooring is a stylish, cost-effective, and durable option for your home. With its excellent resistance to moisture and minimal maintenance needs, vinyl is a smart choice for kitchens, hallways, and other high-traffic areas. Luxury vinyl flooring (LVT) is more popular because of its quality, eco-friendliness, and beauty. Generally, the steps for installing luxury vinyl flooring and vinyl flooring are not much different. This guide Will Teach you how to install vinyl flooring.
Let’s review the steps involved and learn about expert and professional tips for maintaining vinyl flooring.
You can install Luxury vinyl flooring in two ways: glue-down, which uses special adhesives to bond the vinyl pieces to the subfloor, or floating (click-lock), which is installed over a subfloor, underlayment, or existing floor. While the glue-down method offers more protection for high-traffic floors, the floating method is more common in residential spaces as it is DIY friendly. It’s also adhesive-free and easy to replace. The best installation method depends on your subfloor condition, room usage, and personal preference.
After choosing the best installation method, remove everything from the floor. This includes furniture, appliances, and even door frame modifications if needed. All of these can be reinstalled after the flooring has been installed. Remove any baseboards before repair work is done to make the installation more manageable.
Ensure your subfloor is clean (either by sweeping or mopping) before installing vinyl planks. Fix any surface irregularities. If the subfloor has cracks or bumps, use a levelling or patching compound to create an even surface. The subfloor must be smooth, clean, and dry. That will help ensure that the vinyl floor is perfectly level. You can sand or plane down any high spots for timber floors. For installation over concrete subfloors, ensure the humidity level is within an acceptable range (usually below 75%). Also, make sure all the planks are tight and free of creaks for wooden subfloors.
Remember, you shouldn’t install flooring on top of the carpet, existing vinyl flooring with cushion backs, or even hardwood flooring. Doing so can ruin your existing floors, subfloor, and the vinyl planks you’re installing.
It is essential to check each board for defects and then contact the supplier if found! If you install defective boards without checking beforehand, you may have to spend extra money replacing them.
Measure your square footage and decide on the layout of your planks. Accurately measure the length and width of the room in metres, then multiply the two to get the area (e.g., 4m x 3m = 12m²). Check how much coverage each pack of vinyl provides — for example, if one pack covers 2.5m², divide your total by this number. Always add 10% extra for trimming and mistakes. It’s better to lay your planks perpendicular to the window in regular rooms and have the hallway planks parallel to the wall.
Listing and preparing the tools you need before you begin will help you focus better during the installation. Using the right tools will ultimately save you time, effort, and money.
Appropriate safety gear—gloves, safety glasses, a dust mask, and knee pads—is essential for a safe and comfortable DIY experience.
Essential tools and materials include:
Having everything at arm’s reach before you begin will help you maintain momentum and achieve a more professional result.
Now it’s time to install your vinyl flooring. While installation processes may vary by brand, most luxury vinyl plank (LVT) installations follow the same general principles— using a floating method or a glue-down technique.

Start from the left-hand corner of the room with the tongue side of the plank facing the wall. Place spacers to maintain a consistent expansion gap—typically 10–15mm—between the flooring and the wall. A straight and accurate first row is critical—it guides the rest of the flooring. Once the first row is laid, double-check for gaps and alignment, and make any minor adjustments as needed.
For glue-down installations, spread adhesive with a notched trowel in small sections and press each plank firmly into place. Use a roller to eliminate any air pockets and ensure complete contact with the subfloor.
To connect the second plank, insert its tongue into the groove of the first plank at a slight angle and press down until it clicks. Continue across the row this way. Make sure to stagger the plank joints—cut the first plank of every other row so that the end joints don’t line up. This improves both the strength and visual appeal of the floor. Keep the groove side facing you throughout the process. If you notice uneven height or misalignment, disassemble and re-lay the row—continuing on an uneven base can permanently damage the joints.
For glue-down vinyl, continue spreading adhesive section by section, laying each plank carefully before the glue sets. Always follow the curing time recommended by the manufacturer.
Avoid pre-drilling holes for sections with obstacles like pipes, radiators, or other obstacles. First, lay the plank in a position to see exactly where the cut is needed. Once you know where the pipe aligns, drill a hole about 12mm (½ inches) larger than the pipe diameter. This gives enough space for expansion and easier fitting.
In the last row, it is essential to note that to maintain the floor’s integrity, the final board in each row should not be less than 12 inches so that the boards are securely locked and do not shift over time.
Once the installation is complete, roll the floor with a heavy roller to apply even pressure. Although this is important with the adhesive method, it can also be helpful with a floating floor, reducing the risk of edge lifting.
Finally, remove the spacers and reinstall the skirting boards.
Read More: How to install laminate flooring
Following a few practical tips will help you have a more professional installation:
Vinyl flooring is easy to maintain. A weekly cleaning is often sufficient, but consider vacuuming every other day or every few days. This will help keep your vinyl flooring in excellent condition. Here are some common mistakes to avoid for better maintenance
Ready to transform your space? Use this guide and visit our website to shop for the best vinyl flooring.
For any flooring queries, drop us an email at info@flooringsurgeons.co.uk, or visit our showrooms located in Birmingham & Wolverhampton!
Halesowen
214A Dudley Road. Halesowen, Birmingham, B63 3NJ
0121 274 8575
Monday – Friday: 9 AM – 6 PM | Weekends: 10 AM – 4 PM
Wolverhampton
317 Penn Rd, Wolverhampton, West Midlands, WV4 5QF
01902 836666
Monday – Friday: 9 AM – 6 PM | Sat: 10 AM – 4 PM | Sun: Closed
info@flooringsurgeons.co.uk
fitting@flooringsurgeons.co.uk
customerservices@flooringsurgeons.co.uk
Looking to give your home the natural, timeless look of solid wood flooring at a more affordable price without high maintenance? Engineered wood flooring may be the right choice. With a real hardwood top layer and a smart multi-layer core made of plywood or HDF, it offers the elegance of real wood with enhanced durability and moisture resistance. In this guide, we’ll walk you through the four most common methods for installing engineered wood flooring, step by step. Whether you’re planning a DIY project or hiring a professional, knowing how to install engineered wood flooring can give you a better overview of the process and help you achieve flawless results
Depending on the subfloor, there are four methods for installing engineered wood flooring: glue down, nail or staple down, and float. Whichever method you choose, you will need to prepare the subfloor by cleaning, levelling, checking, and adjusting the door gap.
Nailing down engineered wood flooring is a traditional method that ensures a secure and long-lasting installation. This technique is ideal for wooden subfloors and is commonly used by professional installers because it requires specific tools and skills.
Installing with staples is very similar to nailing, except that stapling requires inserting the staples into the tongue at a 45-degree angle. Additionally, stapling is generally a quicker method than nailing.
The glue-down method is ideal for wood and concrete subfloors, especially for high-traffic areas, as it ensures a permanent bond between the boards and the subfloor. It is also recommended as the more suitable option for installing engineered wood flooring in areas with underfloor heating.
The floating floor installation method is a common choice for engineered wood floors. In this DIY-friendly method, the planks are interlocked together using either a tongue-and-groove system (T&G) or a click-lock system. The T&G method requires glue to lock the planks in place, while the Click-Lock method allows the planks to lock into place without adhesive. When the floor expands, the entire floor moves together as one unit.
By now, we’ve explored the different methods of installing engineered wood flooring and how each works. Regardless of your chosen method, there are a few essential preparation steps to take before you begin. Below are the key steps to prepare your space for installation.
To ensure that your flooring installation is done correctly, you should first take the following steps:
Essential for All Installation Types
Additional for Floating Installation
Wood glue
Additional for Glue-Down Installation
Additional for Nail/Staple Installation
you can buy engineered accessories from Flooring surgeon:
Underlay for engineered flooring
To determine how many engineered wood planks you’ll need, measure the length and width of your room in metres. Multiply these two numbers to calculate the total square metres. Then, check how many square metres are covered by one pack of flooring—this is usually stated on the packaging. Divide your room’s total area by the pack coverage to determine how many packs you need. Adding an extra 5–10% is wise to allow for cuts, mistakes, and future repairs.
Read more: How to Measure a Room for Flooring (Step-by-Step Guide)
Before installing, make sure the subfloor is ready for the new flooring. Remove any skirting boards, old nails or staples and loose dirt.
In UK homes, a relative humidity of 45-65% is considered normal. Timber-based and concrete subfloors should have a moisture content (MC%) of no more than 12% when tested with a prong meter or below 3% when measured with a concrete moisture metre. As different metres may use varying scales, it is essential to read the manufacturer’s instructions. In addition, the subfloor should be level and not vary more than 3mm in a one-metre span to create a smooth and stable surface suitable for flooring installation.
Carefully open a package and check that the planks’ colour, quality, and finish are as expected. Ensure each flooring is intact before installation, as the supplier may not replace the wood flooring afterwards.
Once you have approved the flooring’s condition, you must acclimate it to the environment. Engineered wood expands and contracts with temperature changes, which can cause the floor to buckle if not properly adapted. Keep the planks flat in the room for 48 to 72 hours. During this time, ensure the room’s temperature and humidity align with the manufacturer’s guidelines.
Stack the planks in piles of no more than three, leaving at least 4cm of space between each stack to allow for proper air circulation. If your flooring will be laid over underfloor heating, place the planks directly on the floor and spread them out individually. Begin by running the heating at a low, comfortable temperature, then increase it by 2°C every two days until you reach your desired maximum. After that, the temperature is gradually lowered by 2°C every two days until it reaches the minimum comfortable level.
We will explain each method step by step below:
Start by placing spacers around the room, leaving a ¼” gap between the wall and the planks. This gap allows the wood to expand.
Begin by positioning the plank with the tongue facing towards the centre of the room. Pre-drill holes near the wall, about 1 inch away and 3-4 inches apart. Pre-drilling helps prevent the wood from cracking and makes it easier to insert the nails. Secure the planks by nailing through the tongue with finishing nails.
After nailing the planks, use a nail punch to drive the nails below the surface for a cleaner finish.
Once the nails are countersunk, fill the holes with wood putty that matches the colour of the planks to ensure a seamless look.
When you reach the end of a row, measure the gap, mark it, and cut the plank to fit. Use leftover pieces (at least 6 inches long) to stagger the seams in the next row.
For each new row, position the planks at an angle above the tongue and nail them into place using a nail gun. Be sure to countersink the nails to avoid disrupting the tongue-and-groove connection between the planks.
When installing around obstacles, carefully measure and mark the area. Using a jigsaw, cut the boards exactly around the barriers, leaving a small expansion gap. For pipes, drill a hole in the board, fit it around the pipe, and firmly nail it. Ensure that the nails are driven vertically through the tongue of the board for a clean look. Always leave a small expansion gap around the edges for natural wood movement.
Continue installing planks until the entire floor is covered. Once finished, remove the spacers and add transition strips and moulding if desired.
Read more: How to install solid wood

The Glue-Down Method requires special adhesives. EWG recommends that is better the adhesive used be free of volatile organic compounds(VOCs). For best results, check the manufacturer’s instructions for the recommended type of adhesive. To start the installation, Place spacers between the wall and the planks to leave a ¼” expansion gap around the room’s perimeter.
Starting at the corner of the room, spread the adhesive onto the subfloor for two to three rows, then use a trowel to create a thin, even layer.
Align the tongue and groove edges, working from left to right. Press the boards firmly into place.
Keep applying glue in small sections and tap each plank into place, ensuring the seams are tight.
After measuring, cutting the boards, and leaving a small expansion gap for the obstructions, apply adhesive to the subfloor in small sections and press the boards into place. Use a tapping block and rubber mallet to attach each board firmly.
Remove spacers and install transition strips and moulding along the edges.

The stapling method is similar to nailing but uses staples instead of nails. Here’s how it works:
Like nailing, place spacers and position your first row of planks. Measure and pre-drill if needed.
Use a staple gun to drive staples at a 45-degree angle above the plank’s tongue. Place staples every 3-4 inches along the plank.
After stapling, countersink any staples and fill holes with matching wood putty, just like with nailing.
Staple each subsequent row, ensuring staples are placed correctly and at the right angle.
Stapling installation around obstacles is similar to the nailing method. The key difference is that when stapling the planks, the staples should be placed at a 45-degree angle above the tongue, ensuring they don’t interfere with the tongue-and-groove system. Unlike nails, staples should be placed more precisely, especially near the edges, to avoid damaging the wood.
Remove spacers and add transition strips and moulding.
Place spacers between the wall and the boards to create a ¼-inch expansion gap around the perimeter of the room
Position the first plank in the corner of the room, working from left to right. For Tongue and Groove, apply the recommended glue in the groove of the plank, then insert the tongue of the next plank into the groove, ensuring they lock together tightly.
For Click-Lock, insert the tongue of the plank into the groove of the next plank at an angle, then push it down until it clicks into place.
Connect the planks similarly for each subsequent row. If you’re using the T&G method, apply glue to the groove of the next plank before inserting it. For Click-Lock, the planks will click together.
When you reach the end of a row and there’s not enough space for a full plank, measure the gap between the last plank and the wall, mark the plank, and cut it to size. (Refer to the earlier section on cutting planks for cutting instructions.)
Start the next row using the leftover pieces from the previous row (at least six inches long). This helps to stagger the joints, giving the floor a more natural and aesthetically pleasing look.
Continue to interlock the planks, using a tapping block and rubber mallet to ensure a tight fit between the seams.
After measuring and cutting, glue it into the groove and insert it into the tongue. For a click lock, angle the board and click it around the obstruction. Leave a gap for expansion to ensure a clean and secure fit.
As you move toward completing the floor, remove the spacers around the edges. Once all the rows are installed, add your transition strips and moulding as needed.
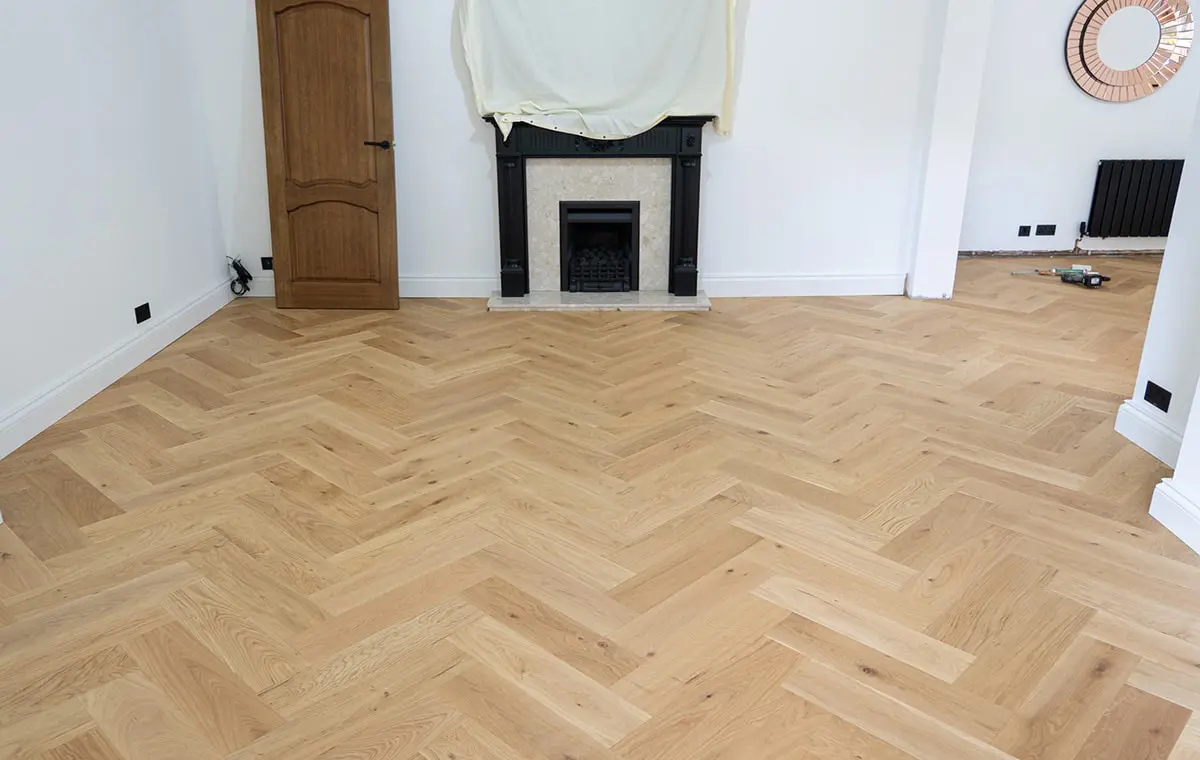
To perform a professional and stable installation, be sure to consider these tips:
Although we have tried to provide a detailed guide to the various engineered wood flooring installations in this article, there are many installation tips. At the Flooring Surgeons, we help you with stylish and professional flooring. So contact us now for advice and purchase the best-engineered flooring in various colours and thicknesses.
For any flooring queries, drop us an email at info@flooringsurgeons.co.uk – or Visit our showrooms located in Birmingham & Wolverhampton!
Halesowen
214A Dudley Road. Halesowen, Birmingham, B63 3NJ
0121 274 8575
Monday – Friday: 9 AM – 6 PM | Weekends: 10 AM – 4 PM
Wolverhampton
317 Penn Rd, Wolverhampton, West Midlands, WV4 5QF
01902 836666
Monday – Friday: 9 AM – 6 PM | Sat: 10 AM – 4 PM | Sun: Closed
info@flooringsurgeons.co.uk
fitting@flooringsurgeons.co.uk
customerservices@flooringsurgeons.co.uk


