


Room Visualiser
Try our floors in your home
0
0
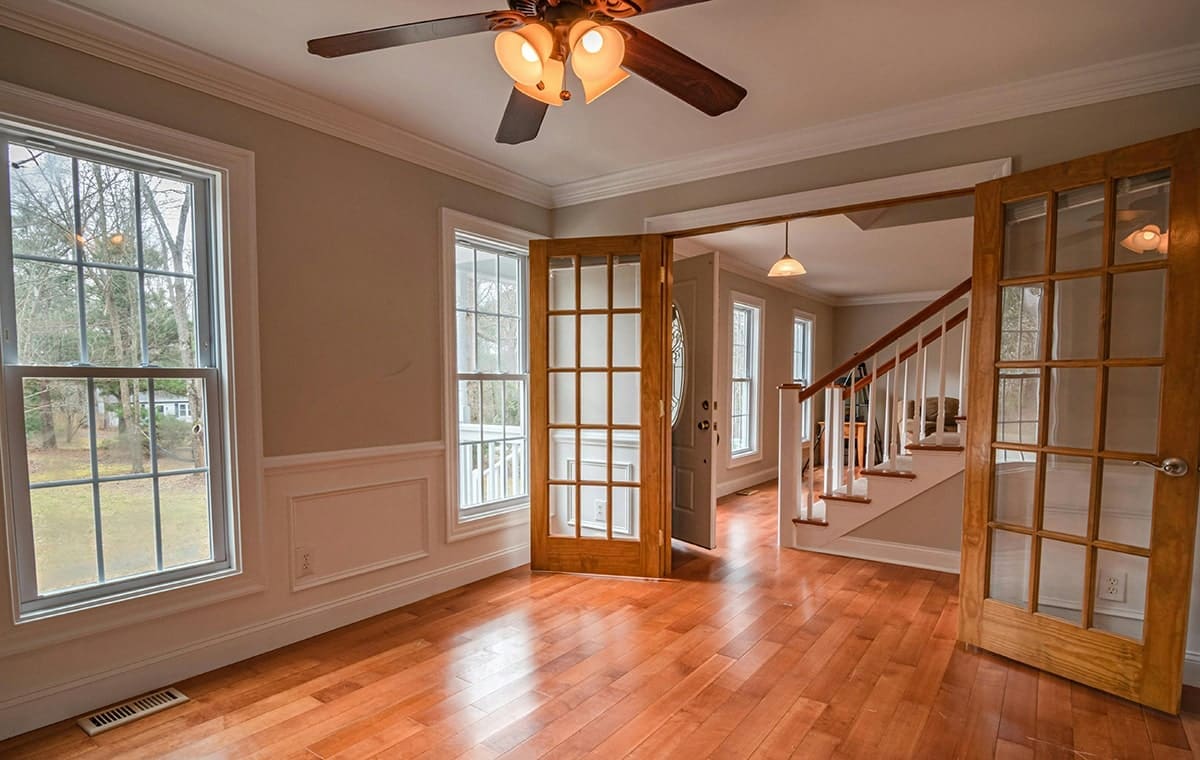
Everybody knows how much solid wood flooring can elevate the aesthetic of any home. However, as beautiful as it is, it requires careful maintenance. Solid wood flooring can last a lifetime, but unlike laminate flooring, they are particularly vulnerable to moisture, scratches, and general wear and tear, making routine maintenance essential. The key to keeping it stylish and extending its lifespan is using the correct cleaning tips and techniques. Using the wrong method can risk durability and dull its shine. In this guide, we’ll cover everything you need to know about cleaning solid wood floors, with step-by-step instructions to ensure they stay as flawless as the day they were installed.
Solid wood flooring comes from trees, most commonly oak, maple, or walnut. Each plank is cut directly from the tree trunk, then shaped and finished to prepare a durable and elegant flooring option. Unlike engineered wood, which consists of multiple layers of bonded wood veneer, solid wood is more sensitive to moisture and abrasive cleaning products, so it is important to know how to clean solid wood flooring correctly.
Read More: How to install solid wood
Daily maintenance and dust removal help prevent scratches and maintain a clean appearance. The best way to achieve this is to vacuum your solid wood floor first before using other cleaning tools.

Some dirt and grit can act like sandpaper and wear down the surface of your flooring over time. Regular vacuuming helps prevent marks and scratches. It also ensures that mopping is safe and more effective. Always set your vacuum to the “hard floor” setting to avoid damaging the wood.
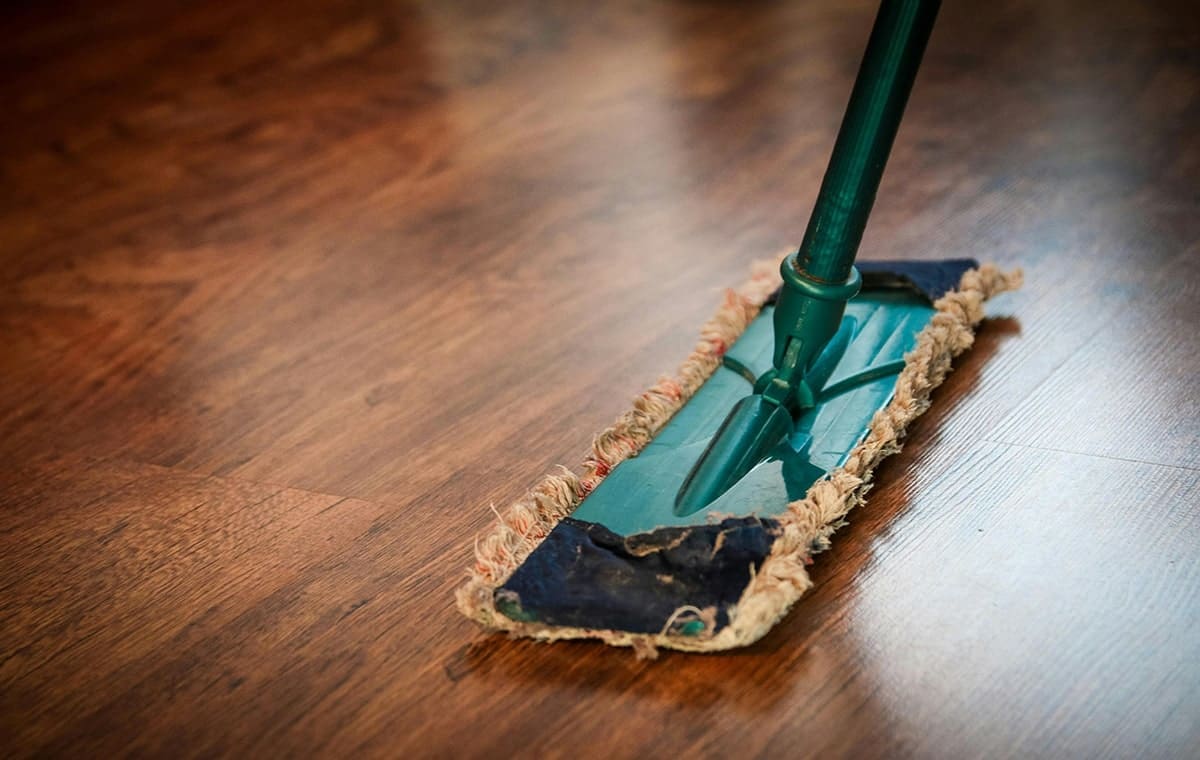
After vacuuming, you can use a microfiber dust mop with peace of mind to remove any remaining dust and debris. For best maintenance, dust your floors at least once a day, especially in high-traffic areas.
If you remove stains when they happen, your floor won’t accumulate deep dirt and stains as easily. However, over time, a build-up of dirt, oil, and grime is inevitable and requires a deeper cleaning. Here’s how to clean solid wood flooring for stubborn spots.
Appropriate cleansers protect the wood’s natural finish and prevent it from drying out. It’s always recommended to follow the instructions on any commercial floor cleaner to ensure it suits your specific flooring type and that you’re applying it correctly.
Use pH-neutral cleaners free from harsh chemicals, thus minimising the risk of damage. Blending a few drops of hardwood flooring cleaner with warm water is also one of the effective cleaning solution.
Solid Wood Flooring requires careful mopping. This is because it is highly absorbent of moisture. Therefore, always ensure that you use a damp microfiber mop rather than a soaked onetain.
For stubborn spots or stains, use a lightly dampened cloth with a small amount of wood floor cleaner and then dry the floor immediately after mopping using a soft, dry cloth or towel.
If water spillages are left on the surface for an extended period, it could heavily damage your solid wood flooring. The best approach is not to allow any water ring or spillages for a long time and to wipe it immediately. For stubborn stains, you can try gently rubbing baking soda on the area and then wipe it with a damp cloth.
Read more: How to remove water stains from wood floors

Taking preventative measures to prevent dirt and scratches can significantly extend the life of your flooring and make it easier to clean.
To know how to clean solid wood flooring properly, you must know the type of stain, scratch, or dirt.Light scuffs can often be mopped easily. Stubborn stains require a little more pressure and attention to remove. Forget harmful cleaning myths, such as using vinegar to clean the wood floors. According to NWFA vinegar acidity can break down the wood’s finish over time.
Whilst a regular cleaning routine can extend the durability of the flooring, over time, your floor needs to be recoated and refinished. The best solution is to call professionals, but you may prefer DIY recoating. Choosing between DIY and experts depends on the flooring’s condition. For deep scratch damage, it is better to leave it to the experts. However, for minor damage, you may be able to get away with restoring it yourself if you are confident enough
Cleaning solid wood flooring doesn’t have to be complicated, but it does require proper techniques. Daily dusting, weekly vacuuming, and appropriate deep cleaning methods can protect your floors from damage and preserve their beauty for decades. For best results, always use cleaning products designed specifically for hardwood floors and avoid excess moisture, which can lead to warping. Thinking about giving your hardwood floors a fresh new look? Visit our store or contact our experts today to find the perfect fit for your home!
If you have any flooring queries, email us at info@flooringsurgeons.co.uk or visit our showrooms in Birmingham and Wolverhampton!
Halesowen
214A Dudley Road. Halesowen, Birmingham, B63 3NJ
0121 274 8575
Monday – Friday: 9 AM – 6 PM | Weekends: 10 AM – 4 PM
Wolverhampton
317 Penn Rd, Wolverhampton, West Midlands, WV4 5QF
01902 836 666
Monday – Friday: 9 AM – 6 PM | Sat: 10 AM – 4 PM | Sun: Closed
info@flooringsurgeons.co.uk
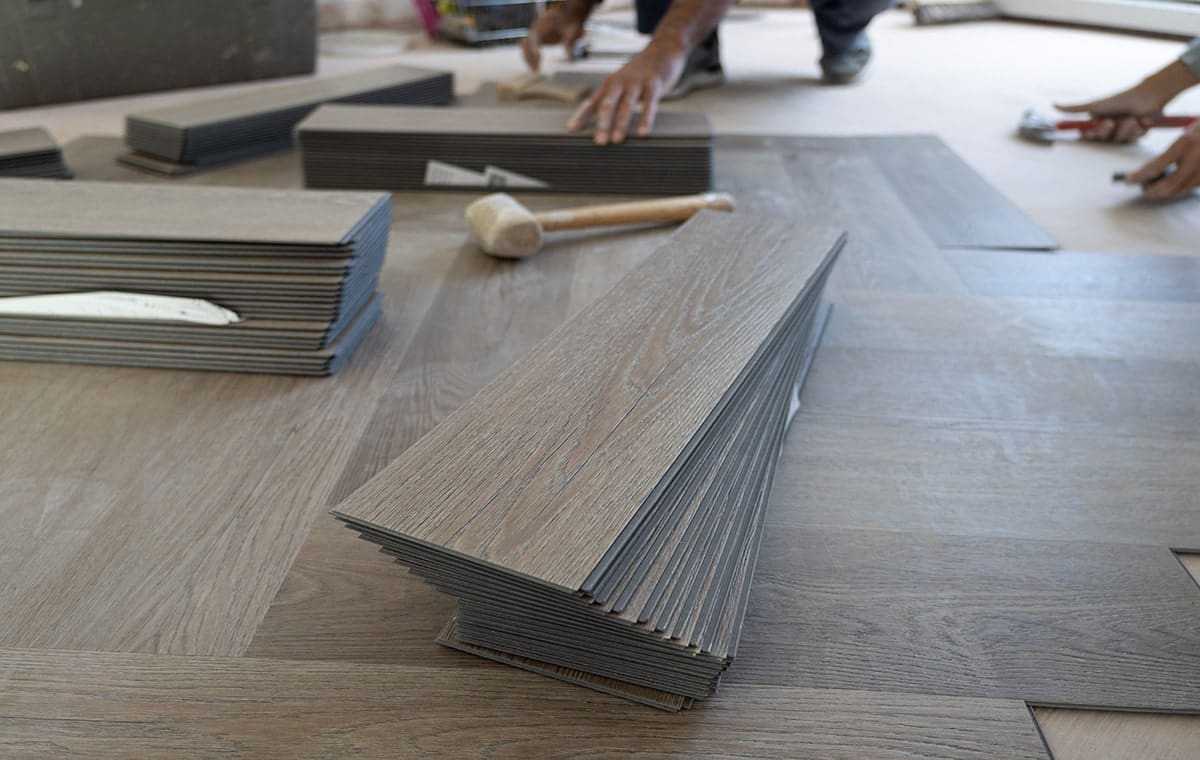
Vinyl flooring is a stylish, cost-effective, and durable option for your home. With its excellent resistance to moisture and minimal maintenance needs, vinyl is a smart choice for kitchens, hallways, and other high-traffic areas. Luxury vinyl flooring (LVT) is more popular because of its quality, eco-friendliness, and beauty. Generally, the steps for installing luxury vinyl flooring and vinyl flooring are not much different. This guide Will Teach you how to install vinyl flooring.
Let’s review the steps involved and learn about expert and professional tips for maintaining vinyl flooring.
You can install Luxury vinyl flooring in two ways: glue-down, which uses special adhesives to bond the vinyl pieces to the subfloor, or floating (click-lock), which is installed over a subfloor, underlayment, or existing floor. While the glue-down method offers more protection for high-traffic floors, the floating method is more common in residential spaces as it is DIY friendly. It’s also adhesive-free and easy to replace. The best installation method depends on your subfloor condition, room usage, and personal preference.
After choosing the best installation method, remove everything from the floor. This includes furniture, appliances, and even door frame modifications if needed. All of these can be reinstalled after the flooring has been installed. Remove any baseboards before repair work is done to make the installation more manageable.
Ensure your subfloor is clean (either by sweeping or mopping) before installing vinyl planks. Fix any surface irregularities. If the subfloor has cracks or bumps, use a levelling or patching compound to create an even surface. The subfloor must be smooth, clean, and dry. That will help ensure that the vinyl floor is perfectly level. You can sand or plane down any high spots for timber floors. For installation over concrete subfloors, ensure the humidity level is within an acceptable range (usually below 75%). Also, make sure all the planks are tight and free of creaks for wooden subfloors.
Remember, you shouldn’t install flooring on top of the carpet, existing vinyl flooring with cushion backs, or even hardwood flooring. Doing so can ruin your existing floors, subfloor, and the vinyl planks you’re installing.
It is essential to check each board for defects and then contact the supplier if found! If you install defective boards without checking beforehand, you may have to spend extra money replacing them.
Measure your square footage and decide on the layout of your planks. Accurately measure the length and width of the room in metres, then multiply the two to get the area (e.g., 4m x 3m = 12m²). Check how much coverage each pack of vinyl provides — for example, if one pack covers 2.5m², divide your total by this number. Always add 10% extra for trimming and mistakes. It’s better to lay your planks perpendicular to the window in regular rooms and have the hallway planks parallel to the wall.
Listing and preparing the tools you need before you begin will help you focus better during the installation. Using the right tools will ultimately save you time, effort, and money.
Appropriate safety gear—gloves, safety glasses, a dust mask, and knee pads—is essential for a safe and comfortable DIY experience.
Essential tools and materials include:
Having everything at arm’s reach before you begin will help you maintain momentum and achieve a more professional result.
Now it’s time to install your vinyl flooring. While installation processes may vary by brand, most luxury vinyl plank (LVT) installations follow the same general principles— using a floating method or a glue-down technique.
Start from the left-hand corner of the room with the tongue side of the plank facing the wall. Place spacers to maintain a consistent expansion gap—typically 10–15mm—between the flooring and the wall. A straight and accurate first row is critical—it guides the rest of the flooring. Once the first row is laid, double-check for gaps and alignment, and make any minor adjustments as needed.
For glue-down installations, spread adhesive with a notched trowel in small sections and press each plank firmly into place. Use a roller to eliminate any air pockets and ensure complete contact with the subfloor.
To connect the second plank, insert its tongue into the groove of the first plank at a slight angle and press down until it clicks. Continue across the row this way. Make sure to stagger the plank joints—cut the first plank of every other row so that the end joints don’t line up. This improves both the strength and visual appeal of the floor. Keep the groove side facing you throughout the process. If you notice uneven height or misalignment, disassemble and re-lay the row—continuing on an uneven base can permanently damage the joints.
For glue-down vinyl, continue spreading adhesive section by section, laying each plank carefully before the glue sets. Always follow the curing time recommended by the manufacturer.
Avoid pre-drilling holes for sections with obstacles like pipes, radiators, or other obstacles. First, lay the plank in a position to see exactly where the cut is needed. Once you know where the pipe aligns, drill a hole about 12mm (½ inches) larger than the pipe diameter. This gives enough space for expansion and easier fitting.
In the last row, it is essential to note that to maintain the floor’s integrity, the final board in each row should not be less than 12 inches so that the boards are securely locked and do not shift over time.
Once the installation is complete, roll the floor with a heavy roller to apply even pressure. Although this is important with the adhesive method, it can also be helpful with a floating floor, reducing the risk of edge lifting.
Finally, remove the spacers and reinstall the skirting boards.
Read More: How to install laminate flooring
Following a few practical tips will help you have a more professional installation:
Vinyl flooring is easy to maintain. A weekly cleaning is often sufficient, but consider vacuuming every other day or every few days. This will help keep your vinyl flooring in excellent condition. Here are some common mistakes to avoid for better maintenance
Ready to transform your space? Use this guide and visit our website to shop for the best vinyl flooring.
For any flooring queries, drop us an email at info@flooringsurgeons.co.uk, or visit our showrooms located in Birmingham & Wolverhampton!
Halesowen
214A Dudley Road. Halesowen, Birmingham, B63 3NJ
0121 274 8575
Monday – Friday: 9 AM – 6 PM | Weekends: 10 AM – 4 PM
Wolverhampton
317 Penn Rd, Wolverhampton, West Midlands, WV4 5QF
01902 836666
Monday – Friday: 9 AM – 6 PM | Sat: 10 AM – 4 PM | Sun: Closed
info@flooringsurgeons.co.uk
fitting@flooringsurgeons.co.uk
customerservices@flooringsurgeons.co.uk
Looking to give your home the natural, timeless look of solid wood flooring at a more affordable price without high maintenance? Engineered wood flooring may be the right choice. With a real hardwood top layer and a smart multi-layer core made of plywood or HDF, it offers the elegance of real wood with enhanced durability and moisture resistance. In this guide, we’ll walk you through the four most common methods for installing engineered wood flooring, step by step. Whether you’re planning a DIY project or hiring a professional, knowing how to install engineered wood flooring can give you a better overview of the process and help you achieve flawless results
Depending on the subfloor, there are four methods for installing engineered wood flooring: glue down, nail or staple down, and float. Whichever method you choose, you will need to prepare the subfloor by cleaning, levelling, checking, and adjusting the door gap.
Nailing down engineered wood flooring is a traditional method that ensures a secure and long-lasting installation. This technique is ideal for wooden subfloors and is commonly used by professional installers because it requires specific tools and skills.
Installing with staples is very similar to nailing, except that stapling requires inserting the staples into the tongue at a 45-degree angle. Additionally, stapling is generally a quicker method than nailing.
The glue-down method is ideal for wood and concrete subfloors, especially for high-traffic areas, as it ensures a permanent bond between the boards and the subfloor. It is also recommended as the more suitable option for installing engineered wood flooring in areas with underfloor heating.
The floating floor installation method is a common choice for engineered wood floors. In this DIY-friendly method, the planks are interlocked together using either a tongue-and-groove system (T&G) or a click-lock system. The T&G method requires glue to lock the planks in place, while the Click-Lock method allows the planks to lock into place without adhesive. When the floor expands, the entire floor moves together as one unit.
By now, we’ve explored the different methods of installing engineered wood flooring and how each works. Regardless of your chosen method, there are a few essential preparation steps to take before you begin. Below are the key steps to prepare your space for installation.
To ensure that your flooring installation is done correctly, you should first take the following steps:
Essential for All Installation Types
Additional for Floating Installation
Wood glue
Additional for Glue-Down Installation
Additional for Nail/Staple Installation
you can buy engineered accessories from Flooring surgeon:
Underlay for engineered flooring
To determine how many engineered wood planks you’ll need, measure the length and width of your room in metres. Multiply these two numbers to calculate the total square metres. Then, check how many square metres are covered by one pack of flooring—this is usually stated on the packaging. Divide your room’s total area by the pack coverage to determine how many packs you need. Adding an extra 5–10% is wise to allow for cuts, mistakes, and future repairs.
Read more: How to Measure a Room for Flooring (Step-by-Step Guide)
Before installing, make sure the subfloor is ready for the new flooring. Remove any skirting boards, old nails or staples and loose dirt.
In UK homes, a relative humidity of 45-65% is considered normal. Timber-based and concrete subfloors should have a moisture content (MC%) of no more than 12% when tested with a prong meter or below 3% when measured with a concrete moisture metre. As different metres may use varying scales, it is essential to read the manufacturer’s instructions. In addition, the subfloor should be level and not vary more than 3mm in a one-metre span to create a smooth and stable surface suitable for flooring installation.
Carefully open a package and check that the planks’ colour, quality, and finish are as expected. Ensure each flooring is intact before installation, as the supplier may not replace the wood flooring afterwards.
Once you have approved the flooring’s condition, you must acclimate it to the environment. Engineered wood expands and contracts with temperature changes, which can cause the floor to buckle if not properly adapted. Keep the planks flat in the room for 48 to 72 hours. During this time, ensure the room’s temperature and humidity align with the manufacturer’s guidelines.
Stack the planks in piles of no more than three, leaving at least 4cm of space between each stack to allow for proper air circulation. If your flooring will be laid over underfloor heating, place the planks directly on the floor and spread them out individually. Begin by running the heating at a low, comfortable temperature, then increase it by 2°C every two days until you reach your desired maximum. After that, the temperature is gradually lowered by 2°C every two days until it reaches the minimum comfortable level.
We will explain each method step by step below:
Start by placing spacers around the room, leaving a ¼” gap between the wall and the planks. This gap allows the wood to expand.
Begin by positioning the plank with the tongue facing towards the centre of the room. Pre-drill holes near the wall, about 1 inch away and 3-4 inches apart. Pre-drilling helps prevent the wood from cracking and makes it easier to insert the nails. Secure the planks by nailing through the tongue with finishing nails.
After nailing the planks, use a nail punch to drive the nails below the surface for a cleaner finish.
Once the nails are countersunk, fill the holes with wood putty that matches the colour of the planks to ensure a seamless look.
When you reach the end of a row, measure the gap, mark it, and cut the plank to fit. Use leftover pieces (at least 6 inches long) to stagger the seams in the next row.
For each new row, position the planks at an angle above the tongue and nail them into place using a nail gun. Be sure to countersink the nails to avoid disrupting the tongue-and-groove connection between the planks.
When installing around obstacles, carefully measure and mark the area. Using a jigsaw, cut the boards exactly around the barriers, leaving a small expansion gap. For pipes, drill a hole in the board, fit it around the pipe, and firmly nail it. Ensure that the nails are driven vertically through the tongue of the board for a clean look. Always leave a small expansion gap around the edges for natural wood movement.
Continue installing planks until the entire floor is covered. Once finished, remove the spacers and add transition strips and moulding if desired.
Read more: How to install solid wood
The Glue-Down Method requires special adhesives. EWG recommends that is better the adhesive used be free of volatile organic compounds(VOCs). For best results, check the manufacturer’s instructions for the recommended type of adhesive. To start the installation, Place spacers between the wall and the planks to leave a ¼” expansion gap around the room’s perimeter.
Starting at the corner of the room, spread the adhesive onto the subfloor for two to three rows, then use a trowel to create a thin, even layer.
Align the tongue and groove edges, working from left to right. Press the boards firmly into place.
Keep applying glue in small sections and tap each plank into place, ensuring the seams are tight.
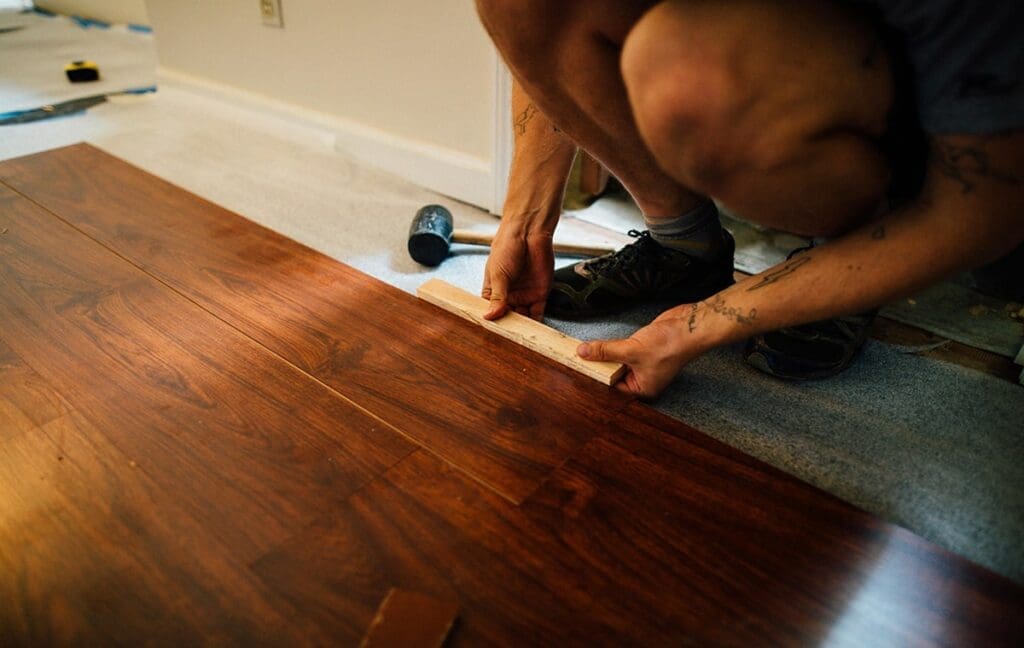
After measuring, cutting the boards, and leaving a small expansion gap for the obstructions, apply adhesive to the subfloor in small sections and press the boards into place. Use a tapping block and rubber mallet to attach each board firmly.
Remove spacers and install transition strips and moulding along the edges.
The stapling method is similar to nailing but uses staples instead of nails. Here’s how it works:
Like nailing, place spacers and position your first row of planks. Measure and pre-drill if needed.
Use a staple gun to drive staples at a 45-degree angle above the plank’s tongue. Place staples every 3-4 inches along the plank.
After stapling, countersink any staples and fill holes with matching wood putty, just like with nailing.
Staple each subsequent row, ensuring staples are placed correctly and at the right angle.
Stapling installation around obstacles is similar to the nailing method. The key difference is that when stapling the planks, the staples should be placed at a 45-degree angle above the tongue, ensuring they don’t interfere with the tongue-and-groove system. Unlike nails, staples should be placed more precisely, especially near the edges, to avoid damaging the wood.
Remove spacers and add transition strips and moulding.
Place spacers between the wall and the boards to create a ¼-inch expansion gap around the perimeter of the room
Position the first plank in the corner of the room, working from left to right. For Tongue and Groove, apply the recommended glue in the groove of the plank, then insert the tongue of the next plank into the groove, ensuring they lock together tightly.
For Click-Lock, insert the tongue of the plank into the groove of the next plank at an angle, then push it down until it clicks into place.
Connect the planks similarly for each subsequent row. If you’re using the T&G method, apply glue to the groove of the next plank before inserting it. For Click-Lock, the planks will click together.
When you reach the end of a row and there’s not enough space for a full plank, measure the gap between the last plank and the wall, mark the plank, and cut it to size. (Refer to the earlier section on cutting planks for cutting instructions.)
Start the next row using the leftover pieces from the previous row (at least six inches long). This helps to stagger the joints, giving the floor a more natural and aesthetically pleasing look.
Continue to interlock the planks, using a tapping block and rubber mallet to ensure a tight fit between the seams.
After measuring and cutting, glue it into the groove and insert it into the tongue. For a click lock, angle the board and click it around the obstruction. Leave a gap for expansion to ensure a clean and secure fit.
As you move toward completing the floor, remove the spacers around the edges. Once all the rows are installed, add your transition strips and moulding as needed.
To perform a professional and stable installation, be sure to consider these tips:
Although we have tried to provide a detailed guide to the various engineered wood flooring installations in this article, there are many installation tips. At the Flooring Surgeons, we help you with stylish and professional flooring. So contact us now for advice and purchase the best-engineered flooring in various colours and thicknesses.
For any flooring queries, drop us an email at info@flooringsurgeons.co.uk – or Visit our showrooms located in Birmingham & Wolverhampton!
Halesowen
214A Dudley Road. Halesowen, Birmingham, B63 3NJ
0121 274 8575
Monday – Friday: 9 AM – 6 PM | Weekends: 10 AM – 4 PM
Wolverhampton
317 Penn Rd, Wolverhampton, West Midlands, WV4 5QF
01902 836666
Monday – Friday: 9 AM – 6 PM | Sat: 10 AM – 4 PM | Sun: Closed
info@flooringsurgeons.co.uk
fitting@flooringsurgeons.co.uk
customerservices@flooringsurgeons.co.uk
Engineered wood flooring is a superb investment and one of the most durable and stylish choices for any home. With proper care, your floor can remain beautiful for 35-40 years – or even longer. Whether your flooring is new or has started showing signs of wear, this guide will walk you through essential tips to maintain and clean engineered wood floors properly, ensuring they remain in excellent condition.
Good maintenance begins with prevention, which is one of the simplest yet most effective ways to keep your engineered wood flooring in top condition. While these floors are designed for durability, they can still suffer from scratches, moisture damage, and general wear over time. A few simple habits can go a long way in preserving their beauty and extending their lifespan.
Using the right cleaning techniques will help preserve the pristine condition of your Engineered Wood Flooring while preventing unnecessary damage.
Use a microfibre brush or soft broom daily to help prevent the build-up of dirt. In high-traffic areas or spaces prone to crumbs and dirt, extra attention should be given. When using a vacuum, ensure the rotary brush is disengaged to avoid damaging the wood surface.
Once a week, use a dry or slightly damp microfibre mop to remove any stubborn marks or sticky residues that sweeping alone may not eliminate. The key is to avoid excess moisture, as engineered wood is more resistant to moisture than solid wood but is not entirely waterproof. When using a cleaning solution, choose a pH-neutral option to prevent damage to the protective finish. Always wring out the mop thoroughly before use to avoid soaking the wood.
For DIY cleaning, vinegar and water are widely used as an eco-friendly method. However, with modern floor finishes, this solution is often too acidic and may damage the surface. Instead, a pH-neutral cleaner designed for engineered wood is the best choice for long-term maintenance.
Polishing or oiling should be done twice a year. Using a manufacturer-recommended wax, oil, or polish helps maintain the floor’s authentic look while enhancing its natural shine.
Over time, minor scratches may appear on engineered wood floors. For oiled floors, small scratches can often be treated by applying a suitable wood oil without the need for sanding. Ensuring the oil matches the floor’s finish is crucial to avoid a patchy appearance.
For lacquered floors, clean the affected area with a dry cloth before applying a matching lacquer. Variations in the sheen may cause slight inconsistencies in the finish.
Deeper scratches may require light sanding followed by refinishing with a compatible varnish or wax. However, remember that engineered wood can only be sanded and refinished a limited number of times(typically two or three)before the veneer becomes too thin.
Before attempting a major repair, consult a professional to determine the best approach based on your floor’s type and finish. Certain issues require professional attention, such as deep stains, mould, or water damage. If the floor has persistent stains that do not lift with standard cleaning or if there is a lingering odour, a specialist may be needed. Our Professionals at flooring surgeons use specialised equipment for deep cleaning, buffing, or refinishing, which can restore the floor without causing further harm.
For any flooring queries, drop us an email at info@flooringsurgeons.co.uk – or Visit our showrooms located in Birmingham & Wolverhampton!
Halesowen
214A Dudley Road. Halesowen, Birmingham, B63 3NJ
0121 274 8575
Monday – Friday: 9 AM – 6 PM | Weekends: 10 AM – 4 PM
Wolverhampton
317 Penn Rd, Wolverhampton, West Midlands, WV4 5QF
01902 836666
Monday – Friday: 9 AM – 6 PM | Sat: 10 AM – 4 PM | Sun: Closed
info@flooringsurgeons.co.uk
fitting@flooringsurgeons.co.uk
customerservices@flooringsurgeons.co.uk
Laminate flooring is a popular choice for many homeowners. It combines affordability, durability, and style, offering the elegant look of hardwood at a fraction of the price. Whether you’re looking to upgrade your living room or refresh a high-traffic area, laminate’s scratch and stain-resistant qualities make it a perfect flooring selection. Plus, it’s incredibly easy to install. At Flooring Surgeons, we have prepared this guide to teach you everything about installing laminate flooring. Let’s get started!
While laminate can be installed in most areas of your home, spaces with high moisture levels, such as kitchens and bathrooms, require extra caution. That’s because laminate is water resistant, but it isn’t waterproof. In such areas, large spillages and prolonged exposure to moisture cause lasting damage to your flooring. Laminate is ideal for high-traffic areas like hallways and living rooms due to its durability. Its HDF (high-density fiberboard) core and scratch-resistant wear layer provide extra strength. Now, before you begin, you should carry out some preparation
It’s important to inspect each plank for defects. If you find any, address them before starting the installation. For commercial use, it’s better to consider laminate rated either AC4 or AC5, which make it perfect for rooms such as office spaces (AC4) or large department stores and public buildings (AC5).
The good installation of laminate flooring depends on the site condition. These essential checks should always be made:
Concrete or timber sub-floors should have a moisture content of no more than 12% MC on a surface prong test or below 3% on a concrete moisture meter. Different meters have different scales, so it’s important to check their documentation.
Like solid wood flooring, your laminate flooring should remain in its packaging and lie flat in the room where it will be installed. Most manufacturers recommend a 48-hour acclimatization period.
Do not stack the boxes on top of each other, and ensure the room’s temperature remains normal with the heating on.
It’s okay if you notice any bowing in the planks after acclimatisation. It’s simply the laminate HDF core adjusting to the heat and humidity of the room.
Read more: How to install solid wood flooring
Selecting the appropriate underlay is crucial for the longevity and performance of your floor. foam underlay, ensuring that the edges butt together without overlapping. Secure the seams with underlay tape. For flats or upper floors, consider using sound-reducing underlay for better noise insulation.
If you’re installing over concrete, use a DPM (damp-proof membrane) to prevent moisture damage. For wooden subfloors, choose underlays specifically designed for wood, offering added benefits such as insulation and surface leveling. Proper underlay selection ensures both protection from moisture and improved overall flooring performance.

Before you start your laminate flooring project, it’s essential to know the exact area of the room in square metres. To calculate how many packs you’ll need, divide the room’s area by the pack size. Then round up to the nearest whole number to determine the total number of packs required.
For example, if your room measures 24.75m² and the pack size is 2.39m², divide 24.75 by 2.39, which equals 10.3. Round it up to 11 packs, which is the final number of laminate flooring packs you’ll need. To account for waste, we recommend adding 10% to the total area.
Read more: How to measure a room for flooring?
What You’ll Need to
Before you begin, ensure your subfloor is clean, dry, and level. The most co
on method of laminate installation is the floating method, which uses an underlay. This method allows laminate to be fitted over almost any type of subfloor without the need for adhesive—simply click the planks together.
Begin the layout along the longest wall of the room. It’s important to plan a staggered pattern for the planks to ensure that the joints in adjacent rows do not align. Always leave an 8-12mm expansion gap around the walls and fixed objects using spacers to allow for the natural expansion and contraction of the laminate. As you lay the planks, make sure the cut planks are at least 30cm long for added stability in the overall flooring structure.
Trim the tongue edge of the planks to create a clean edge against the wall. Lay the planks with the cut edge facing the wall, ensuring that the 8-12mm expansion gap is maintained. You can use the offcut from this plank to start the second row, ensuring that the rows are properly staggered. This method prevents the joints from aligning between rows, maintaining a strong and stable floor.
Continue to hold each plank at a 45-degree angle and insert the tongue of the plank into the groove of the previous row. Lower the plank into place, allowing it to click securely. If necessary, use a pull bar and tapping block to ensure the joints are tightly secured. Remember to maintain a staggered pattern throughout the installation process, making sure that the joints are offset by at least 30cm from row to row. This staggering of the joints adds structural integrity to the floor. Additionally, leave a 10mm gap around obstacles such as walls, radiator pipes, door frames, and skirting boards to allow for natural expansion.
Installing laminate flooring around common obstacles such as corners, door frames, radiator pipes, and stairs requires extra attention. In these areas, precise measurements and careful cutting of planks are essential for a professional finish.
Place the laminate plank against the corner. Where the plank meets the wall, add the expansion gap and mark it with a pencil. This gives you the width of the cut needed.
To measure the length, place the plank along the adjoining wall and mark the required length. Use a set square to mark a clear cutting line. Secure the plank to a workbench using clamps and cut along the marked lines with a jigsaw. Fit the board into place and ensure a tight fit.
For fit laminate wood floor around the door frame, it’s better to undercut the door frame so the laminate slides underneath for a seamless look.
Take a piece of laminate and your underlay, then put these up against your door. Make a pencil line across the width of your door at the line your flooring and underlay reach.
Then, take a hand saw to cut into your door frame at the pencil line. Using a chisel and hammer, tap the wood below the wood line to create a gap your flooring will fit under.
Remove the excess wood, ensuring there’s enough space for the laminate and underlay to fit underneath.Test the fit by sliding a piece of laminate under the frame. If necessary, trim more for a perfect fit.
Lay a laminate plank next to the radiator pipe with its short side against the wall.
Use a pencil and ruler to draw a horizontal line along the plank, aligned with the center of the pipe.
Now, move the plank so that the short side is against the pipe. Draw a vertical line along the plank, again aligned with the pipe’s center. These two intersecting lines mark the center point of the pipe. Secure the plank to a workbench with clamps. Use a drill and spade bit or hole saw to create a hole at the marked center point. The hole should be slightly larger than the pipe to allow for expansion.
Draw two straight pencil lines from the hole to the nearest short edge of the plank.
Use a jigsaw to cut along these lines and remove the small wood section.
Fit the laminate around the pipe and reattach the removed section using wood glue, flexible caulk, or a matching putty to create a seamless finish.
To fit laminate around the bottom of staircases, you can use the same technique as fitting around door frames.
Trim the bottom of the staircase to allow the laminate to slide underneath. Measure and cut the plank, leaving a small expansion gap, then slide it into place and use a tapping block for a snug, professional finish.
Once you reach the final row, measure the planks to fit the remaining space and cut them lengthwise using a jigsaw or saw. Use a pull bar to gently lock the planks into place, ensuring a snug and secure fit. It may be helpful to tap gently with a hammer to ensure the planks align correctly with the previous row.
After the planks are all laid and secured, remove the spacers and cover the gaps with skirting boards or beading, making sure the skirting is not fixed directly to the floor. This is to allow for expansion without restricting the movement of the laminate. Finally, clean the floor using a dry mop or vacuum to remove any dust or debris from the installation process.
Need expert help with your flooring project?
If you’re looking for expert help with your flooring project, look no further than Flooring Surgeons. At Flooring Surgeons, we provide top-notch floor installation services and a wide range of premium flooring solutions to suit every style and budget.
For any flooring queries, drop us an email at info@flooringsurgeons.co.uk – or visit our showrooms located in Birmingham & Wolverhampton!
Halesowen
214A Dudley Road. Halesowen, Birmingham, B63 3NJ
0121 274 8575
Monday – Friday: 9 AM – 6 PM | Weekends: 10 AM – 4 PM
Wolverhampton
317 Penn Rd, Wolverhampton, West Midlands, WV4 5QF
01902 836666
Monday – Friday: 9 AM – 6 PM | Sat: 10 AM – 4 PM | Sun: Closed
info@flooringsurgeons.co.uk
fitting@flooringsurgeons.co.uk
customerservices@flooringsurgeons.co.uk
Most people choose Laminate flooring for its affordability, durability and ease of installation. However, one crucial factor often gets overlooked; thickness. Laminate flooring thickness can impact everything from durability and comfort to noise reduction and even how your flooring feels underfoot. So, how do you choose the right one? This guide will clearly and concisely explain everything you need to know. Let’s dive in!
Laminate flooring thicknesses are usually measured in millimetres (mm). There are a variety of laminate thicknesses. Some of the most common ones are:
6mm-7mm Laminate flooring is the thinnest option and is usually the most budget-friendly. It is also attractive for DIY enthusiasts! This laminate thickness is suitable for areas with less foot traffic. However, it may not provide as much durability or sound insulation in comparison with thicker options. Additionally, it also tends to be more susceptible to dents, wear and damage over time. It offers less insulation and sound-deadening properties. This thickness is ideal for guest rooms, home offices or storage rooms.
The 8mm laminate flooring is a little thicker, but offers a balance of good sound insulation, durability and affordability. This thickness suits areas with moderate foot traffic, like general household spaces.
A 10mm Laminate flooring thickness provides better durability, insulation and sound-absorbing properties. It’s also a more resilient option for medium-to high-traffic areas, like dining rooms, kitchens and hallways. Naturally, these enhanced properties make 10mm laminate a more expensive option.
12mm laminate flooring offers the highest durability, insulation and sound-deadening properties. It is one of the thickest and most expensive options you can choose from, but closely mimics the feel of hardwood flooring.
A 12mm laminate thickness is the best choice for high-traffic areas, rooms with extreme temperature fluctuations and commercial and industrial-grade scenarios.
In our store we offer 8mm, 10mm and 12mm laminates.
| Thickness | Key Features | Best Suited For |
| 6mm – 7mm | – Budget-friendly, ideal for DIY projects – Thinner, less durable and lower sound insulation – More susceptible to dents and wear | Guest rooms, home offices, storage rooms (low-traffic areas) |
| 8mm | – Good balance of durability andaffordability – Good sound insulation – Suitable for moderate foot traffic | Living rooms, bedrooms, general household areas |
| 10mm | – Increased durability and insulation – Better sound absorption – More resilient for medium to high-traffic areas | Dining rooms, kitchens, hallways |
| 12mm | – Thickest, most durable and best sound insulation – Closely mimics hardwood feel – Suitable for high-traffic and commercial use | High-traffic areas, kitchens, dining rooms, commercial spaces |
Some essential factors like foot traffic, subfloor conditions and household requirements affect the performance of laminate flooring.
The sub-floor condition is a big factor in choosing the right laminate flooring thickness.
Thicker laminate flooring is usually best for unlevel subfloors Enhancing, balancing and lowering the chance of gaps or cracks. A thinner laminate requires a smooth, well-prepped subfloor to avoid warping or an uneven finish.
The right thickness of the underlay is also an essential decision. You should select the correct underlay thickness depending on the laminate thickness and the subfloor condition. A thicker laminate might not need an underlay with a greater thickness, potentially saving you money and installation time.
If sound insulation matters to you, choosing a thicker laminate flooring will help you achieve softer footfall, lower echo, and a more natural sound.
Thicker Laminate Flooring offers enhanced comfort as it creates more stability, cushioning and sound insulation. This makes it ideal for those who plan on using it within high traffic areas.
Laminate flooring comprises four distinct layers: the backing layer, the core layer, the decorative layer and the top wear layer. The wear layer, the topmost layer of laminate flooring, protects the floor from damage. Therefore, thickness is a key factor in determining how well the floor will withstand heavy use and how long it will last.

When choosing the best laminate thickness for your home, define your needs and priorities. Here are four tips you should consider
As you can see, correctly choosing the thickness of laminate flooring plays a key role in creating the right atmosphere in your home. Deciding on a flooring thickness can be affected by subfloor evenness, noise reduction, cost, and durability. Understanding the variety of thicknesses and the features of each option can help you choose more effectively. Here at Flooring Surgeons, our wide range of laminate flooring will cater to all your needs
Check out our range today, or contact our experts to help decide on the best choice for your home and preferences.
If you have any flooring queries, email us at info@flooringsurgeons.co.uk or visit our showrooms in Birmingham and Wolverhampton!
Halesowen
214A Dudley Road. Halesowen, Birmingham, B63 3NJ
0121 274 8575
Monday – Friday: 9 AM – 6 PM | Weekends: 10 AM – 4 PM
Wolverhampton
317 Penn Rd, Wolverhampton, West Midlands, WV4 5QF
01902 836 666
Monday – Friday: 9 AM – 6 PM | Sat: 10 AM – 4 PM | Sun: Closed
info@flooringsurgeons.co.uk
Patterned flooring is like well-tailored tweed suits. You might say a simple suit can still be chic and classy, but the tweed one has more authenticity, elegance, and real character. Just like a high-end outfit, patterned flooring doesn’t just look good; it is durable, transforms a room’s vibe and even elevates the value of your property! There are various patterns that can be applied to different types of flooring, such as solid wood, vinyl, or laminate. Considering some factors can help you choose the right pattern flooring that is best for your home.
Just like a professional stylist who can help choose the best style for you, considering some factors for patterned flooring can narrow down your options and help you select an excellent pattern for your space.
Even the best tweed suits won’t look perfect if they don’t fit your body! It’s the same with a wood flooring pattern.To choose the right pattern, you need to consider the room size and layout of the space.
Complex patterns work perfectly in large areas, but it’s better to go simple in small spaces. More subtle patterns can also make a small space larger and more welcoming.
It’s important to consider the flooring material as this can heavily impact its durability. For low traffic areas, laminate flooring and vinyl flooring will suffice just fine. However, for high-traffic areas where more stability is needed, you may want to consider using solid wood or engineered wood flooring.
Just like you wouldn’t wear a flashy suit to a business meeting, the patterned wood flooring should match the décor vibe!
Flooring is a fundamental element in interior design. You should ensure that selective patterns harmonise well with the walls and furniture and make a Cohesive design with other elements. If your walls have a neutral, muted colour, choosing a pattern with bold colours can bring a lot of energy to the space. If you already have busy décor, keep the patterned flooring simple to make it balanced.
Colour consideration and natural or artificial light can affect the appearance of patterned flooring. If your home has little access to natural light, a simple pattern with soft colours can make the room larger and brighter. Using busy patterns in low light space makes your room tight and boring. Make sure the colour of your wood flooring matches with the décor palette to keep it harmonious.
At first glance, you may think the pattern chosen won’t affect the cleaning and maintenance of the flooring. However, patterned flooring can affect the way you maintain it.
Flooring with simple, straight patterns is typically easy to clean. They have no angle or groove to hide and collect the dust. However, complex patterns may require more precision and time to be cleaned. You may need a vacuum cleaner with a special nozzle that can access groves and remove dust. Also, it is more likely to get exposed to scratches; it is recommended to use mild cleaning agents and a soft cloth to maintain the appearance and shine of the wood.
Finally, we reach the interesting part of choosing the right pattern for flooring, Where you can walk to the showroom and see patterns. Take a look at some of the most popular flooring patterns.
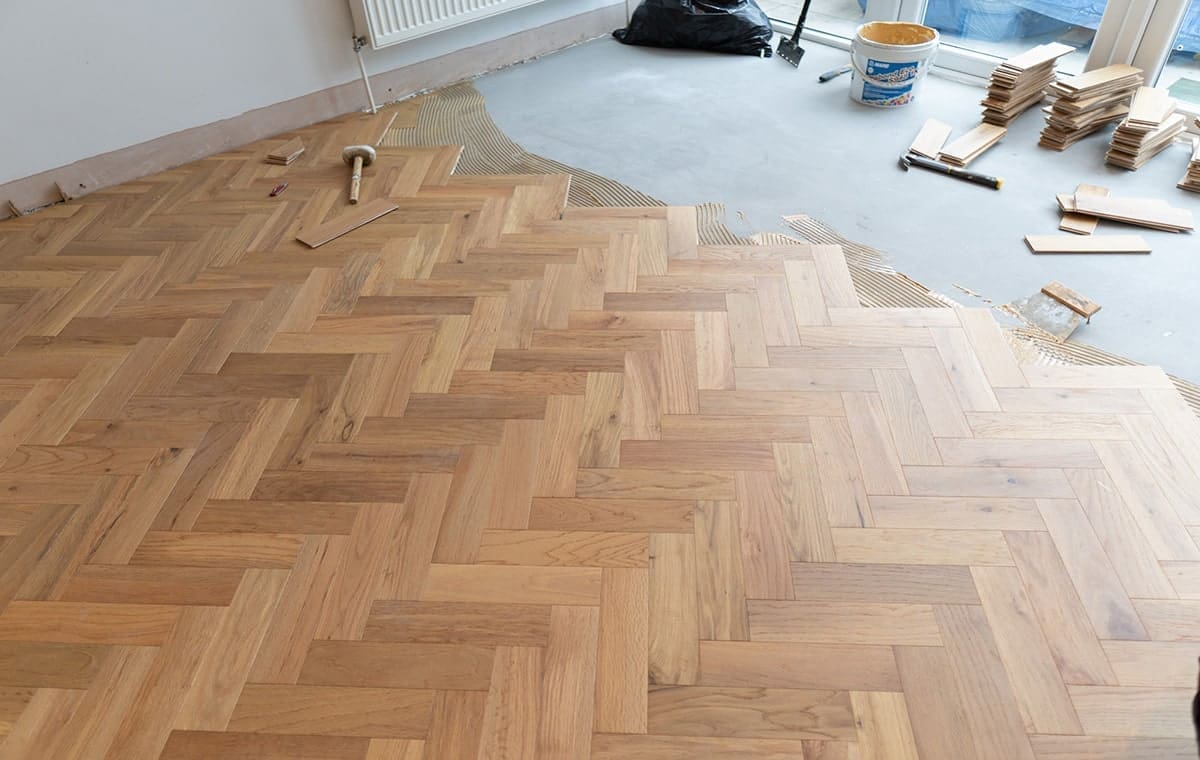
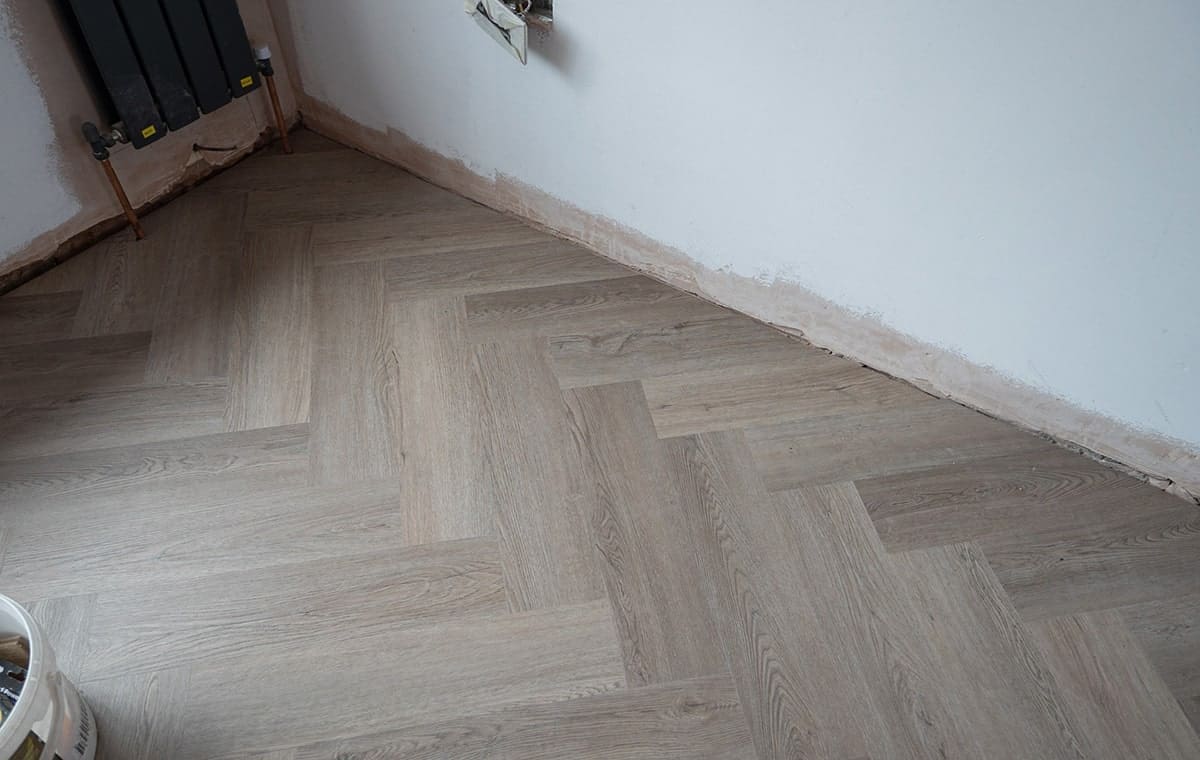
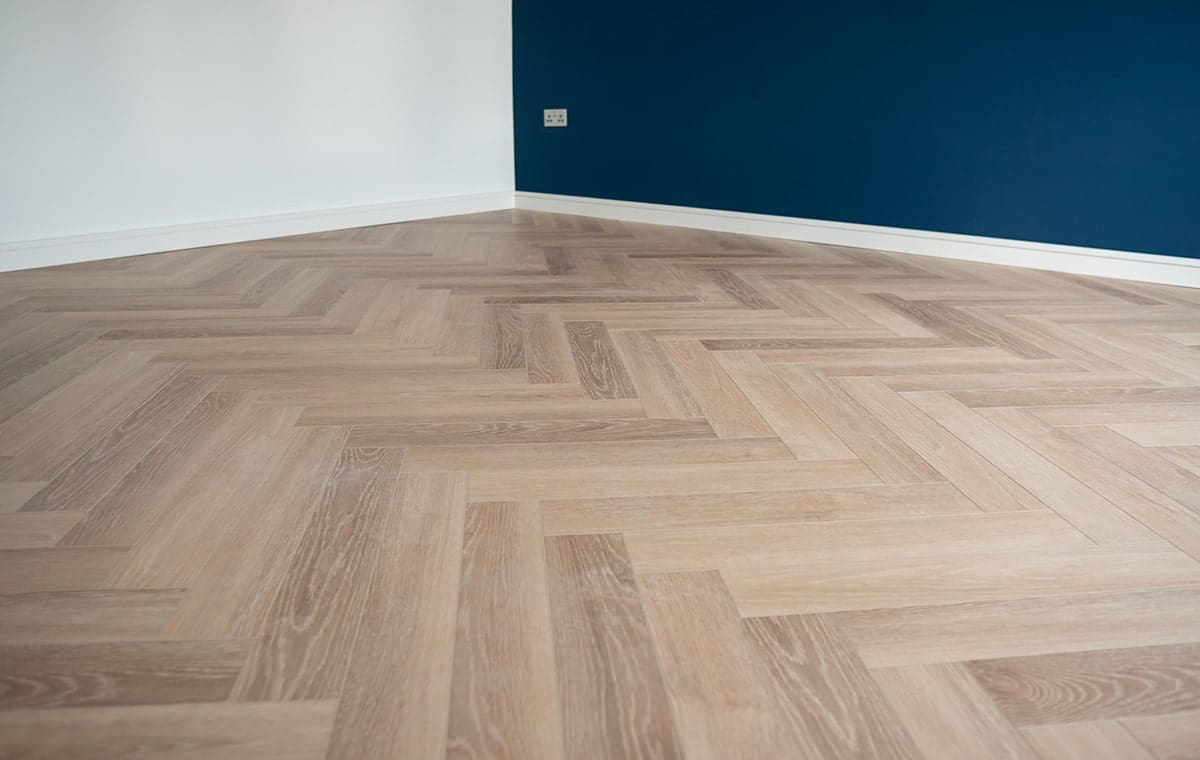
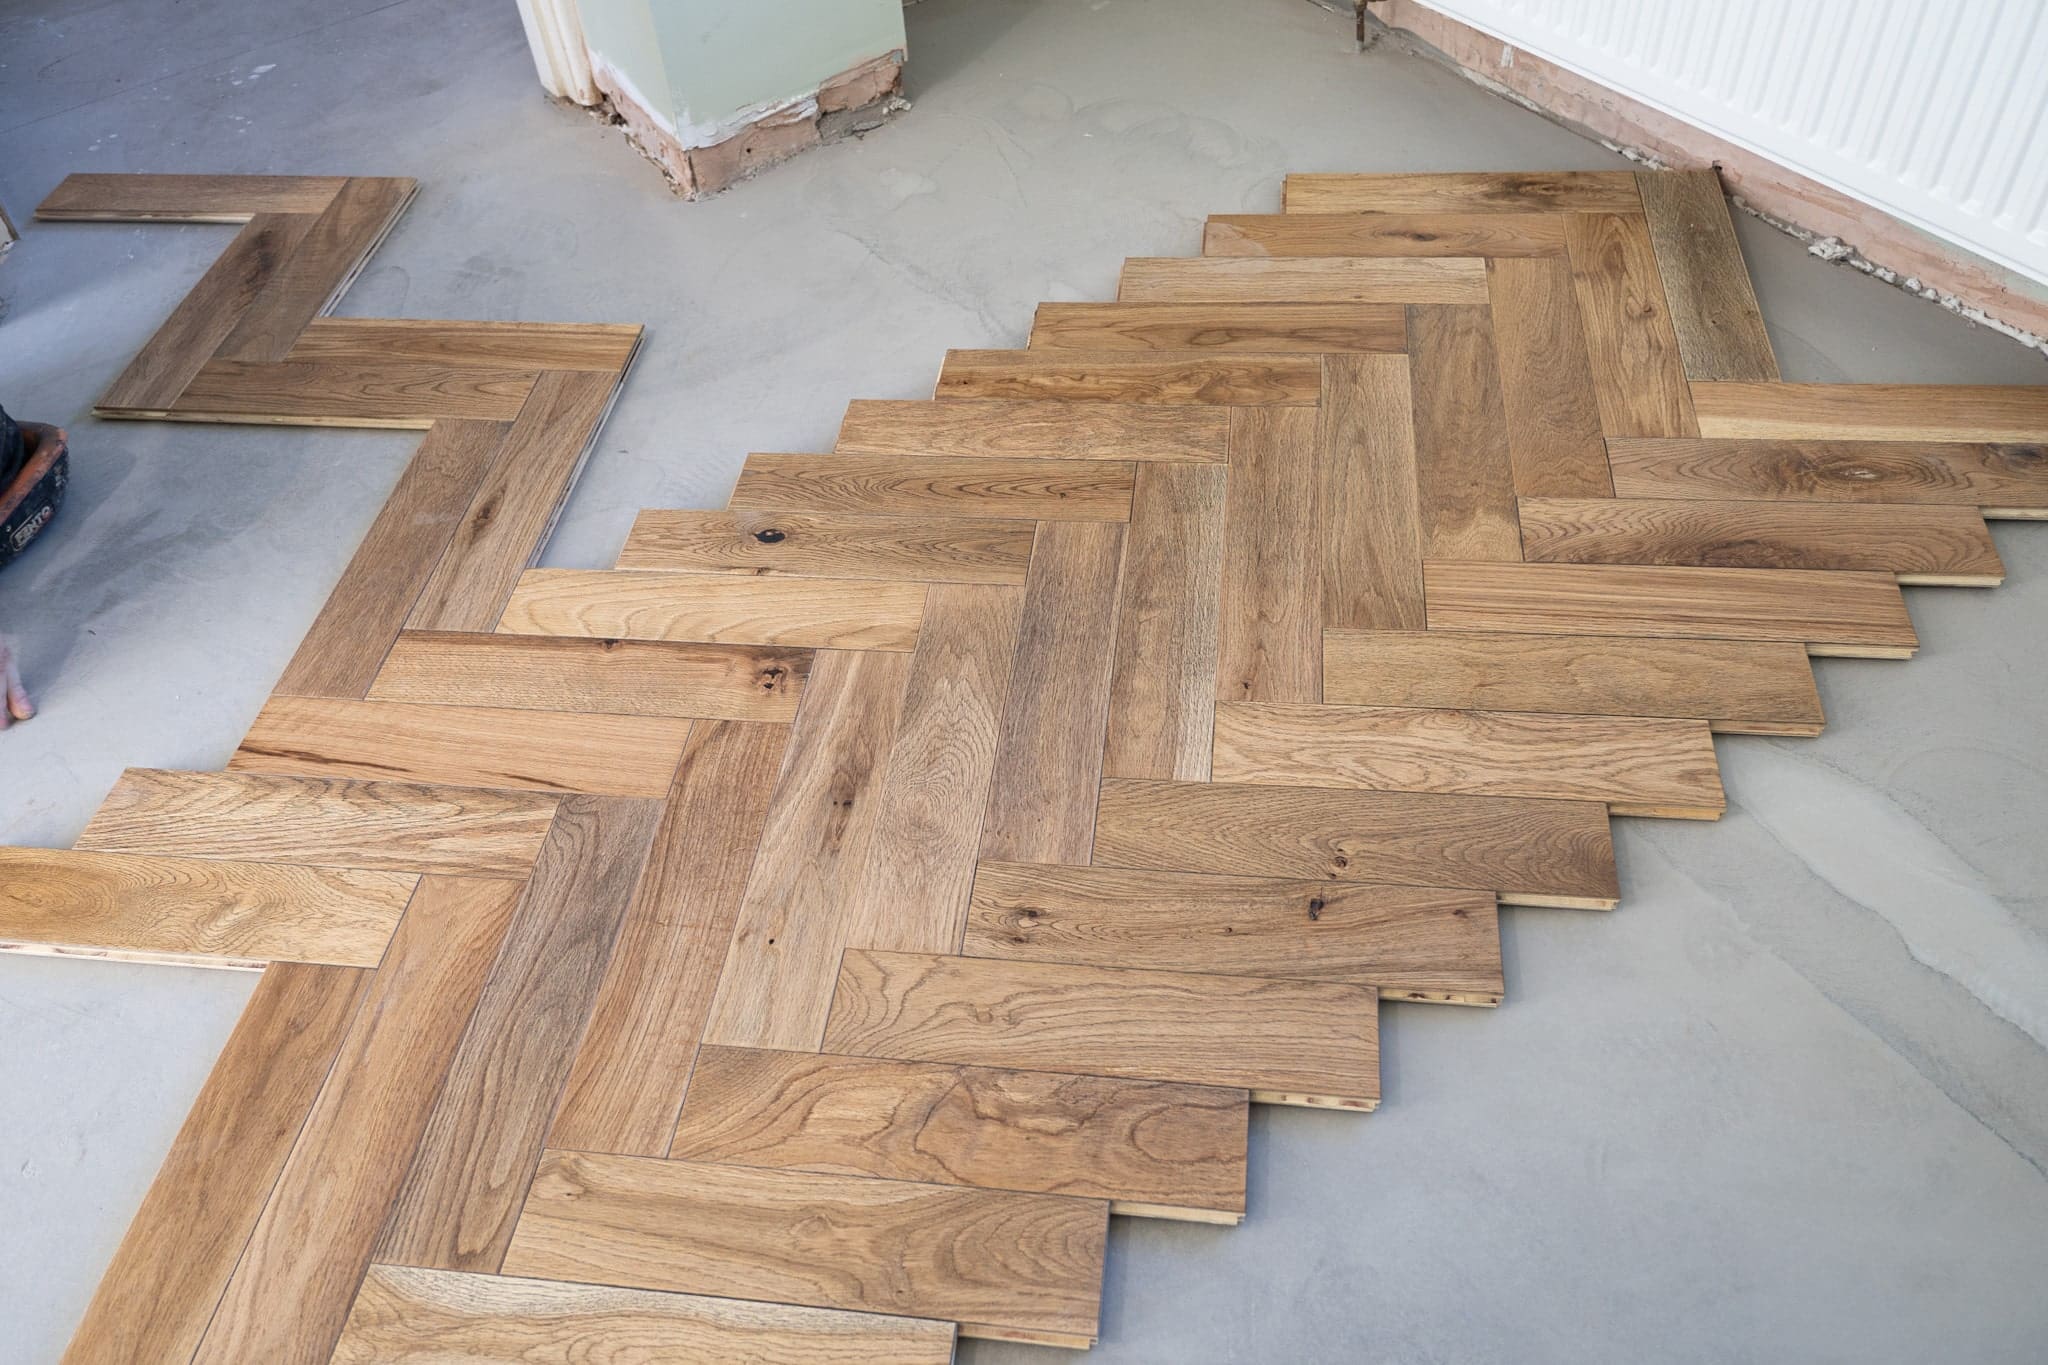
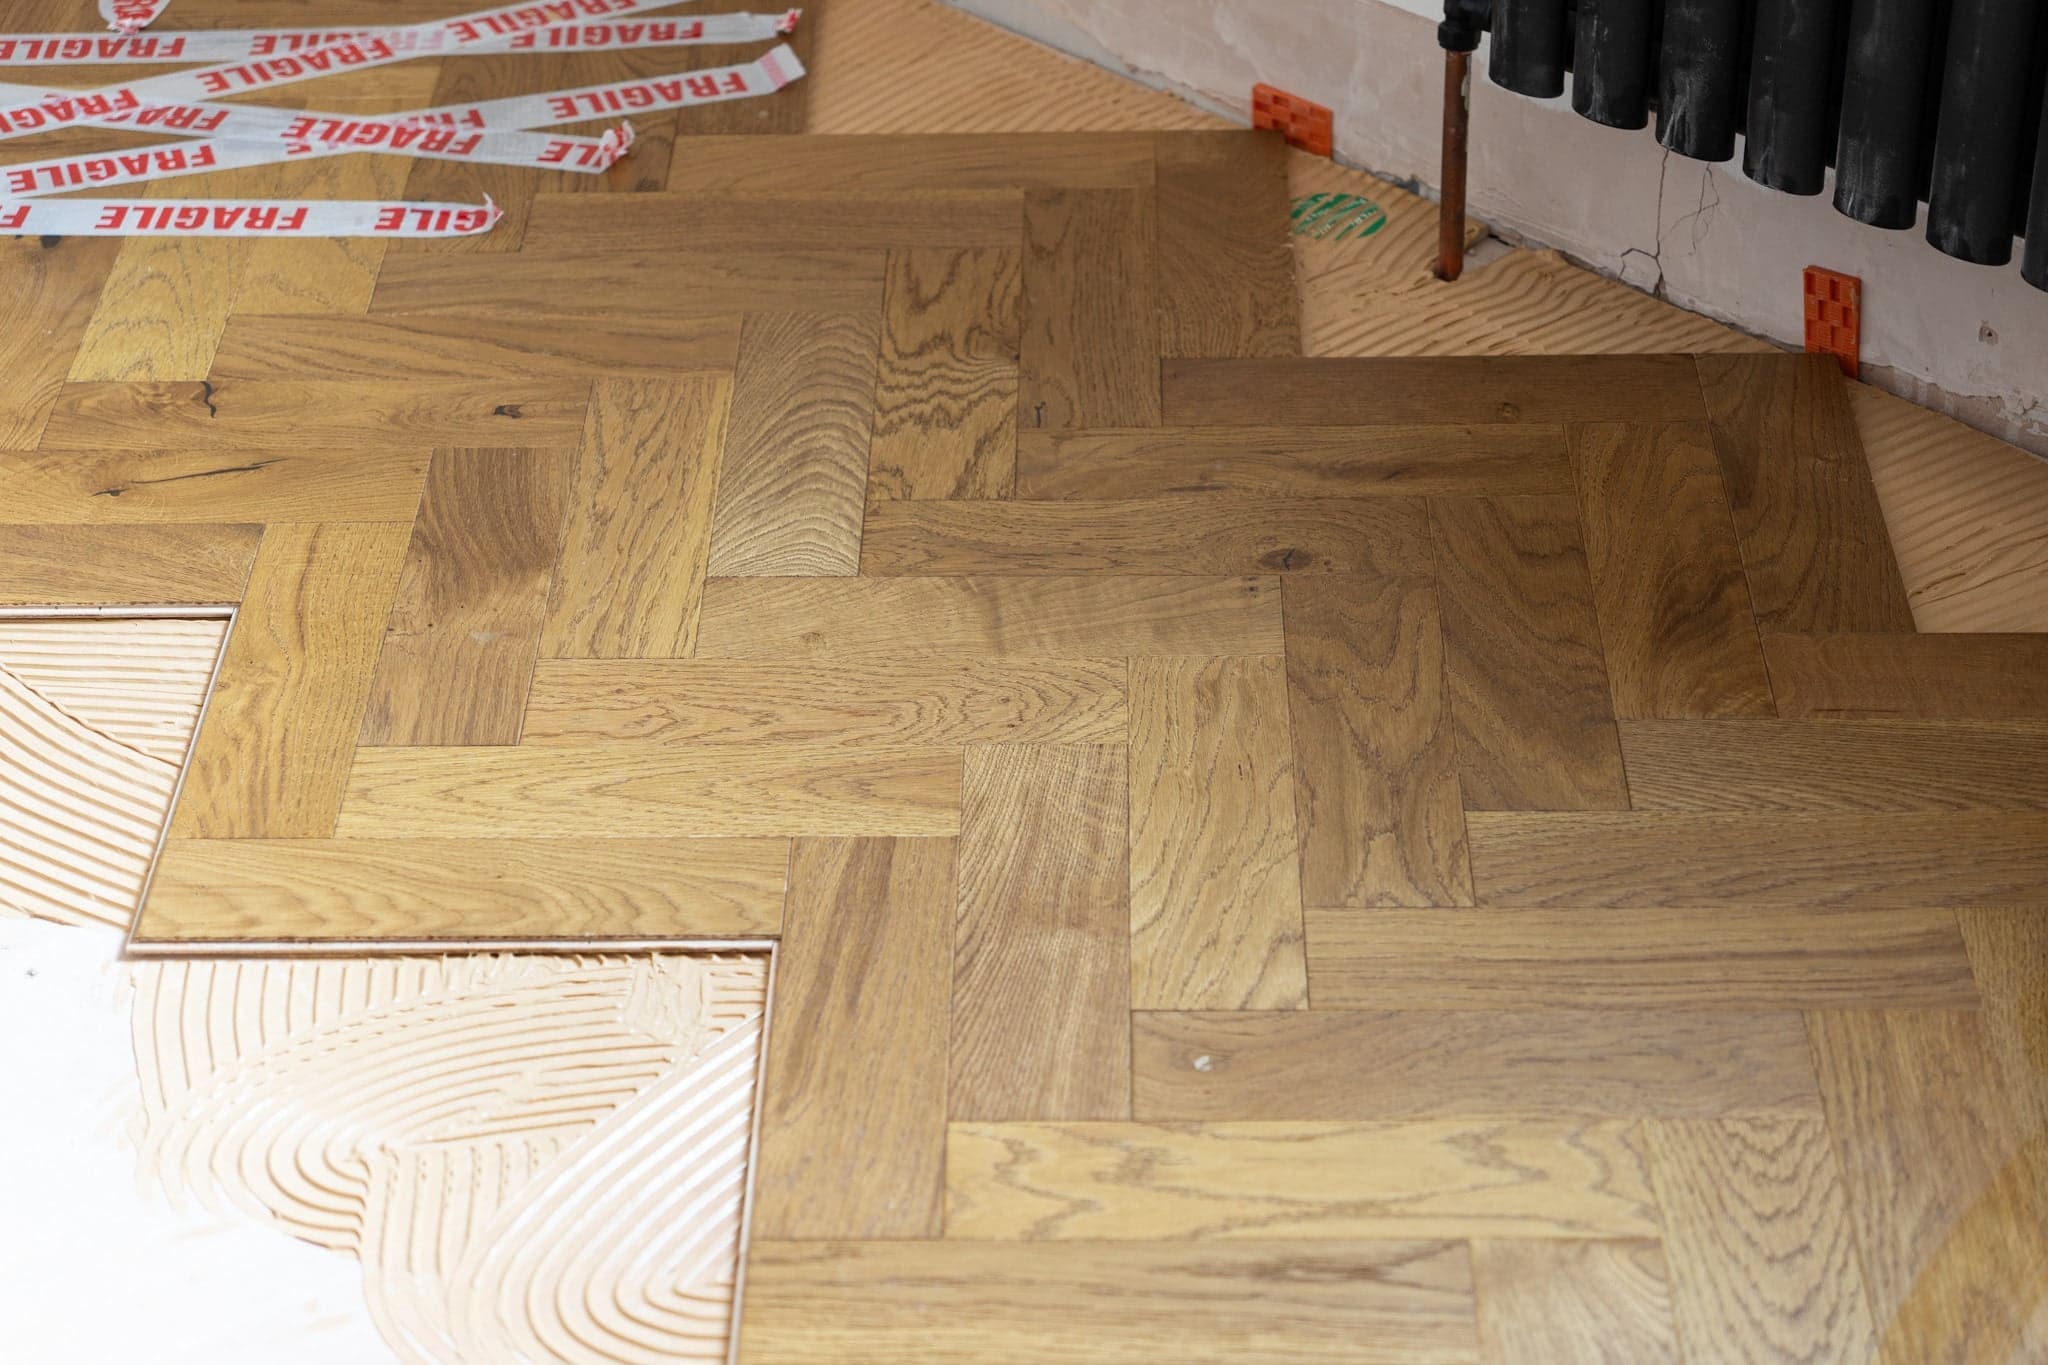
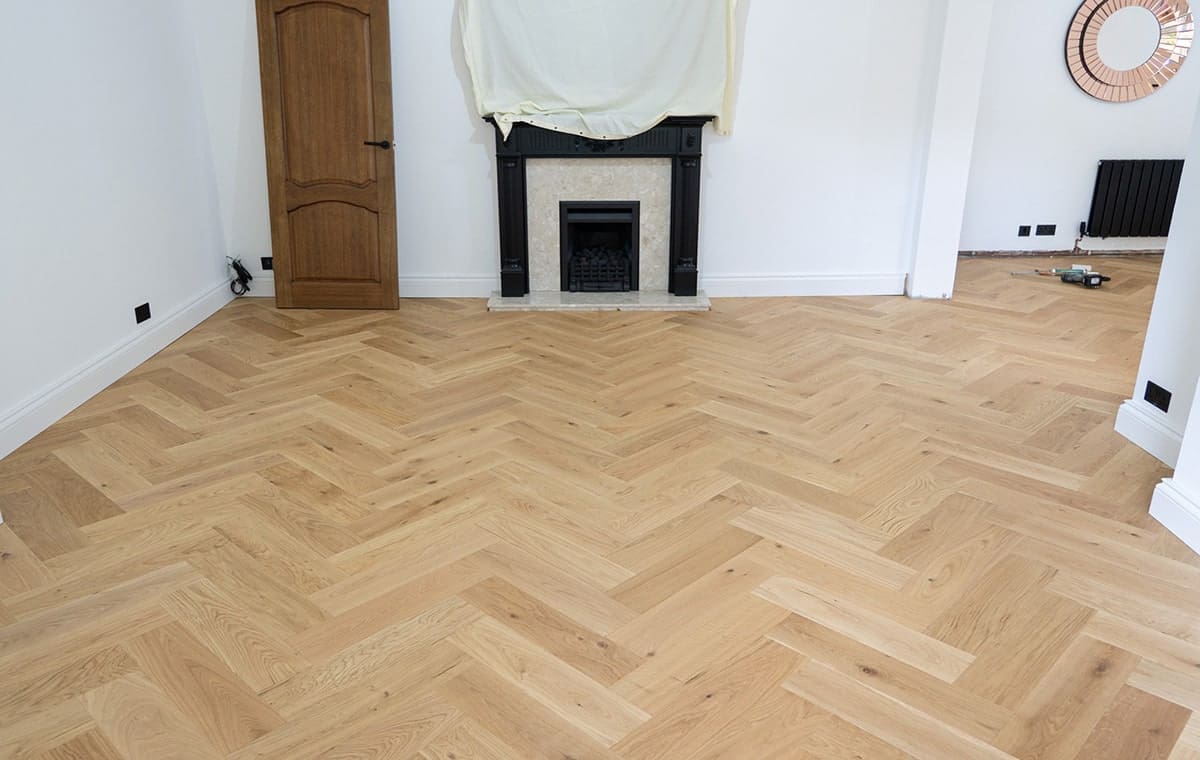
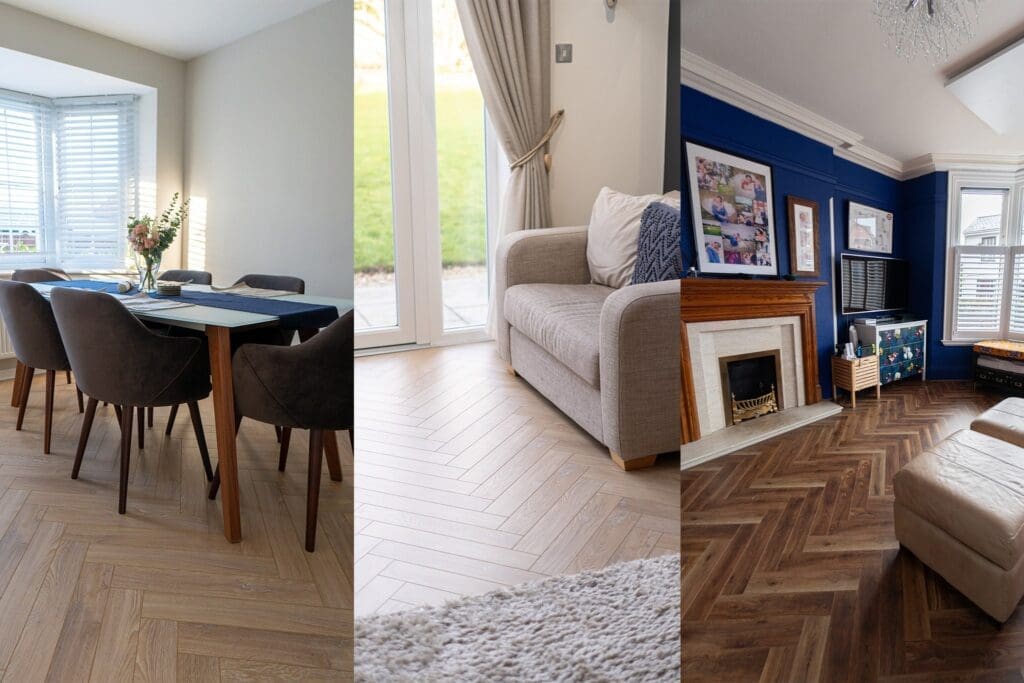
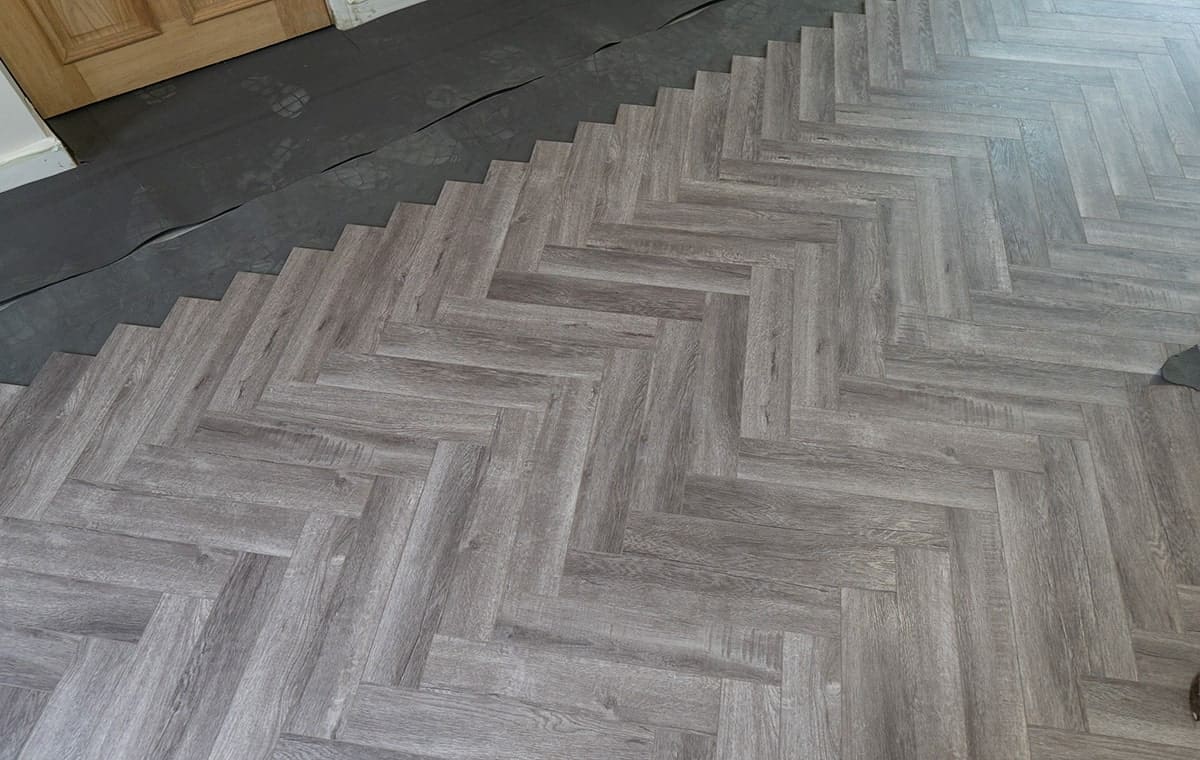
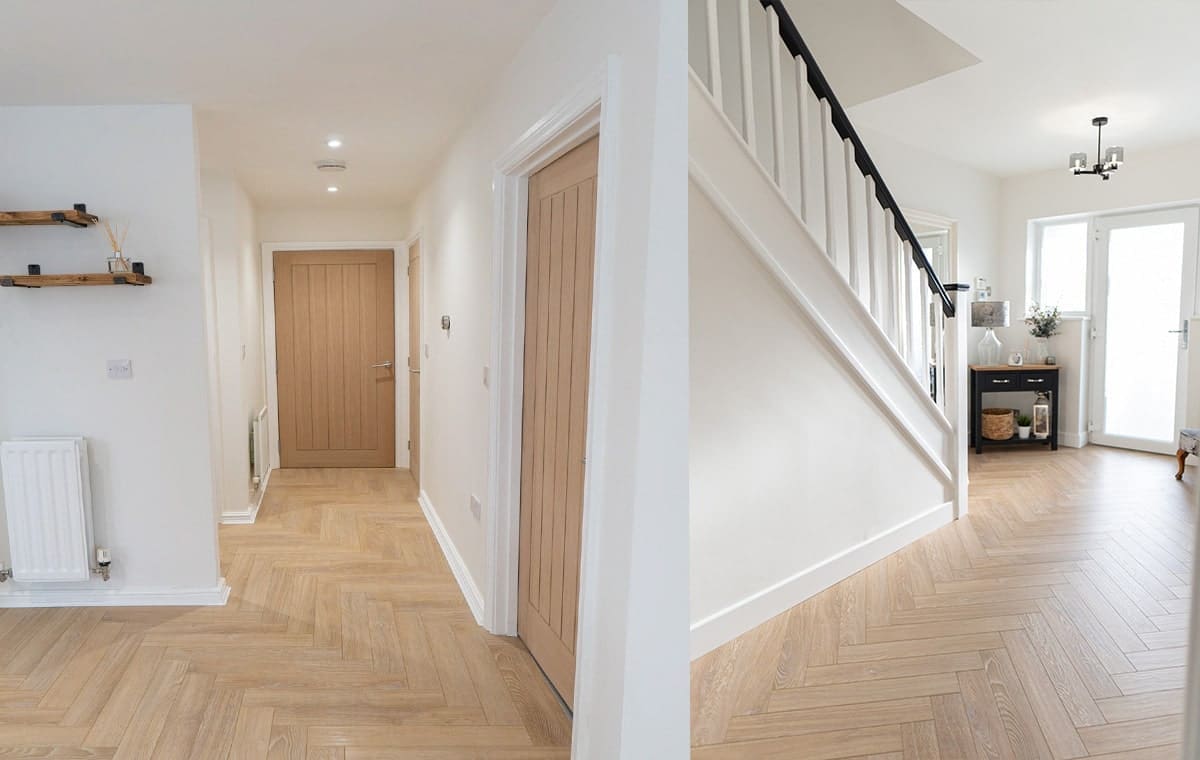
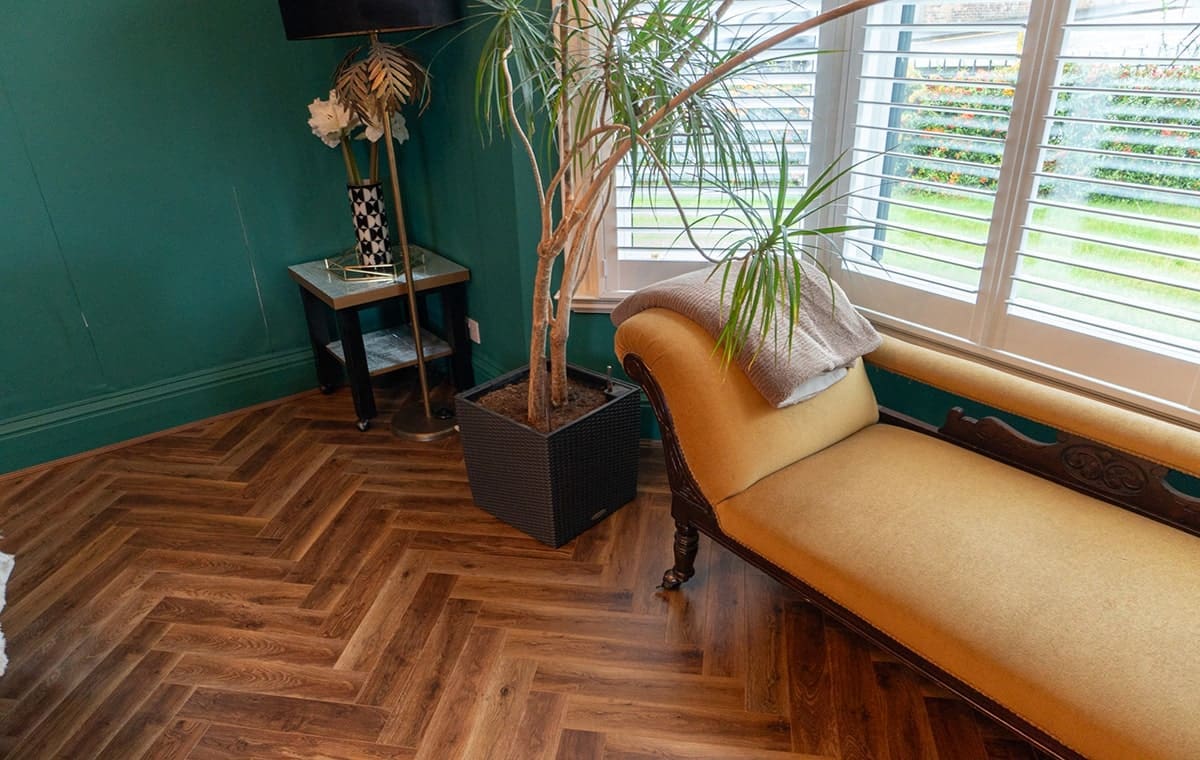
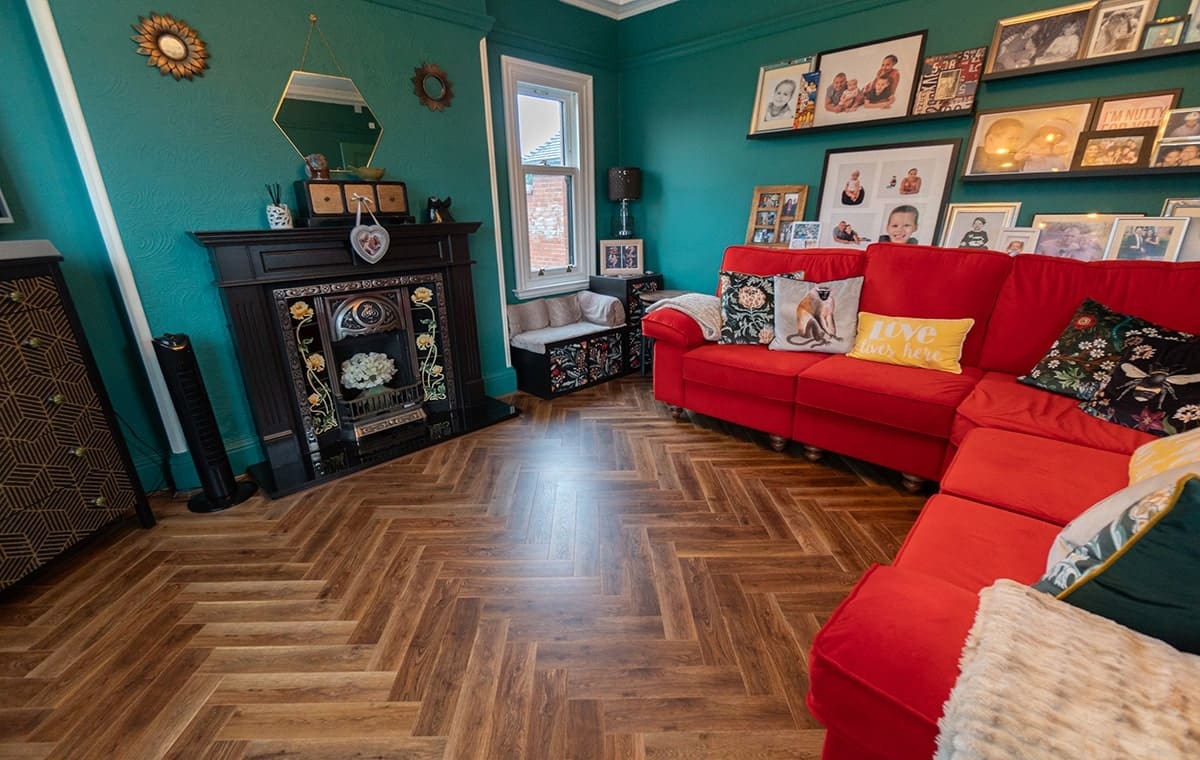
In a herringbone pattern, the wood planks are installed in a V shape. This pattern can be an excellent choice for smaller rooms.The lines move the eyes and give depth to the space, creating the illusion of a large room. However, herringbone flooring has a complex installation process and tends to cost more. It is better to leave it to professionals if you are not confident with DIY installation. If Herringbone is not installed correctly, it won’t create the same impact. The herringbone pattern is an ideal choice for the living room, office, café, long hallway and kitchen.
In a chevron pattern, the wood planks are arranged in the form of interconnected triangles. This modern pattern creates an artistic look and adds depth to the space. Chevron flooring is bolder than herringbone; if you want to use it in a small room, consider the plank dimensions and the colour. Darker colours may create a closed feel whereas lighter colours can help make the room seem larger and more open. Chevron goes very well in large entrances, dining rooms, long hallways or reception halls.
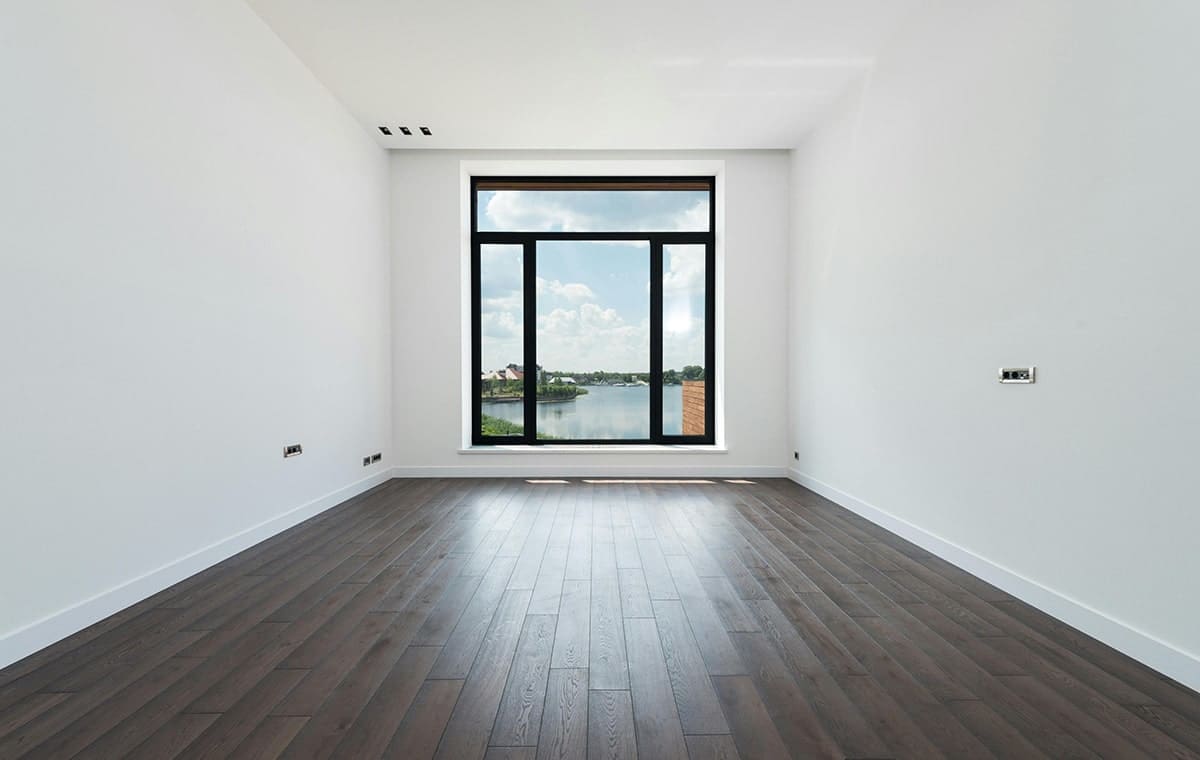
The straight lay pattern is the easiest pattern to clean and install. The straight and parallel arrangement of wood pieces makes the space appear larger and brighter. It is ideal for small rooms, living rooms and hallways. This pattern is also DIY friendly and more affordable.
Mixed-width is another easy yet elegant wood flooring pattern. You can reach this classic, timeless pattern just by laying different widths with random sequences of the wood plank. This pattern can pair perfectly with rustic decor and adds natural warmth and charm to space.
Geometric pattern flooring offers a striking, modern look that can elevate your interior design. Hexagonal and Square are the most common geometric patterns, which can add character, depth and a sense of openness to large spaces. It’s a good choice for part of your home that you want to make a focal point.
Testing and Finalising Your Choice
Just like wearing suits in front of the mirror, you should test your patterned flooring to make sure it looks good for your space. Unfortunately, pattern flooring testing is not as easy as trying on a suit!
Try to use physical samples in different parts of your home and notice how the light and size of the space can affect your selective pattern sample. You can also ask flooring experts to show you examples of previous projects that are similar to your space. This can help you to have a better view of how the pattern works.
Choosing the right pattern for flooring requires precision and time. You have to consider everything from room size to light, colour, your home decor, type of wood flooring and maintenance to make sure that your choice will remain useful and durable in the long term. Need more help finding the perfect patterned flooring? We’re here to help you pick the best choice, even at weekends!
If you have any flooring queries, email us at info@flooringsurgeons.co.uk or visit our showrooms in Birmingham and Wolverhampton!
Halesowen
214A Dudley Road. Halesowen, Birmingham, B63 3NJ
0121 274 8575
Monday – Friday: 9 AM – 6 PM | Weekends: 10 AM – 4 PM
Wolverhampton
317 Penn Rd, Wolverhampton, West Midlands, WV4 5QF
01902 836 666
Monday – Friday: 9 AM – 6 PM | Sat: 10 AM – 4 PM | Sun: Closed
info@flooringsurgeons.co.uk
The kids are racing around the house, running up and down the stairs at full speed and your energetic pet single-handedly increases the foot traffic in your home. Suddenly, you spill some water in the kitchen and then, here come the guests. Which flooring can withstand such heavy traffic, along with spills and scratches that can easily be removed?
Well, there’s only one flooring that can successfully win this challenge: Laminate! With its unmatched durability, beauty, and unique qualities,
Let’s take a closer look to see what factors make laminate the best flooring for high-traffic areas.
The areas in your home or business with more foot traffic/activity are known as high-traffic areas. These include stairs, kitchens, entryways, living rooms and hallways. Unlike solid wood, which is made from a single piece of real wood, Laminate is made from several layers;
The Bottom Layer, which is moisture resistant and is near the subfloor, The core layer, which is made of MDF or HDF,The Design Layer, that can offer you an appearance mimicking wood, stone or marble and wear layer on the top, to make laminate moisture and scratch resistance and acts as a protective shield against them.
The layers of Laminate are made to be resilient and withstand these pressures without fading. With good maintenance, the average laminate lifespan is between 15 to 25 years.
Of course, there are other flooring options for your high-traffic areas, but what features make the Laminate the best one compared to others?
Both flooring options have moisture resistance, are easy to install, and give the space a luxurious look. But Luxury Vinyl offers less durability and does not withstand heavy traffic as well as Laminate.
Compared to solid wood, Laminate is less durable against severe abrasions and doesn’t offer a sense of natural warmth.
But, it is more resistant to stains and moisture and is easy to install. More than that, Laminate is budget-friendly compared to solid wood.
This table helps you compare the 3 flooring options better.
| Features | Laminate | Luxury Vinyl | Solid Wood |
| Price | Affordable | Mid-range | Expensive |
| Durability | Moderate to High | High | Very High |
| Scratch Resistance | Good | Good | Good |
| Water Resistance | Good | Excellent | Poor |
| Installation | Easy (Click-lock system) | Easy (Glue-down, click-lock) | Requires professional installation |
| Maintenance | Low (requires occasional cleaning) | Low (requires occasional cleaning) | High (needs refinishing and regular maintenance) |
| Best for High Traffic Areas | Yes | Yes | Yes |
| Suitable for Moisture-Prone Areas | No | Yes | No |
When you want to choose the best laminate for high-traffic areas, several factors should be kept in mind.
The Abrasion Criteria (AC) indicates how much the flooring can resist abrasion, impact, stains, and burns. Regarding high-traffic areas, the AC rating should be at least AC3 for homes and AC4 or AC5 for commercial spaces to ensure durability and compatibility with heavier foot traffic. you can find AC4 laminate flooring in our showroom.
Laminate flooring comes in different thicknesses. The thicker the laminate, the better the sound insulation and the more durable it feels. It is also a great alternative to solid wood.
A thickness of 10mm and above is considered ideal for high-traffic areas.Thicker laminate stays firm on the ground, while thinner laminate may have a spring-like feel over time.
you can explore different laminate flooring thickness here:
8mm laminate flooring
10mm laminate flooring
12mm laminate flooring
Water and moisture resistance is one of the most important factors when choosing Laminate flooring. The wear layer should be moisture-resistant enough to protect the flooring when you enter your home with a wet umbrella or when kids run around with damp feet. A waterproof laminate flooring prevents water from penetrating the inner layers, reducing the risk of swelling or damage over time.
Here is the top AC5 Laminate flooring option you can consider for your high-traffic areas:
Malmo Herringbone laminate flooring, with AC5 core and 12mm thickness, offers a sturdy feel under your feet that matches both contemporary and classic interior styles. With its waxed joints, you can choose it for the kitchen or bathroom with peace of mind.

Craft 12mm Helsinki Herringbone AC5 Laminate offers you enough waterproof and abrasion-resistant capabilities to safely use it in high-traffic areas with a risk of moisture. With stylish and timeless herringbone patterns, you can enhance the aesthetic appeal of your place and ensure durability.

Available on back-order
Another luxury Scandinavian style for laminate flooring is Craft 12mm Bergen Herringbone AC5 Laminate. It is the best choice for high-traffic areas, and with an AC5 score, you can easily install it using a floating method without worrying about water resistance.

Available on back-order
The Cambridge 12mm Nude Oak AC5 Laminate Flooring is a combination of the aesthetic appeal of natural hardwood with water-resistance and toughness of Laminate. With DIY-friendly installation, it is an affordable, durable and stylish choice for modern interiors.
Proper installation and regular maintenance are key to protecting laminate flooring, ensuring its appearance and durability, helping it to last much longer.
Laminate flooring, with its tempting features, including affordability, beauty, and moisture resistance, has a high rank among the best flooring for high-traffic areas. From kids to pets and moisture, it is worry-proof and can withstand it all with proper maintenance. At Flooring Surgeons, we provide the best quality laminate flooring with various colours, textures, and patterns that can help you choose the perfect style to complement your space.
If you have any flooring queries, email us at info@flooringsurgeons.co.uk or visit our showrooms in Birmingham and Wolverhampton!
Halesowen
214A Dudley Road. Halesowen, Birmingham, B63 3NJ
0121 274 8575
Monday – Friday: 9 AM – 6 PM | Weekends: 10 AM – 4 PM
Wolverhampton
317 Penn Rd, Wolverhampton, West Midlands, WV4 5QF
01902 836 666
Monday – Friday: 9 AM – 6 PM | Sat: 10 AM – 4 PM | Sun: Closed
info@flooringsurgeons.co.uk
Everyone agrees that flooring colours have a major role in interior design and people’s moods. It is not just about selecting a colour. It can magically make your room larger and airier, or smaller and tighter. Replacing or choosing a new flooring colour may be more challenging than a furniture wall. It is also costly. So, making the right decision is important, but of course, it can be confusing. We are here to help you avoid being stuck and to help you choose the right colour for flooring.
Assume you are in a showroom. You choose a tone, come home, and realise it’s not working as expected. That’s because everything in colour is perception. Maybe you selected a colour without considering other aspects of the room or neglected light direction and its colour temperature. Maybe you did not know how much flooring colour can change the game on room size! So, there are some essential factors that you should consider when picking a flooring colour.
Choosing the right flooring colour must be considered in terms of the space size. If you are trying to use the best from your small living rooms, hallways or bedroom, several light flooring colours like white Laminate flooring , light oak or soft beige can help make small rooms feel more spacious. By contrast, if you need to add more warmth, depth, and a sense of calmness for your large room, darker hues like darke walnut engineered flooring, charcoal, or deep oak can serve as cosiness and more inviting.

Considering the size of the room is important for choosing the flooring colour. Considering the most prominent source of lighting in your space is essential, as this can heavily influence the undertones of your flooring.. To realise the undertone, you need to know what colour the flooring is leaning toward.
We have three basic light types; you should know your light temperature: warm, cool, or neutral.
Natural light tends to be a lot more easygoing with regards to choosing a pairing flooring colour, but don’t underestimate it; it is a bit more complex. Pay attention to how much outside light can affect your inside light. You should consider the outside environment, the green of the trees, the blue of the swimming pool or the yellow light from the sun. All of it can reflect on your flooring.
Considering the existing colours in your space or what you decide to do with your space, if you are starting from scratch, can help you choose the right colour for flooring. As flooring is a fundamental part of interior design, it should be harmonised with other elements like walls, carpets, furniture, and décor. Yellow-toned flooring brings fun and optimism to your space, while light beige and grey can bring calmness. Brown flooring pairs perfectly with rustic décor, and Black is a modern, luxurious flooring colour choice.
Your flooring colour has to match your lifestyle. In busy households with children and pets, thats more likely need to be cleaned at short intervals dark, medium colours are better for concealing scratches and stains. However, in the kitchen or hallways, light, soft flooring colours are better for creating a welcoming atmosphere.
Different colours create different moods. White enhances a minimalist or Scandinavian look, espresso tones are classic, rustic, or even modern, and grey offers a contemporary feeling. When choosing the colour of your flooring, consider the decoration style you want to create.

Staircases hold significant importance in both commercial and residential structures, making it crucial to prioritise their protection. A reliable approach to ensuring stair safety involves investing in top-notch stair nosing solutions.. Product Specification Product Code AN2 Compatibility (Use) Laminate, Engineered & Vinyl Length 2.7m

Natural colours are always trendy and popular. Warm shades like beige and camel are favoured for their inviting and cosy feel, adding richness, warmth and depth to any space. Of course, it’s not necessary to follow trends. Some colours are timeless, stylish, and never going to be outdated. For those instances, neutral flooring and natural tones will give you a timeless option. Espresso and walnut are common natural brown that work well with almost all colours and interior styles.
Even if you are certain about the colour you have chosen for your flooring, it’s crucial to test samples in different lighting conditions to see how the flooring colour changes throughout the day. It’s also recommended to consider future décor plans to ensure the colour complements your space over time.
Choosing the best colour for your home flooring can be challenging. However, by considering some factors like your preferences, home décor and light, you can choose the right colour for flooring with a lot more ease. At Flooring Surgeons, we offer a wide range of flooring colours that allow you to have many options that you can choose freely. We offer many shades to complement any décor style and home lighting.
Not sure what colour to choose for your flooring? Ask us to help even on weekends!
If you have any flooring queries, email us at info@flooringsurgeons.co.uk or visit our showrooms in Birmingham and Wolverhampton!
If you have any flooring queries, email us at info@flooringsurgeons.co.uk or visit our showrooms in Birmingham and Wolverhampton!
Halesowen
214A Dudley Road. Halesowen, Birmingham, B63 3NJ
0121 274 8575
Monday – Friday: 9 AM – 6 PM | Weekends: 10 AM – 4 PM
Wolverhampton
317 Penn Rd, Wolverhampton, West Midlands, WV4 5QF
01902 836 666
Monday – Friday: 9 AM – 6 PM | Sat: 10 AM – 4 PM | Sun: Closed
info@flooringsurgeons.co.uk
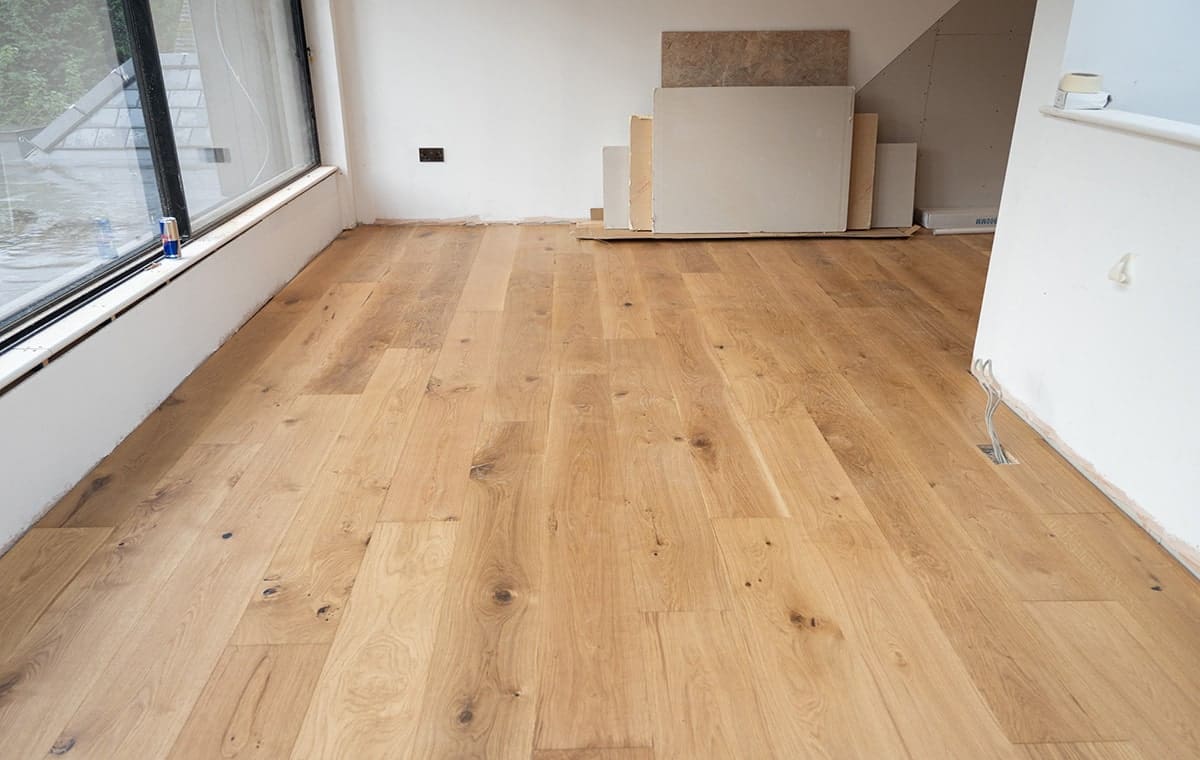
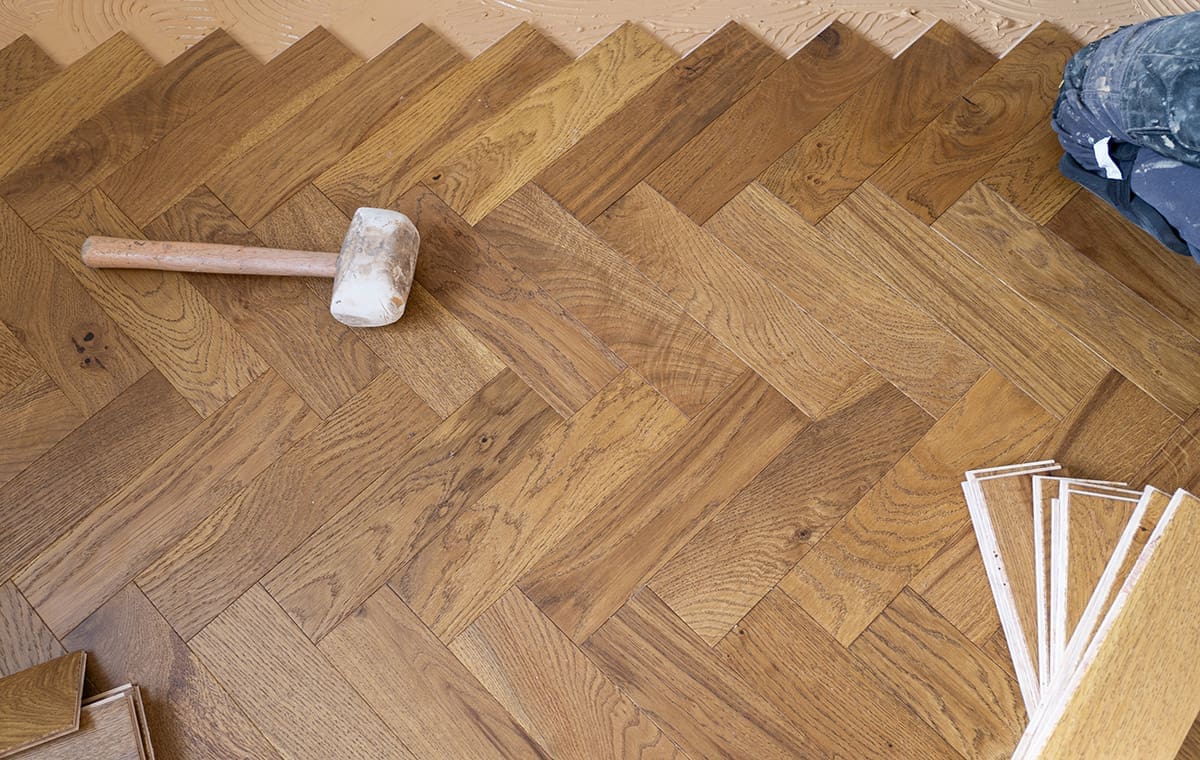
Solid wood is one of the most popular flooring choices. It brings depth, warmth, and a sense of connection to nature to interior décor, and it has been a favourite for generations. Whether you’re looking to enhance your living room or transform your hallway, solid wood flooring can elevate your interior décor. If this is your type, too, and you want to know more about how to install solid wood flooring, we prepared a full guide for you to learn everything from zero to a hundred.
Before solid wood installation, ensure that both the space and the solid wood floorboards are properly prepared
Measure the room size in square meters (length x width = m²) to determine how much flooring you need, then add 10-15% extra for cutting and wastage.
Ensure the room width is divided by the width of a panel, accounting for expansion gaps. If the last row is under 60mm, trim the first board along its length for a seamless finish.
read more: How to measure a room for flooring
After determining how much flooring is needed, start cleaning any debris or dust from the subfloor. Check any nails or screws and make sure they are not protruding and completely secured. and old adhesives must be removed.
Use a long, straight edge and spirit level to check the subfloor’s level, ensuring it doesn’t vary by more than 3mm over 1 metre. if you notice uneven spots, try to fix them by using a self-levelling compound or proper underlayment to ensure thay are smooth and solid wood can install properly.

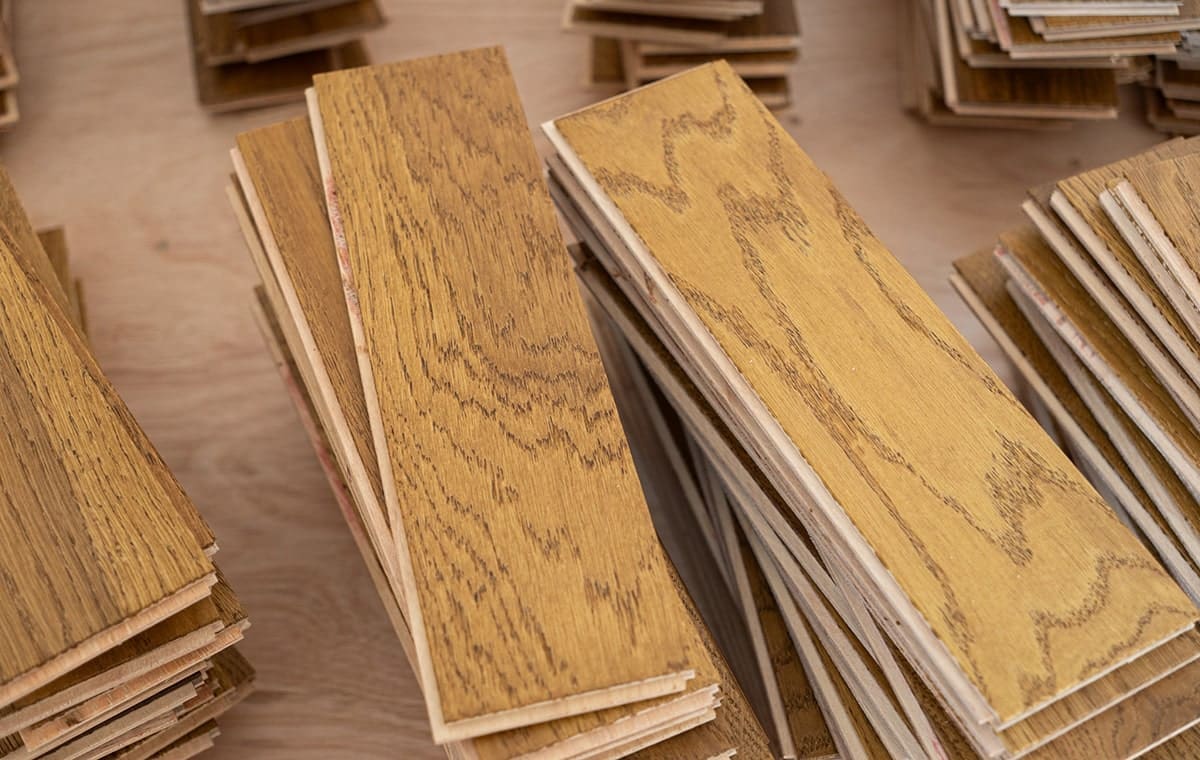
Upon receiving the flooring, it’s important to check a few pieces.
As natural wood can vary significantly between batches, it’s essential to inspect the grading, finish, and quality to ensure the product meets your expectations.
Now it’s time for the solid wood to get to know their new space! Therefore, you should leave unopened packs flat for at least 7 days. Stack them with spacers between the packs for airflow. Avoid leaning the packs against a wall or stacking them more than three high. Normal living conditions must be maintained; the room should have a humidity level between 45-65%. If the room is usually heated, keep the heating on as normal.
For solid wood flooring, it’s essential to leave an expansion gap around the perimeter of the room. Leave a 10-12mm expansion gap around the room’s perimeter, including walls, skirting boards, pipes, and doorframes. Limit the installation width to 5m and the length to 7m across the grain. In larger rooms, use expansion bars or spacers to manage wood expansion and maintain a professional finish.
Here’s a list of essentials and suggestions to ensure the job runs smoothly:
Essential Items for solid wood installations
Recommended Tools:
The important tip to know how to install solid wood flooring on concrete correctly is to make sure it’s completely dry before installation. As concrete is porous, check moisture levels using a professional meter—acceptable moisture levels should be below 3% on a moisture meter or 12% on a prong test. Some meters use different scales, so always check the documentation. Installing a damp-proof membrane is essential to protect wooden boards from moisture.
If the floorboards are clean, dry, and level, solid wood flooring can be laid directly on them. The best method for securing boards to timber subfloors is secret nailing at 90 degrees to the existing floorboards. If the floorboards are uneven, a 12mm plywood subfloor should be installed. Avoid laying solid wood flooring directly onto chipboard, as chipboard lacks strength and moisture resistance.

Choosing your installation method (Nail-Down, Glue-Down, Floating)
depends on the type of your subfloor
Nail-Down: This is Suitable for timber subfloors, where planks are secured using nails through the tongue of each board.
Glue-Down: This is best for concrete subfloors, using adhesive to firmly bond planks. This method is ideal for tongue-and-groove parquet flooring.
Floating: In this method, planks are not attached to the subfloor but interlock via a tongue-and-groove system, allowing flexibility and easy replacement.
Now it’s time to get started with laying solid wood flooring. Lay the planks parallel to the longest wall or the main light source for a seamless look. Measure and cut the planks carefully, ensuring clean edges. The final row may need trimming to fit properly.

Glue-Down Method: Start from one corner and spread adhesive along the subfloor. Position the first row with the tongue facing away from the wall, using 10-12mm spacers for an expansion gap. Ensure the row is perfectly straight, as this sets the direction for the entire floor. Apply adhesive 1 metre ahead of each row.
Nailing Method: Secure the first row with a nail gun. Then, use a powered flooring nailer or Tongue-Tite screws to fix each plank through the tongue, ensuring hidden nails. Continue staggering the joints for a natural look.
Floating Method: This method uses no nails or glue—just click planks together over underlay. Maintain a 10-12mm expansion gap and stagger joints.
For all methods, place spacers consistently to maintain a uniform expansion gap from the sidewalls.
Use pre-cut boards for staggered joints. When fitting around pipes, position them at the centre of a plank for easier cutting.
The final row may need to be trimmed for a proper fit. Secure it tightly with a pull bar and rubber mallet. If necessary, surface nail the last row. For floating floors, ensure the last plank clicks securely into place.
For the glue-down method, leave the floor for 24 hours before using the space. To maintain a straight line, always check the alignment of the planks
For solid wood flooring, a protective finish is important to preserve the wood. Common finishes include Polyurethane and Natural Oils.
After learning how to install solid wood flooring correctly, proper maintenance is key to keeping it in excellent condition. To prevent scratches, attach felt pads or castors to the bottom of chairs and tables. To maintain the superb natural look of the wood, avoid using abrasive cloths or excessive water when cleaning. Instead, opt for dry brushes, vacuum cleaners, or specialist wood flooring maintenance products designed to protect the finish and extend the lifespan of your floor.
If you’re not familiar with how to fit solid wood flooring, you may make some mistakes. Here are common mistakes you should be aware of.

Different types of wood have unique characteristics that impact durability and appearance. Ensure you select the right wood for your needs based on traffic levels and room conditions.
Choosing an unsuitable finish can lead to rapid wear and tear. For high-traffic areas, a durable finish, such as polyurethane, is recommended to protect your flooring from everyday damage.
It’s crucial to check the moisture levels in your subfloor before installation to avoid future issues like shifting floorboards or cracks.
Acclimating the wood helps prevent issues such as expansion or shrinkage, which could cause structural damage or warping of the floorboards.
For correct installation, you must leave expansion gaps to allow for wood movement over time. Without proper spacing, your floor could buckle or loosen. Ensure a ¾ inch gap along walls for hardwood and ½ inch for engineered wood. Additionally, the distance between nails or staples should be 10 to 12 inches, with at least two nails per floorboard, to prevent uneven movement.
The easiest way to avoid costly hardwood flooring mistakes is by hiring a professional flooring contractor. Skilled professionals use the right techniques to ensure your installation meets industry standards. Leave the installation of your flooring to the expert fitting and enjoy a flawless, long-lasting result!
If you have any flooring queries, email us at info@flooringsurgeons.co.uk or visit our showrooms in Birmingham and Wolverhampton!
Halesowen
214A Dudley Road. Halesowen, Birmingham, B63 3NJ
0121 274 8575
Monday – Friday: 9 AM – 6 PM | Weekends: 10 AM – 4 PM
Wolverhampton
317 Penn Rd, Wolverhampton, West Midlands, WV4 5QF
01902 836 666
Monday – Friday: 9 AM – 6 PM | Sat: 10 AM – 4 PM | Sun: Closed
info@flooringsurgeons.co.uk

