Installing solid wood flooring on concrete can be a rewarding way to enhance the look and feel of your home. Many homeowners are curious about whether it’s possible to install solid hardwood flooring directly onto a concrete slab. The good news is that it is entirely feasible! With the right preparation and techniques, you can successfully install solid wood floors on concrete surfaces, transforming any room into a warm and inviting space.
But how to install solid wood flooring on concrete? And can you put solid hardwood flooring on concrete slab without facing issues down the line? The process requires careful attention to detail, from preparing the concrete subfloor to selecting the best installation method. In this article, we will walk you through the steps for installing solid wood floors on concrete, ensuring you get long-lasting, beautiful results. So, if you’ve been wondering how to install solid wood floor on concrete, read on for a complete guide.
Preparing the Concrete Subfloor for Solid Wood Flooring Installation
Before installing solid wood flooring on concrete, it’s crucial to properly prepare the concrete subfloor. A well-prepared subfloor ensures a strong, lasting bond and prevents future issues like warping or instability. Whether you’re wondering how to install solid wood flooring on concrete or seeking the best approach to prepare your concrete slab, these steps will guide you through the process.
Assessing the Condition of the Concrete Subfloor
The first step in preparing the concrete subfloor for solid wood flooring installation is to assess its condition. Start by examining the surface for any cracks, unevenness, or damage. An uneven or cracked subfloor can affect the stability and appearance of your solid wood floor, so it’s important to fix any issues before proceeding with installation. You can level out minor imperfections with a concrete levelling compound to ensure a smooth, stable base for your floor.
Moisture Testing and Measuring Moisture Content
One of the most critical aspects of installing solid wood flooring on concrete is moisture control. Concrete naturally absorbs and releases moisture, which can cause solid hardwood floors to warp or buckle if not properly managed. It’s essential to perform moisture testing to measure the moisture content in the concrete slab. Use a moisture meter or the plastic sheet test to check for excess moisture. Ideally, the moisture content should be below 4% for the best results when installing solid wood flooring on concrete. If moisture levels are too high, you may need to use a moisture barrier before proceeding with the installation to prevent future damage to your floors.
By ensuring the subfloor is in good condition and moisture-free, you can move forward with confidence in your solid wood flooring installation.
Now that you’ve assessed the condition of the concrete subfloor and ensured it’s moisture-free, the next critical aspect to consider is the expansion gap. This space allows your solid wood flooring to expand and contract with changes in humidity, ensuring the floor remains stable and visually appealing over time. Let’s dive into why expansion gaps matter and how to properly manage them during the installation process.

Understanding Expansion Gaps in Solid Wood Flooring Installation on Concrete
When installing solid wood flooring on concrete, one crucial consideration is leaving proper expansion gaps around the edges of your floor. You might wonder, “Can solid hardwood be installed over concrete without worrying about expansion?” The answer is no — managing expansion gaps is essential to ensure that your floor performs well and lasts for years. Let’s have a closer look at what expansion gaps are and why they matter when installing solid wood flooring on concrete.
What is an Expansion Gap?
An expansion gap is a small, intentional space left between the flooring and the walls or any fixed objects, such as cabinets or door frames. Solid wood is a natural material that expands and contracts due to changes in humidity and temperature. Without these gaps, the floor could buckle, warp, or shift as the wood moves. When installing solid wood flooring on concrete, it’s essential to account for these natural fluctuations by leaving a gap that allows the wood to adjust without restriction.
Why Expansion Gaps Matter for Solid Wood Flooring?
So, why exactly are expansion gaps necessary when installing solid wood flooring on concrete? The key factor is moisture. Concrete, especially in basements or ground-level rooms, can contain moisture that might cause the wood to swell or shrink. Even slight humidity changes in the environment can lead to expansion or contraction in the wood. If there isn’t enough space for this movement, your floor may suffer from unsightly gaps or, worse, structural damage over time. By allowing for proper expansion gaps, you ensure that your floor remains in good condition, preventing warping or buckling while allowing for the natural behaviour of the wood.
With expansion gaps properly addressed, you’re ready to move forward with the installation process. Now, let’s look at the tools and materials you’ll need to ensure a successful solid wood flooring installation on concrete.
Tools and Materials Needed for Installing Solid Wood Flooring on Concrete
When you’re ready to install solid wood flooring on concrete, having the right tools and materials is essential for a smooth and successful installation. If you’re wondering, “Can solid wood flooring be installed on concrete?” or looking for specific methods like gluing solid wood flooring to concrete, this section will walk you through the key tools and materials required to get the job done right. Whether you’re wondering how to install solid hardwood floors on concrete or seeking the best adhesive options, here’s what you need to know.
Essential Tools for Installing on Concrete
To properly install solid wood flooring on concrete, you’ll need a few essential tools to ensure accuracy and efficiency throughout the process:
- Moisture Meter – Before beginning, it’s important to test the moisture level of the concrete. This tool helps ensure that the slab is dry enough for installation.
- Tape Measure and Square – Accurate measurements are critical for ensuring straight cuts and even placement of the planks. Use a tape measure and square to mark the floor and cut the wood as needed.
- Power Saw or Mitre Saw – A saw is necessary for cutting the wood planks to fit the room’s dimensions. A mitre saw will provide precise cuts for corners and edges.
- Notched Trowel – If you’re gluing solid wood flooring to concrete, a notched trowel will help you apply the adhesive evenly across the floor.
- Nail Gun or Flooring Nails – If you choose to use a nail-down method for your installation, a nail gun will speed up the process and ensure secure placement of the boards.
- Rubber Mallet – A rubber mallet helps tap the flooring into place without damaging the wood’s surface.
With these tools at your disposal, you’ll be well-equipped to begin the installation process.
Required Materials and Adhesive Options
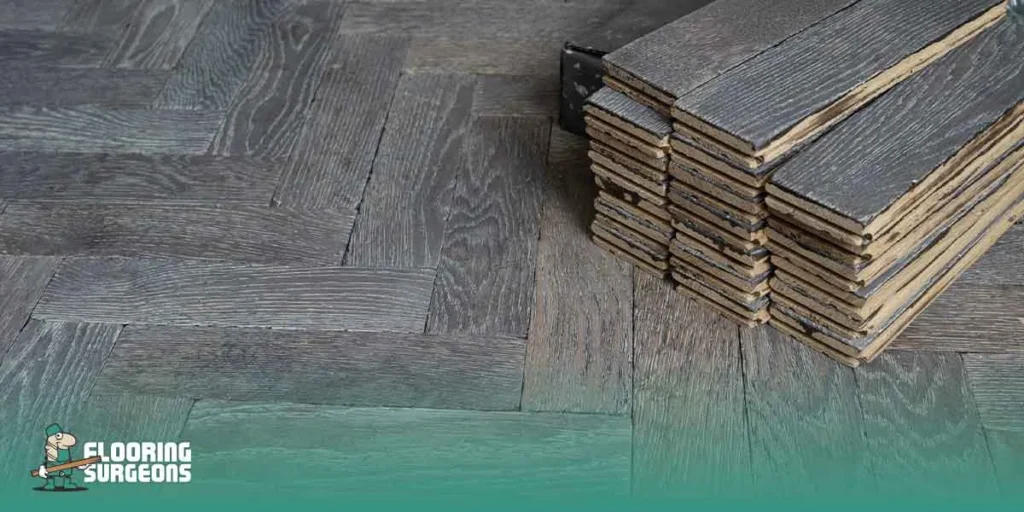
When installing solid wood flooring on concrete, choosing the right materials is equally important. The type of flooring and adhesive you use will depend on the method you select.
- Solid Hardwood Planks – Choose the type of wood that suits your style and budget. Make sure the wood is acclimated to the room’s temperature and humidity before installation.
- Adhesive for Gluing Solid Wood Flooring to Concrete – If you decide to glue your flooring down, it’s essential to use the right type of adhesive. A high-quality polyurethane-based adhesive is ideal for concrete floors, as it offers strong bonding and moisture resistance. Follow the manufacturer’s instructions for applying the adhesive to ensure a lasting bond.
- Moisture Barrier – Since concrete can retain moisture, a moisture barrier is crucial to prevent the wood from absorbing excess moisture and potentially warping. This is especially important if you are installing solid hardwood floors on concrete in a basement or ground-level room.
- Underlayment (Optional) – Some people opt for an underlayment beneath the wood floor for added insulation and noise reduction. However, this may not always be necessary if you’re gluing solid wood flooring directly to the concrete slab.
- Transition Strips – These are used to finish the edges of the flooring, especially if it meets another type of flooring, such as carpet or tile.
By using the right tools and materials, you can ensure a smooth installation process that results in a stunning floor. Now that you’re set up with the necessary equipment, let’s look at the installation methods that work best for gluing solid wood flooring to concrete, starting with the glue-down method. For more professional tips on flooring, you can check out the Flooring Surgeons for expert guidance.
| Tools & Materials | Purpose |
| Moisture Meter | Tests moisture level in concrete slab to ensure it’s dry enough for installation. |
| Tape Measure and Square | Ensures accurate measurements for straight cuts and even plank placement. |
| Power Saw or Miter Saw | Cuts wood planks to the correct size for the room. |
| Notched Trowel | Applies adhesive evenly when gluing wood flooring to concrete. |
| Nail Gun or Flooring Nails | Secures wood planks to the concrete using nails. |
| Rubber Mallet | Helps tap flooring into place without damaging the wood. |
| Solid Hardwood Planks | Select the wood type, ensuring it’s acclimated to room conditions. |
| Adhesive for Gluing Solid Wood Flooring to Concrete | Used for bonding the solid wood flooring to the concrete slab. |
| Moisture Barrier | Prevents moisture from seeping into the wood, especially in basements. |
| Underlayment (Optional) | Provides insulation and noise reduction (optional). |
| Transition Strips | Used to finish the edges where the wood meets another floor surface. |
Installation Methods for Solid Wood Flooring on Concrete
When it comes to installing solid wood flooring on concrete, there are several methods you can choose from, each with its own benefits depending on the conditions of your concrete slab and the type of wood you’re using. Whether you’re wondering how to install solid wood flooring on concrete slab or considering whether you can put solid hardwood flooring on concrete, these methods will help guide your decision. Let’s explore the three main installation techniques: glue-down, nail-down, and floating installation.
Glue-Down Method
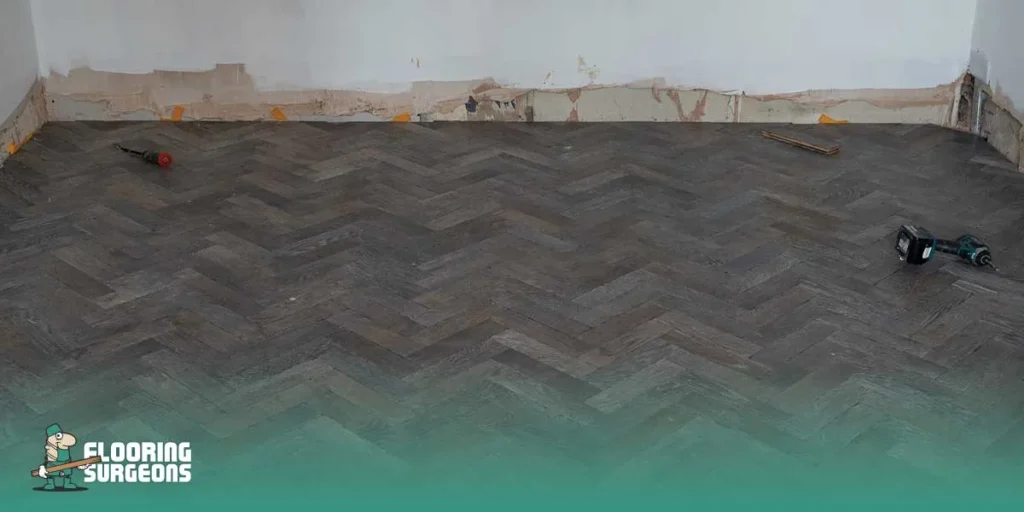
The glue-down method is one of the most popular choices for installing solid wood flooring on concrete. This method involves applying a strong adhesive to the concrete subfloor and then gluing the wood planks directly onto it. It’s especially suitable for areas where the concrete is stable and dry.
Preparing the Subfloor for Glue-Down
Before you start, ensure that the concrete slab is clean, dry, and free of any debris or moisture. Use a moisture meter to check the concrete’s moisture levels; ideally, it should be below 4%. If necessary, apply a moisture barrier to prevent any moisture from affecting the wood over time. Once the slab is ready, level any uneven spots with a concrete levelling compound.
Applying the Adhesive
To install solid wood flooring on concrete using the glue-down method, spread a high-quality adhesive evenly across the subfloor using a notched trowel. Start in one corner of the room and work your way out, ensuring the adhesive covers the entire area where the planks will be placed. Be mindful to apply the adhesive in small sections to prevent it from drying out before the planks are laid.
Glue-Down Flooring Tips
- Use the right adhesive: Make sure to choose an adhesive specifically designed for wood flooring and concrete.
- Keep a steady pace: Apply adhesive to a manageable area to avoid letting it dry before you can lay the planks.
- Allow proper curing time: After installing the planks, let them sit undisturbed for at least 24-48 hours to allow the adhesive to fully bond.
Nail-Down Method
The nail-down method involves attaching the solid wood planks to the concrete using nails. This method is often used when a subfloor, such as plywood, is added over the concrete slab, or when the concrete is not ideal for gluing.
Preparing the Subfloor for Nail-Down
If you are installing over a concrete slab, you’ll need to add a plywood or wood subfloor for the nails to properly anchor. The plywood should be securely fastened to the concrete, and, like with the glue-down method, it’s essential to ensure there is no moisture that could damage the flooring over time. Use a moisture barrier if necessary.
Tips for Successful Nail-Down Installation
- Use a power nail gun: A nail gun will speed up the process and help secure the wood firmly to the subfloor.
- Pre-drill holes if needed: In some cases, pre-drilling holes for nails can help prevent the wood from splitting.
- Nail spacing: Be sure to space the nails evenly, typically about 6-8 inches apart, to ensure the planks stay securely attached.
Floating Installation on Adhesive-Backed Underlay
The floating installation method uses an underlayment that has adhesive backing, allowing the solid wood planks to “float” over the concrete slab without being glued or nailed directly. This method is often used for ease of installation and can be a great choice if you’re looking for flexibility in your flooring.
Floating floors are also easier to replace or remove, which can be an advantage if you plan to make changes in the future.
By choosing the right method based on your specific concrete conditions, you’ll ensure a durable and beautiful solid wood flooring installation. Whether you opt for gluing, nailing, or floating, make sure to follow the correct steps to achieve the best results for your home.

Step-by-Step Guide to Installing Solid Wood Flooring on Concrete
If you’ve chosen to install solid wood flooring on concrete, following a detailed step-by-step process ensures that your floor looks great and lasts for years. Whether you’re wondering can solid hardwood be installed over concrete or how to install solid wood flooring on concrete, this guide will walk you through each phase of the installation process.
| Step | Description |
| Measuring and Finding the Centre of the Room | Measure the length and width of the room, then find and mark the center point to ensure straight and symmetrical plank placement. |
| Applying Adhesive or Using a Nail Gun | Apply adhesive to the concrete slab (for glue-down) or use a nail gun (for nail-down) to secure the planks. Follow the method chosen for your installation. |
| Installing Solid Wood Flooring Planks | Lay down the planks starting from the centreline. Ensure each plank is tightly fitted. Cut planks as necessary to fit the room’s edges and leave an expansion gap. |
Measuring and Finding the Centre of the Room
Before you begin laying your solid wood flooring, you need to establish the centre of the room. This is crucial to ensure that the planks are evenly spaced and aligned throughout the installation.
- Measure the Length and Width: Use a tape measure to determine the length and width of the room. Divide both measurements by two to find the centre point.
- Mark the Centre: From the centre point, draw a chalk line from one end of the room to the other, both horizontally and vertically. This will act as a guide to ensure your planks are laid symmetrically and evenly.
This step is essential to ensure the first row of planks is straight, which sets the tone for the rest of the installation.
Applying Adhesive or Using a Nail Gun
Depending on the installation method you’ve chosen, you will either apply adhesive or use a nail gun to secure the planks.
- For the Glue-Down Method: If you are gluing solid wood flooring to concrete, apply a high-quality adhesive to the concrete slab using a notched trowel. Work in small sections to prevent the adhesive from drying out before you place the planks. Once the adhesive is applied, immediately lay the first row of planks along the centre line you marked earlier.
- For Nail-Down Method: If you are using the nail-down method, use a power nail gun to attach the planks to the plywood subfloor. Start at the centre line and work your way outward. Be sure to nail the planks at a consistent spacing to ensure they are securely fastened.
Installing Solid Wood Flooring Planks
With the centre marked and adhesive applied (or nails ready), it’s time to lay down the planks:
- Place the First Row: Begin by placing the first row of planks along the centreline, ensuring they are straight and tightly fitted together. If you are installing solid wood flooring on concrete using adhesive, press the planks firmly into place to ensure they bond with the adhesive.
- Continue Installing Rows: After placing the first row, continue laying the remaining rows, making sure each plank is tightly secured. If you’re using a nail gun, be sure to nail the planks at the tongue of each board, leaving no visible nail holes.
- Cutting Planks to Fit: As you approach the edges of the room, you may need to cut planks to fit. Use a saw to measure and cut the last row of planks to the correct width. Leave an expansion gap around the perimeter of the room to allow for the natural expansion of the wood.
Once all the planks are installed, you’ll have a beautifully laid solid wood flooring surface. With careful attention to detail and the right installation method, your floor will be both stunning and durable for years to come.


